Hello,
Actually buddypress by default hides post comments that are more than 5 like this :

You can change that number to any number you want using this snippet below :
https://gist.github.com/KaineLabs/80ef281cfa7d7d1300a42ffb4be7dd78
Here's how to solve the 502 Bad Gateway :
1. Go to "wp-content/plugins".
2. Open the file "bp-custom.php" ( if you didn't find it just create a new one ).
3. Paste the code below :
https://gist.github.com/KaineLabs/9328e334a75a6170fcd8438c252c4eed
Hello,
Actually buddypress by default hides post comments that are more than 5 like this :
You can change that number to any number you want using this snippet below :
https://gist.github.com/KaineLabs/80ef281cfa7d7d1300a42ffb4be7dd78
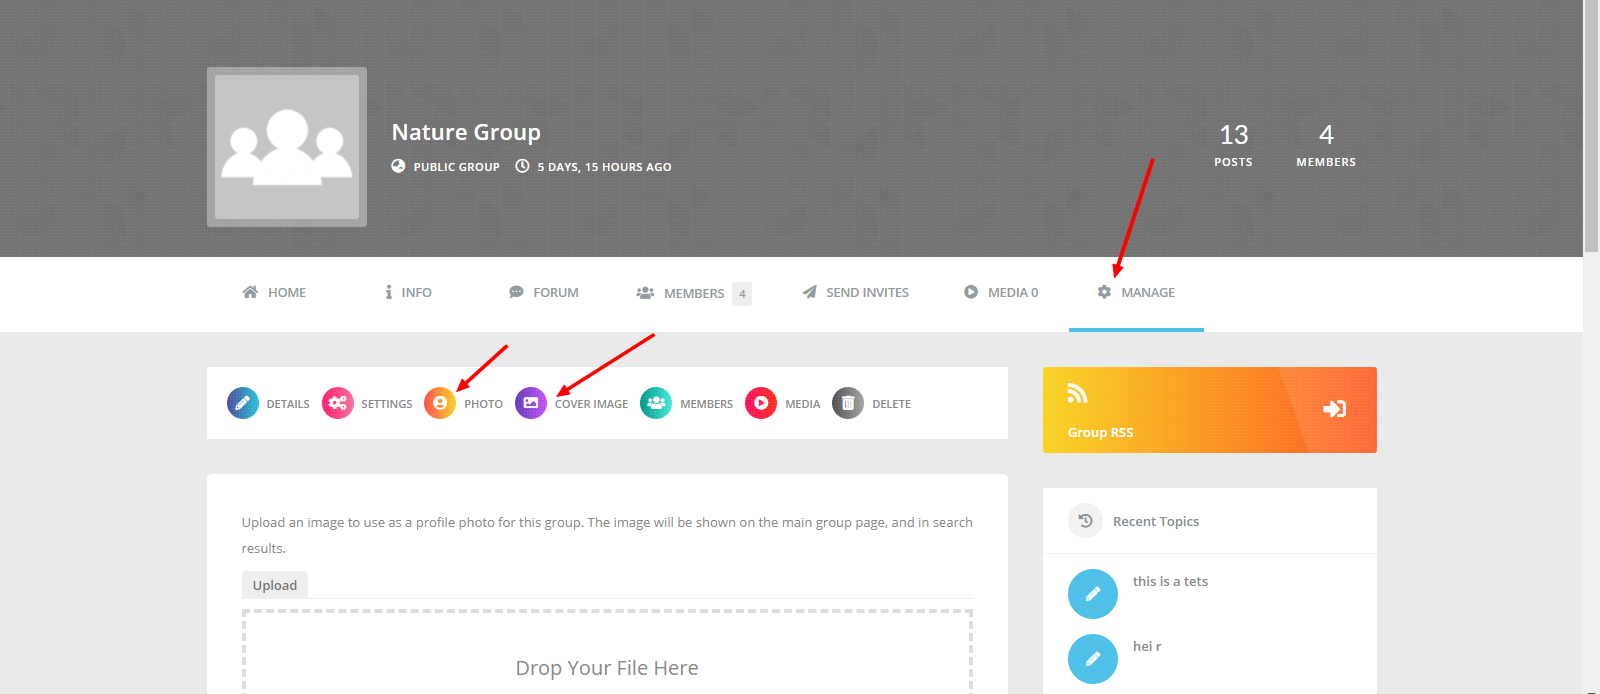
1. Go to the group page and then click on tab "Manage".
2. You upload the group avatar from the sub tab "Photo"
3. You can upload the group cover from the sub tab "Cover Images"
4. if you couldn't find this sub tabs check thic topic below :
Groups Avatar or Groups Cover Not Working ?
You should install the MyCRED Plugin and MyCRED Badges Extension to activate the user badges widget and tab.
The badges tab will be added automatically to the user profile !
and you can control the badges tab icon, title, visibility, order ... from :
Youzer Panel > Profile Settings > Tabs Settings > Badges Tab.

Please check this topic below on how to modify emails from the admin dashboard :
Note 1: Before installing Youzify Make sure that you Installed & Activated Buddypress.
Note 2: Make Sure to Unzip the downloaded folder from CodeCanyon so you can find the installable version from Youzify.
1 - Go to the WordPress admin panel and then navigate to Plugins > Add New > Upload
2 - Choose the Youzify plugin zip .
3 - Wait untill the installation process ends .
4- Congratulations you are ready to bring life to your author page.
I have member type plugin. can I show custom tabs for specific member type? for example "student" have "learn" tab. and "teacher" have "work" tab on their profile
Pleae go to your FTP/CPanel >> Folder wp-content/plugins >> create a file and name it with bp-custom.php >> Paste snippet code below into the file >> Save
https://gist.github.com/KaineLabs/ecaa2532c740d9602c8e7805a116da9f
Please change 'member_type_id_here' with member type ID and 'tab_slug_here' with Tab Slug. For tab, you can add a new custom tab on Youzer Panel.
1. Go to "wp-content/plugins".
2. Open the file "bp-custom.php" ( if you didn't find it just create a new one ).
3. Paste the code below :
<?php
/** * Remove Theme Default Buddypress CSS */
function youzify_remove_default_bp_css() {
    // 27 Theme
    wp_dequeue_style( 'c27-buddypress-style' );
}
add_action( 'wp_enqueue_scripts' , 'youzify_remove_default_bp_css', 999 );
4.For the css goto youzer Panel > General Settings > Custom Styling Code > Global Styling Settings

and paste this code in "Global Custom Css"
.bp-user .yz-page {
    margin-top: 89px;
}
.buddypress.bp-user  .c27-main-header.header.header-fixed {
    background-color: rgba(29, 35, 41, 0.98);
}
.buddypress.listings .yz-sidebar-column {
    display:none;
}
#buddypress.youzer #activity-stream .ac-reply-content a {
    background: transparent;
    color: #898989;
    font-weight: 600;
}
.directory.activity #buddypress div.item-list-tabs ul li.selected a,
#buddypress.youzer #activity-stream .ac-reply-content a:hover  {
    background:transparent !important;
}
.youzer #activity-stream .ac-reply-content input[type="submit"] {
    width:initial;
}
@media screen and ( max-width: 1024px ) {
    .bp-user .yz-page {
    margin-top: 80px;
    }
}
@media screen and ( max-width: 425px ) {
    .bp-user .yz-page {
    margin-top: 60px;
    }
}
1. Go to Youzer Panel > General Settings > Wall Settings.
2. Then Disable the option "Url Live Preview".
3. Save Settings.

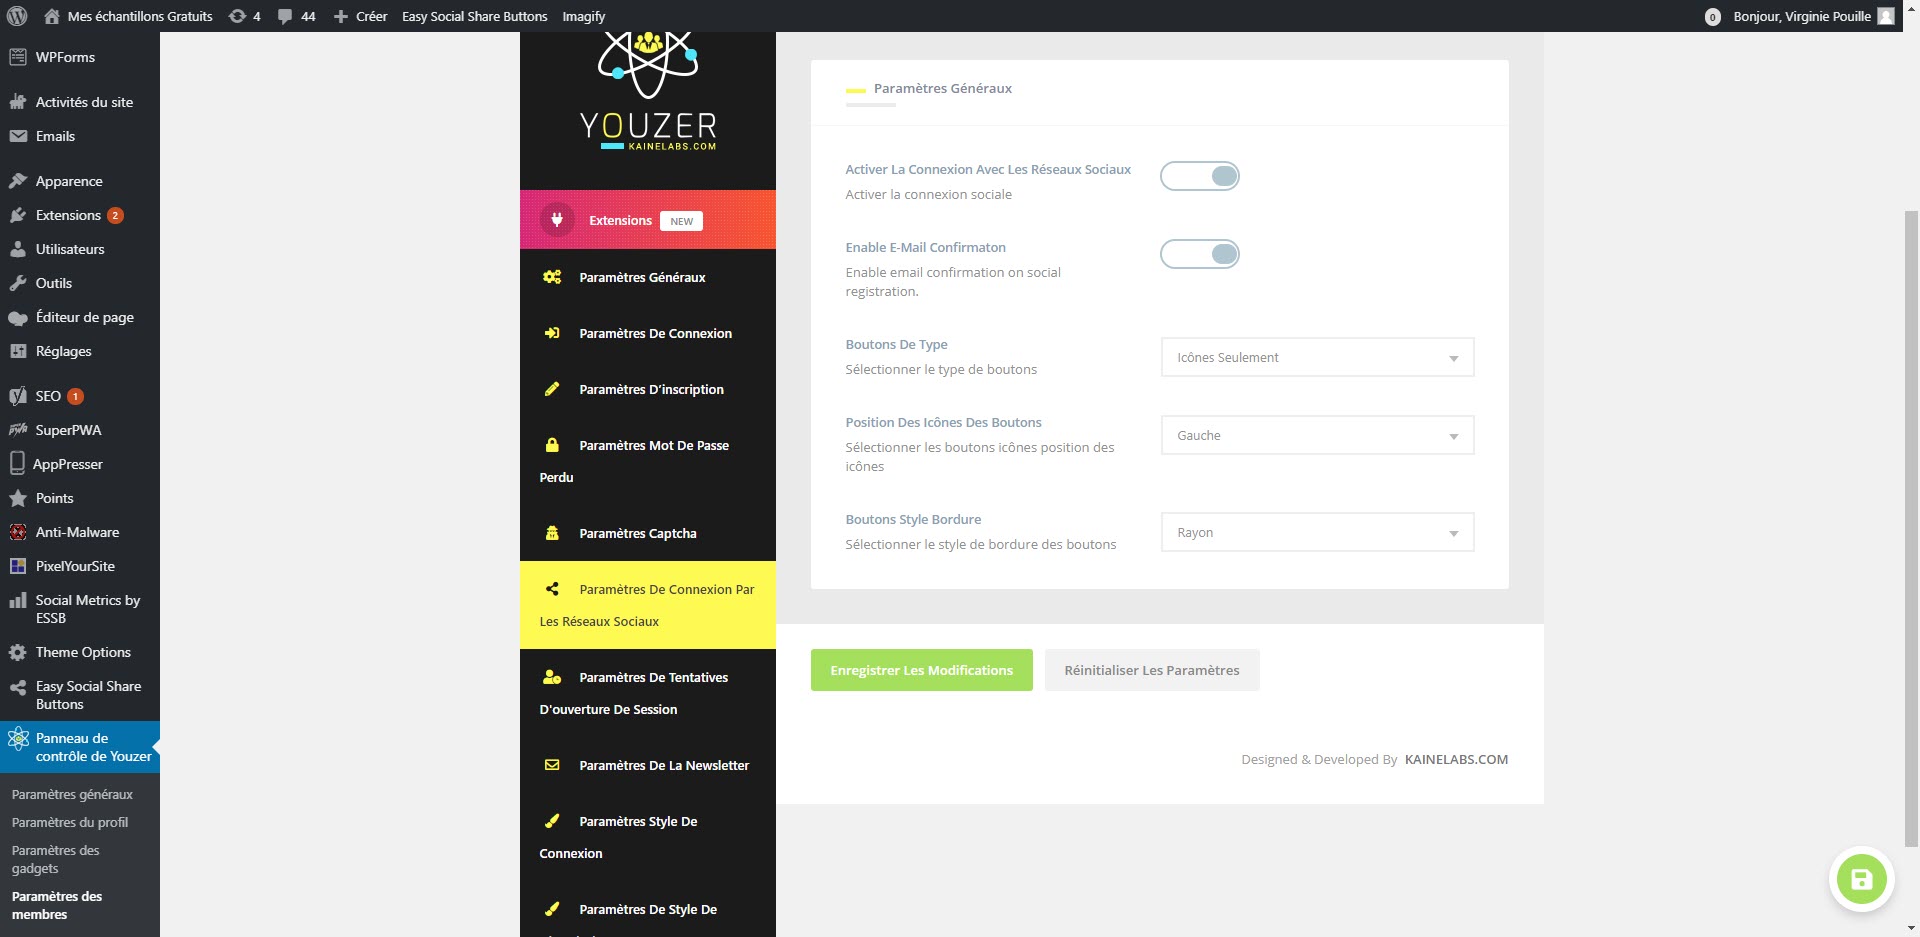
To activate the social login go to :
Wordpress Dashboard > Youzify Panel > Membership Settings > Social Login Settings.
And Then go to the networks you want and you will find the steps of how to setup each network above the network settings section like in the screenshot below.

Please add below code into functions.php file of the active theme
function custom_login_page() {
$new_login_page_url = home_url( '/login/' ); // new login page
global $pagenow;
if( $pagenow == "wp-login.php" && $_SERVER['REQUEST_METHOD'] == 'GET') {
wp_redirect($new_login_page_url);
exit;
}
}
if(!is_user_logged_in()){
add_action('init','custom_login_page');
}
1. Go to Wordpress Dashboard > Points > Settings.
2. Open the "Buddypress" tab settings.
3. Set "Points History" to "Do Not Show".
4. Uncheck the option "Members can view each others points history".

5. Click "Update Settings".
There could be a number of reasons uploads would fail, your server error logs may provide a clue as to what has happened.
The predominant reason uploads fail is due to the server being unable to write to the uploads directory, the ‘server’ in this instance is the server process that is running your web server and on *nix boxes is generally ‘httpd’ or ‘Apache’ this process and it’s ‘group’ or ‘owner’ must have access to the sites folder structure.
When uploads such as Avatars do fail establish whether this is a general uploads failure by attempting to upload an image via the WordPress Media library interface, more often than not this, too, will fail and you will know it’s an owner/permissions failure that needs correcting – you may need to contact your host to have this corrected explaining that the server process can’t write to your site directories, specifically ‘uploads’.
Another important factor is that the PHP image manipulation extension must be installed, make sure you have the ‘GD image library’ installed by checking your phpinfo stats – usually available if you have control panel installed if not you would need to upload a file to your site root with the single command in <?php phpinfo() ?> and navigate your browser to that file to see all your PHP configuration detail. Remember to remove that file from your site root after you’ve copied the details for reference.
Next, check permissions, so make sure the web server has correct permissions.
/wp-content/uploads should be set to 755 on a Unix server.
On this matter you may see advice along the lines of setting permissions to ‘777’ or ‘world writeable’. This is bad advice. Changing permissions to ‘777’ may overcome the problem but there is never a case where any folders need completely open permissions; it’s very insecure.
Reference :
https://codex.buddypress.org/getting-started/troubleshooting/avatar-upload-fails/
It maybe because "Membership System Settings" on Youzer Panel >> General Settings is disabled.

Please just enable it and Membership Settings will appear then.
Note: To disable upload button you have to add the following filter hook below inside of \"wp-content/plugins\" and then open \"bp-custom.php\" (If you have not find, create one).
add_filter(\'yz_allow_wall_upload_attachments\', \'__return_false\');
Step One:
Step Two:

Step Three:

How to setup the login page ?
1. First, on your WP Admin Dashboard, go to menu pages >> All pages. And then check if you already have "Login" page or not.
2. If you don't have it yet, please create a new empty page and add title "Login" or any title you want.
3. And then, go to Youzify Panel > Membership Settings > General Settings.
4. Select the Login Page ( Check image below ) .

How to add the login page to your site navigation ?
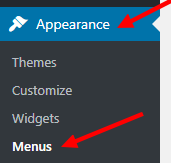
1- Go To Appearance > Menus.
2- Add ( Login ) to your website navigation menu.

3- After you click on the "Add To Menu" Button. they will be added to the Menu Structure.
 Ps: The login page will be named "Logout" for logged-in Users.
Hello,
Definitely you can translate our plugin to your language. Please follow following steps to translate all the strings into french language.
1. Please create a copy of youzify/languages/youzify.pot with your language. For example, if you want to translate it to France, so you need to rename the copy file to youzify-fr_FR.po and youzify-fr_FR.mo.
You can check the list of language code here >> https://wpastra.com/docs/complete-list-wordpress-locale-codes/
2. Open this copied file using POEDIT editor and change language for strings you wants. You can edit it using your text editor as well.
3. Once you are done, click on “Save” and it should generate youzify-fr_FR.mo file on its own.
4. Now upload both the files in languages folder i.e. wp-content/languages/.
5. You should see the language change as soon as you upload it.
Let us know if you have any further query.
Don't forget to clear your browser and site cache after re-upload them.
1. Go to the link html code.
2. Add the attribute( data-show-youzer-login="true" ) to the link.
Example :
<a href="http://youzer.kainelabs.com/login/" data-show-youzer-login="true">Login Popup</a>
You can speed up your activity page by following the steps below, we will just load small number of posts then the others will be loaded while the user scrolling down just like the big social media networks : Facebook, Twitter ...
1. Go to Youzer Panel > General settings > Wall Settings.
2. Go to "Posts Per Page Settings" Section.
3. Set the posts per page numbers to 3 or 5 like the image below and then save settings :

4. Enable "The infinite Loader".
Ps: The "Infinite loader" option is enabled by default and you can turn it off be checking the topic below.
https://kainelabs.ticksy.com/article/14514/
5. Enable the "Activity Loading Effect" for a smoth scroll.
Ps: The activity loading effect option is enabled by default and you can turn it off by checking the topic below :
Most the time when you find an issue on your site with Youzify, it will be caused by a plugin or theme conflict. This can range from a simple CSS styling issue to a more complex issue where another plugin/theme is stopping Youzify from functioning properly.
NOTE: We suggest that you take a full backup of your site before deactivating plugins and themes as this will give you a restore point.
Because a conflict test involves deactivating plugins and switching themes, this will effect the look and functionality of your site (even if temporary). To not impact visitors to your site we strongly advice creating a clone of your site and putting the clone onto a test domain to allow for proper testing to be done.
There's huge blank empty space an the bottom of Activity Page.
It's a rare issue but will appear if user install a plugin that conflict with Youzer JS effect. To fix it, just use this CSS code
.yz_effect {
visibility: visible !important;
}
Put on Global CSS Box on Custom Styling Settings On Youzer Panel
Add this code snippet to bp-custom.php :
https://gist.github.com/KaineLabs/3b372c3a1297af8840264d4481259e08
Some built-in Buddypress from Newspaper is conflicted with built-in Buddypress from Youzify.
Youzify Developer has contacted theme developer and here is their answer >> Answer from Newspaper Author
But you can fix the CSS conflicts. Here's how to do it:
1. Go to the folder "/wp-content/themes/Newspaper".
2. Open the style.css
3. Remove all the code after this code mark
/* ---------------------------------------------------------------------------- BuddyPress plugin */
And STOP at this code mark
/* ----------------------------------------------------------------------------
Footer General
*/
4. Once you edit the file save changes and re-upload it to same folder "/wp-content/themes/Newspaper"
========
Update
A customer write an article about Debugging Youzify & Newspaper Theme for WP Header Conflict. You can check the article here >> https://cubicitconsulting.com/wordpress/debugging-youzify-and-newspaper-theme/
Thanks to Mr. Angel Ramos (Cubic IT)
Hello !
Add This code snippet to bp-custom.php in the path "wp-content/plugins" !
Ps : if u didn't find the file "bp-custom.php" create a new one !
https://gist.github.com/KaineLabs/6f86315ba12123ebcf461f71923d0782
1. Go to "wp-content/plugins".
2. Open the file "bp-custom.php" ( if you didn't find it just create a new one ).
3. Paste the code in the page below :
https://gist.github.com/KaineLabs/69bb38df689e6329e84dbd1e044a77a5
if your users profile is showing 404 page check if this line :
define('BP_DEFAULT_COMPONENT', 'profile' );
is exist in one of these places :
- The file bp-custom.php in the folder "wp-content/plugins".
- Your Theme folder.
- The wordpress Config file "wp-config.php"
if you found it just remove it and you can control the profile default tab from our panel :
Youzify Panel > Profile Settings > Tabs settings > Set Default Tab option :

1. Go to Users > Profile Fields > Edit Field.

2. From the right side change the value of the box "Visibility", the available options by default are ( Everyone, Only Me, All Members, My Friends ).

3. You can force the field visibility or allow members to change it from below :

4. Click Update to save changes.
Method 1 :
1. Go to Username > Edit Prodile.

2. Open the Widget Settings.

Method 2:
1. Go to Profile Page.
2. Click on "Widgets Settings".

Install This plugin below it works perfectly with youzer !
If you want to change the embedded posts wordpress icon like the one below :

1. Go to Appearance > Customize.

2. Click on "Site Identity".

3. Go to "Site Icon" and click "select image".

4. Save Changes.
1. Go to Youzify Panel > Membership settings > Register settings

2. Go to "Header Settings" and upload the cover from the field "Upload Cover".

How can I change users permalinks from "site.com/members/username" TO "site.com/username"
Please use this snippet code
define ( 'BP_ENABLE_ROOT_PROFILES', true );
add_filter( 'bp_core_enable_root_profiles', '__return_true' );
Put it on bp-custom.php file on wp-content/plugins folder. If you dont have it yet, please create one.
1. Add the code snippet below to the file "bp-custom.php" in the path "wp-content/plugins" :
https://gist.github.com/KaineLabs/c285ba7637de3fc45f0220156f9926ae
Ps: if you didn't find the file "bp-custom.php", just create a new one.
2. Go to the Wordpress Dashboard > Appearance > Widgets.
3. Add your widgets to the sidebar named "Members Directory Sidebar".

1. Go to Youzify > Membership Settings > Login Attempts Settings.
2. Disable the option "Enable Limit Login".

1. Go to the activity and Click on the activity Date .

Use this snippet below :
https://gist.github.com/KaineLabs/c0dfe6d07c64c1ab0d34046e7853251a
Please refer to this article to know how you can add it:
How to Add Custom PHP Snippet?
Please add the code snippet below to the file "bp-custom.php" in the path "wp-content/plugins" :
https://gist.github.com/KaineLabs/80c7fe3111a59474bdcfd6c0c27adfdd
Ps: if you didn't find the file "bp-custom.php", just create a new one.
This code snippet will add the code to the "Thank you for your registration" page.
1. Go to "wp-content/plugins".
2. Open the file "bp-custom.php" ( if you didn't find it just create a new one ).
3. Paste the code in the page below :
https://gist.github.com/KaineLabs/3ccf39949f05e31c1b2f3c94dc8ecc37
4. Goto your theme folder and rename the follwing the folder :
- members
- groups
to any thing you want for example : ( members0, groups 0 )
and that's it ^^
If the profile avatar is not showing up :
1. Make sure that the "Extended Profiles" component is enabled !

2. Go to Dashboard > Settings > Discussion .
3. Go to Display Avatar then Enable "Show Avatars".

1. Go to Youzer Panel > Profile Settings > General Setting.
2. Enable the option "Use Profile Effects ?".

Hello !
Thank you for being interested in our plugins !
Are you seeing the error "The merchant country is not supported" ?
The solution is using the second paypal button its supported from all the countries ^^

Method 1 :
1. Go to Username > Edit Profile.

2. Click on "Profile or Account Settings".

Method 2:
1. Go to your Profile Page.
2. Click On "Account Menu" > "Account Settings".

Add this code snippet below to bp-custom.php
https://gist.github.com/KaineLabs/52703399f1646593f931e3d29f8953a6
and dont forget to change the icon "diamond" to any icon you want from here :
1. Go to Wordpress Dashboard > Settings > Buddypress.
2. Uncheck the component you want to disable.
3. Click "Save Settings".

In case the login is not working and you are using the plugin "Swift Performance Lite" !
Just set Cache Expiry Mode to Intelligent mode in "Swift Performance Lite" and the issue will be solved !
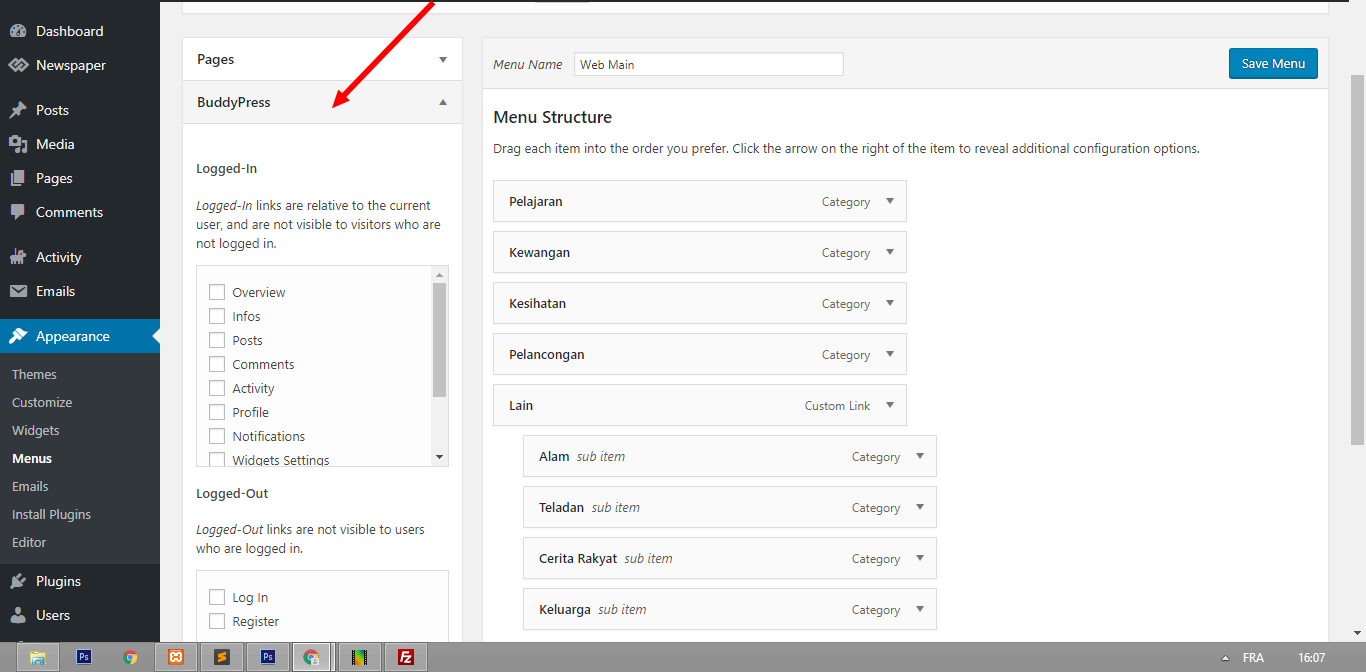
1. Go to Wordpress Dashboard > Appearance > Menu
2. Click on "Screen Options" and make sure "Buddypress Members" is enabled :

4. Add the pages you want under that custom link menu as a sub pages check the image below :
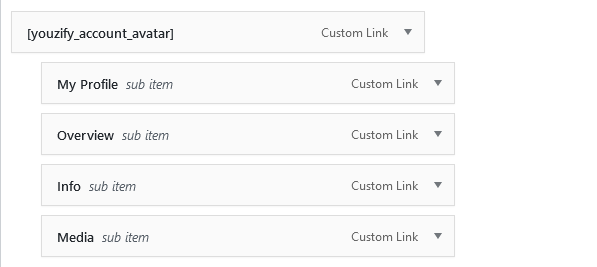
5. You will find all the buddypress pages under the "Buddypress" Tab :
6. If you wanna add a page that is not exist in the buddypress tab, you can use a "Custom Link" with the variable #youzify_user#. let's add for example the logged-in user change cover page:
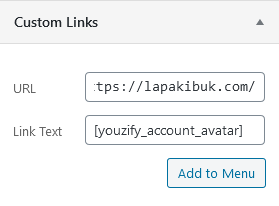
6.1 - Go to "Custom Links" Tab
6.2 - Type in the "URL" field : http://www.yourwebsite.com/members/#youzify_user#/change-cover
6.3 - Type in the "Link Text" Change Cover.
6.4 - Click "Add to Menu".
7. Click "Save Menu".
1. Go to Youzer Panel > General settings > Wall Settings.
2. Go to "General Settings" Section.
3. Disable "Activity Loading Effect" Button.

1. Go to Youzify Panel > Profile Settings > Tabs settings
2. Set Default Tab option :
3. Save Changes .


1. Go to Youzer Panel > General Settings > Wall Settings.
2. Go to the section "Attachments Settings".
3. Change the value of the option "Max File Size".

1. Go to Wordpress Dashboard > Settings > Buddypress > Options.
2. Scroll to the "Groups Settings" Section.
3. To enable Groups Avatar check this option "Allow customizable avatars for groups".
4. To enable Groups Cover check this option "Allow customizable cover images for groups".

if you want to add new fields to the registration form you should add them into the buddypress xprofile primary "Base" Group .
1. Go to Dashboard > Users > Profile Fields.
2. Make sure you are on the primary tab "Base".
3. Click "Add New Field".

1. Go to "wp-content/plugins".
2. Open the file "bp-custom.php" ( if you didn't find it just create a new one ).
3. Paste the code in the page below :
https://gist.github.com/KaineLabs/50f4a50c199b87883363b34e44901a79
4. Go to "wp-content/themes/bimber/includes/plugins/buddypress/buddypress.php"
and remove the line 16 :
define( 'BP_DEFAULT_COMPONENT', 'profile' );
5. Save the file.
Please add below code into functions.php file of the active theme
function custom_login_page() { $new_login_page_url = home_url( '/login/' ); // new login page global $pagenow; if( $pagenow == "wp-login.php" && $_SERVER['REQUEST_METHOD'] == 'GET') { wp_redirect($new_login_page_url); exit; } }
if(!is_user_logged_in()){ add_action('init','custom_login_page'); }
1. Go to Youzify Panel > General Settings > Members Directory Settings.
2. Go to the section "Card Meta Settings".
3. Enable the option "Enable Cards Custom Meta".
4. Select an icon and select the field you want .

5. Save Changes.
Hello,
Actually Youzer it's not a Wordpress theme, it's a Wordpress Plugin !
1. Go to Wordpress Dashboard > Plugins > Add New .

2. Follow this topic below on "How to install Youzer" :
1. After installing Mycred Plugin :
http://wordpress.org/plugins/mycred/
2. Go to Points > Add-ons.
3. Install "Badges" Add on.

Ps: On how to add badges please check the topic below :
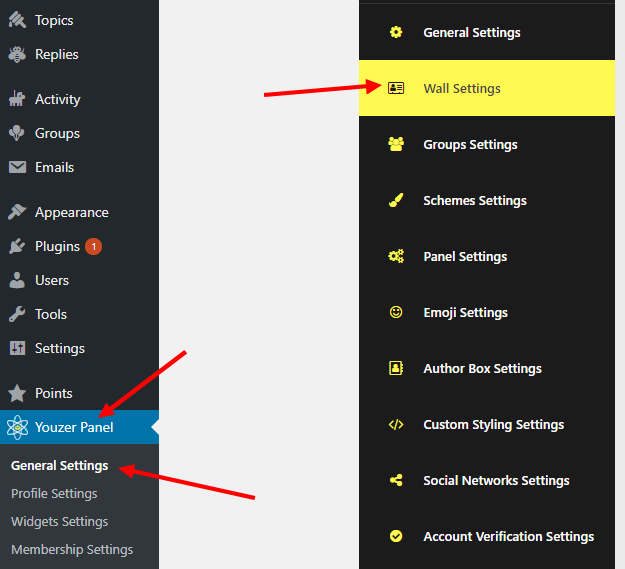
1. Go to Youzer Panel > General settings ( Page ) > Wall Settings.
2. Go to "General Settings" Section.
3. Disable "Infinite Loader" Button.

1. Go to Dashboard > Users > Profile Fields.
2. Click Edit Group Button.

3. Change the title and Click Update .

1. Go to Youzer Panel > Profile Settings > Reviews Settings.
2. Enable/Disable the option "Enable Reviews".

1. Go to Youzer Panel > General Settings > Wall Settings.
2. Scroll to the section "Control Wall Posts Visibility".
3. Enable / Disable the post types you want.

On group wall, sometimes there some posts misses out (can not show on wall) when user click Load More button. Here is the solution :
1. Go to FTP.
2. Go to directory "wp-content/plugins/youzer/includes/public/templates/activity"
3. Open file "index.php"
4. Add this script onto line 11 (under code do_action( 'bp_before_directory_activity' ); ?>)
<script>
document.cookie = "bp-activity-oldestpage=1; expires=Thu, 18 Dec 2013 12:00:00 UTC; path=/";
</script>
5. Save file.
Method 1 :
1. Go to Username > Your Username.

Method 2:
Make "My Profile" link accessible through your site navigation, Please check the topic below on how to add my profile link :
https://kainelabs.ticksy.com/article/12874/
Method 3:
Access the user profile through the following structure:
http://www.yoursite.com/members/username
You can use any other themes you want and if you find any conflicts our support team will be happy to help you. also we are open to work with any theme team in order to make it compatible with Youzify.
- Here's our list of The Official Compatible Themes :
Ps1 : The Themes that are in this list are the themes that we are in touch with their creators and in case any problems appeared in the future we will work together to solve them.
1. Go to Wordpress Dashboard > Points > Settings.
2. Open the "Buddypress" tab settings.
3. Set "Points History" to "Show In Profile".
4. Check the option "Members can view each others points history".

First, please note that only some Header Types that can show Social network on Profile Page header. You can change the profile header type on Youzify Panel >> Profile Settings >> Header Settings >> Scroll down until find Header Layouts
The type are header 2, 7, 8, and all vertical layouts.
Add Social Networks on Youzify Panel
To add a new social network go to Youzify panel > General Settings > Social Networks Settings. Then click on the button.
Once you clicked the button above a popup window will show up and it contains these fields :
To Update a social network click on the 'Pencil' Button ( Check the image below ) and Don't Forget To Save Changes.
To Remove a social network click on the 'X' Button ( Check the image below ) and Don't Forget To Save Changes.
Also please make sure, Display Social Networks button disabled. Please go to Youzify Panel >> Profile Settings >> Header Settings >> Scroll down until find Header Networks Settings


This appears to be a problem with certain web hosts (GoDaddy, Bluehost ).
Members of the BP community have had success using:
Ps1 : WP Mail SMTP and Configure SMTP can send a test email which often provides useful debug information.
Note :
GoDaddy.com prevents me from sending emails from email accounts other than the ones associated with their hosting service. So try to install "Easy SMTP mail" and configured it with your Godaddy.com email, and it will work.
Index :
00. General Questions.
01. Profile
02. Activity
03. Groups
04. Membership
- Is Buddypress required for youzer to work ?
Yes.
- How to hide all the buddypress pages from non-logged-in users and redirect them to login page ?
Use this Snippet : https://gist.github.com/KaineLabs/ab894a2b53e9b884e8bcef2f9702166d
- How to enable/disable ratings/reviews ?
https://kainelabs.ticksy.com/article/14879/
- How to limit profile avatar filesize ?
Use this snippet : https://gist.github.com/KaineLabs/1fd34a901195c71d39d7f90cc392fb50
1.Go to Youzify Panel > General Settings ( page ) > General Settings ( tab ) .
2. Enable/Disable the option "Activate Membership System".

3. Save settings.
Please use this plugin below :
https://wordpress.org/plugins/bp-disable-activation-reloaded/
1. Goto Youzify Panel > General Settings > Custom Styling Settings > Members Directory Styling Settings.
2. Enable "Enable Members Directory CSS".
3. Paste the code snippet below to "Members Directory Custom CSS"
@media only screen and (min-width: 1224px) {
#youzify-members-list li {
width: 25% !important;
}
}
in 99.99% issues we recieved this happened because a conflict with the lazyload plugin !
- If you are using JetPack Follow the following steps :
Add this code snippet to the file "bp-custom.php" on the the path "wp-content/plugins". If you don't have it yet, please create a new one.
https://gist.github.com/KaineLabs/be6e87ae48e027739a0df34f2ed1e801
- if you are using WP Rocket Disable the cropping option !
Add this code snippet to the file "bp-custom.php" on the the path "wp-content/plugins". If you don't have it yet, please create a new one.
https://gist.github.com/KaineLabs/d4cd8e77b6bf862c7b72c0736bb43c05
1. Go to Youzer Panel > Profile Settings.
2. Increase the number of "Navbar Menus Limit".

2. Go to the section "Global Styling Settings".
3. Enable the button "Enable Global CSS".
4. Paste this css snippet below in the fied "Global Custom CSS".
.youzer [data-icon]:before, .youzer i.fas { font-family: "Font Awesome 5 Free"!important; font-weight: 700; }
.youzer i.fab { font-family: "Font Awesome 5 Brands" !important; }

The overview tab should be empty by the default untill you add some content to the widgets !
and here's how to access the widgets settings page :
1. From the user profile :

2. From the profile settings page :

And here's the place of the widgets settings pages :

1. Go to Youzify Panel > Profile Settings > Tabs Settings.
2. Open the tab that you want to change from the "Arrow" at the right side.

3. You can now change the tab title, order, icon or hide/delete the tab.
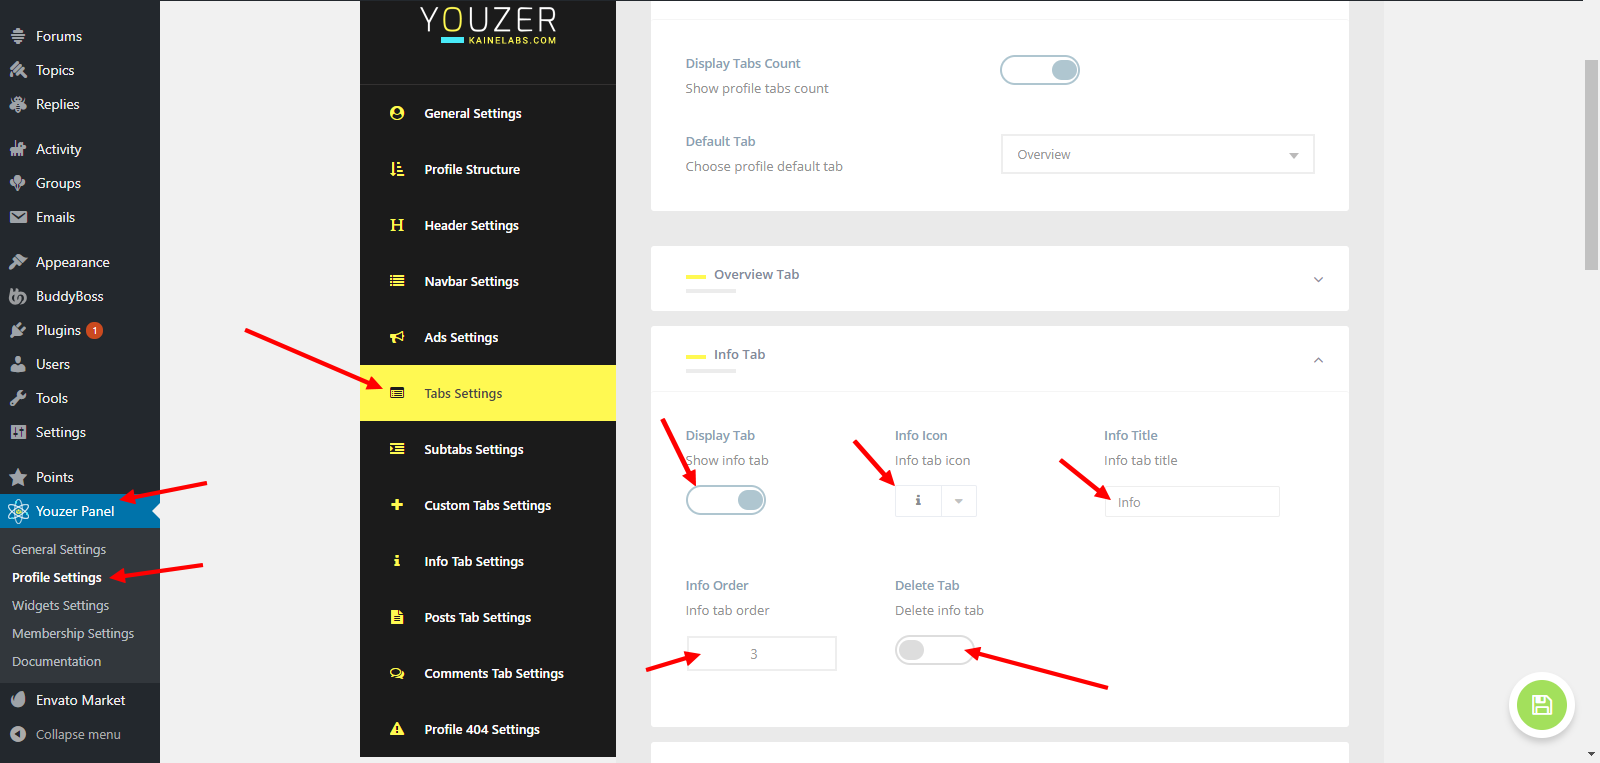
4. Save Settings.
Please do these steps
1. Go to wp-content\plugins\youzer\includes\admin\core\general-settings\
2. Open file yz-patches.php
3 Remove this code
if ( ! get_option( 'install_youzer_2.1.5_options' ) ) {
return false;
}
it's on line 26
4. Save the file
5. Back again on your WP admin and do update patches n Youzer Panel >> General settings >> patches Settings
And then you will get Contact Info fields on your profile Settings page.
1. Go to "wp-content/plugins".
2. Open the file "bp-custom.php" ( if you didn't find it just create a new one ).
3. Paste the code in the page below :
https://gist.github.com/KaineLabs/5950200d0dff734ab594eddfc52bfc33
Method 1 ( Recommended ):
You can use a plugin named "Envato Market" for auto update and here's a tutorial how to do it :
https://envato.com/market-plugin/
Method 2 :
Note : Don't worry you won't lose the Youzify settings on updates ^^
1. Deactivate the old version.
2. Remove the old version.
3. Install the new version.
1. Go to Wordpress Dashboard > Appearance > Widgets.
2. Then Add your widgets to a sidebar called "Wall Sidebar".

1. Go to Youzify Panel > Widgets Settings > Instagram.
2. Scroll to the very bottom and fill "Instagram App Settings" .

3. After that you will see that the instagram widget settings is appearing
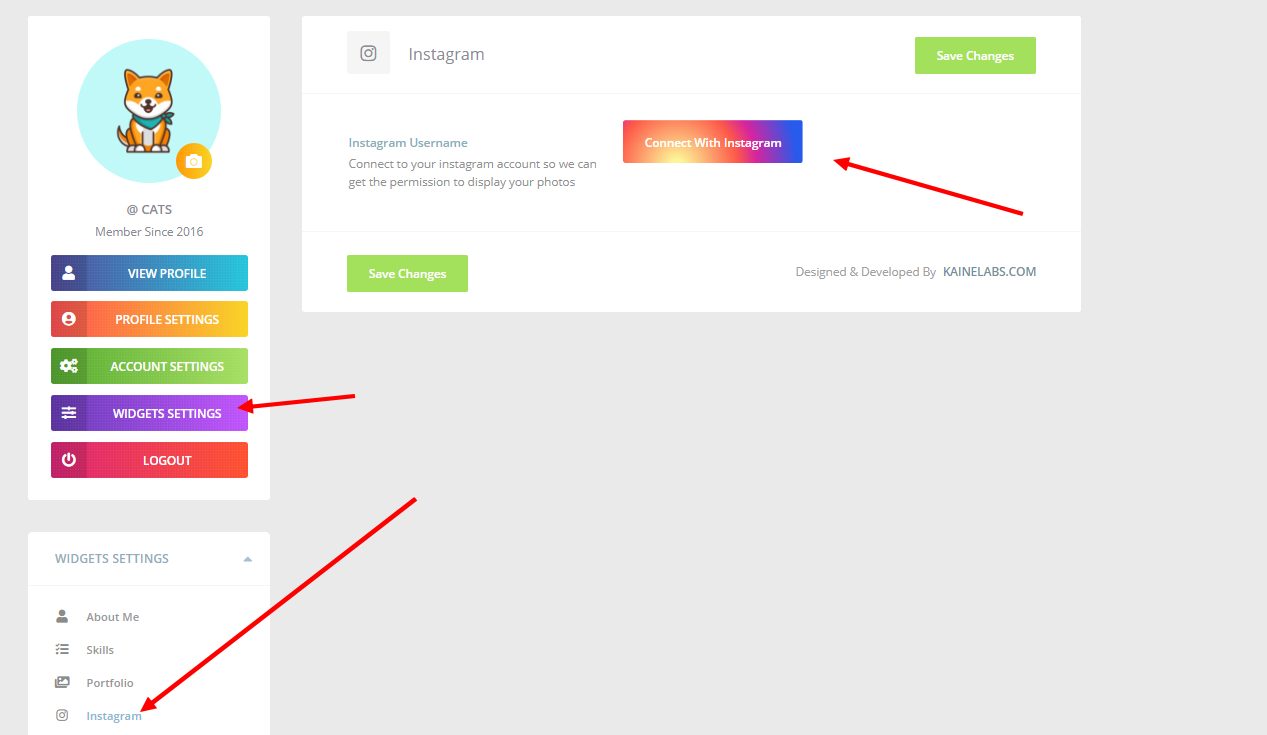
And your website users can now connect their instagram accounts .
Please use this snippet code
https://gist.github.com/KaineLabs/6ff34b2290797e764e4676931545d0cc
If you want to add BANNER, here is the snippet code
<?php
/**
* Add Content Above Groups Directory.
*/
function yzc_add_content_above_groups_directory() {
// Add content here.
echo '<a href="addlinkhere"><img src="addimageurlhere" alt="" class="bannergroup" /></a>';
}
add_action( 'bp_before_directory_groups', 'yzc_add_content_above_groups_directory' );
Change "addimageurlher" with URL image you upload into your site and "addlinkhere" if that image you want to clickable banner.
And add this CSS code into Youzer Panel >> general Settings >> Custom Styling Seettings >> Group Directory CSS Box (dont forget to switch on the "Enable CSS" button first
.bannergroup {
width: 97% !important;
margin-bottom: 5%;
margin-left: 20px;
}
Method 1 :
1. Go to the user profile page .
2. Put the mouse above the header area, a new button will appear.
3. Click on "Verify Account".

Method 2 :
1. Go to the members directory.
2. Put the mouse above the user header area, a new button will appear.
3. Click on the blue icon.

1. Go to "wp-content/plugins".
2. Open the file "bp-custom.php" ( if you didn't find it just create a new one ).
3. Paste the code in the page below :
https://gist.github.com/KaineLabs/597c394473e809fa20d1cd27949a150a
4.Go to "wp-content/themes/thrive-nouveau/functions.php"and remove the line 89 below :
define( 'BP_DEFAULT_COMPONENT', 'activity' );
=======
Infinite Loader Does not work
Please add this snippet on the "bp-custom.php" file
function yzc_add_thrive_load_more_fix() {
  return 'buddypress';
}
add_filter( 'youzify_profile_template_id', 'yzc_add_thrive_load_more_fix' );
add_filter( 'youzify_group_template_id', 'yzc_add_thrive_load_more_fix' );
add_filter( 'youzify_activity_template_id', 'yzc_add_thrive_load_more_fix' );
1. Go to Youzer Panel > General Settings > Wall Settings.
2. Scroll Down to the section "Posts Embeds Settings".
3. Disable the option "Enable Posts Embeds" if you wanna disable Posts Embeds.
4. Disable the option "Enable Comments Embeds" if you wanna disable Comments Embeds.

When try to activated Youzer 2.2.9, it give notification
Parse error: syntax error, unexpected 'include' (T_INCLUDE), expecting identifier (T_STRING) in /home/yoursite/public_html/wp-content/plugins/youzer/includes/public/core/class-yz-wall.php on line 31
Here is why and the solution.
Word “include” is forbidden on some servers.
1. Please go to FTP or Cpanel, go to folder public_html/wp-content/plugins/youzer/includes/public/core/
2. Open file class-yz-wall.php file
3. Change include() into include_files(). It's on line 31 and 10
4. Save the file
And then please try activate youzer again. It should work then.
1. Go to Wordpress Dashboard > Users > Profile Fields.
2. Click on "Add New Field Group".
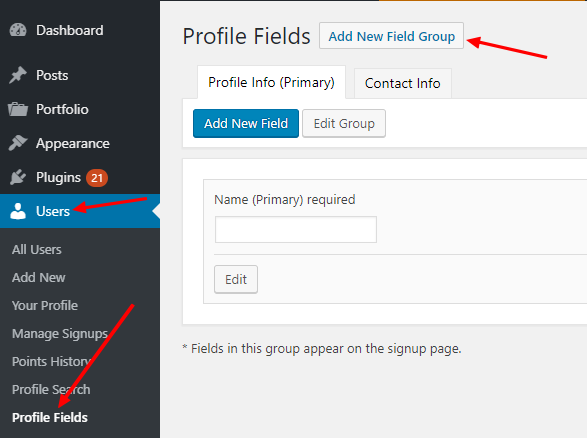
3. Enter Group name, description and choose the icon then hit "Save".
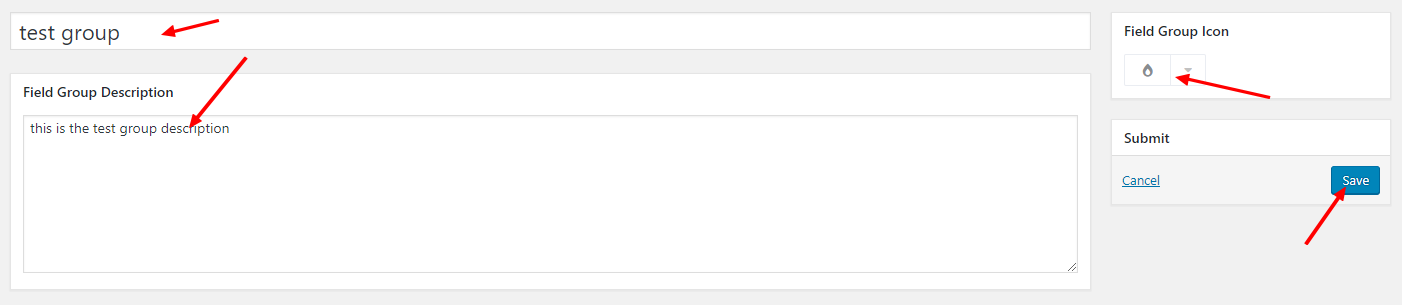
4. You will see a new group is added here :

5. Then click "Add New Field" If you wanna add new fields to the group.
6. You can edit the group info by clicking "Edit Group" or Delete it by Clicking "Delete Group".

1. Go to "wp-content/plugins".
2. Open the file "bp-custom.php" ( if you didn't find it just create a new one ).
3. Paste the code in the page below :
https://gist.github.com/KaineLabs/719efde063d7f9e738fec9cb59731a59
Please Check This topic :
https://codex.buddypress.org/administrator-guide/extended-profiles/
If you want to Hide a widget follow the next steps :
Go to Youzify Panel > Profile Settings > Profile Structure.

1 - Put the mouse above the widget and then an "EYE" icon will show up :

2 - Click on it and you will see the "HIDDEN" flag next to the widget name :
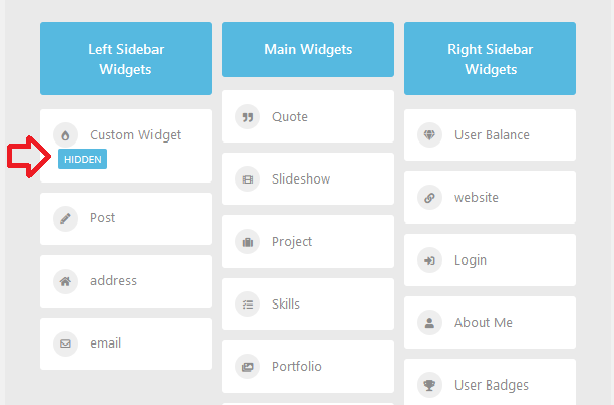
If you want to Display a hidden widget follow the next steps :
1 - Put the mouse above the hidden widget and then an "EYE" icon will show up :

2 - Click on it and you will see the "HIDDEN" flag disappeared from the widget name :

When you finish save settings and that's it :)
Install This plugin below it works perfectly with youzer !
Hello,
For "people you may know" you have to have some friends cuz the widgets shows the friends of your friends same for "group suggestions" you should have some friends that are already joining some groups.
1. Go to Youzer Panel > Profile Settings > General Settings.
2. Scroll to the section "Account Settings".
3. Disable the option "Allow Delete Accounts".

1. Go the Youzer Panel > Membership Settings > Login Attempts Settings.
2. Disable the option "Enable Limit Login".
How to Set a tab as default?
Please go to Youzer Panel >> Profile Settings >> Tab Settings. And then choose Profile Default Tab as you want.

How to ordering Tab?
On the tab settings, click tab you want to order >> Set value of Overview order

1. Go to Wordpress Dashboard > Appearance > Menus.
2. Click on Screen Options and enable Buddypress option.

3. You will find a new tab in your menus builder page called "Buddypress" you will find their all the links related to buddypress pages and all of them are dynamic, they will be changed depending on the logged in user and one of them is named "My Profile" just add it to your site menu and save settings.
- Activity Shortcode :
[youzify_activity]
Check all the activity shortcode options here : https://kainelabs.ticksy.com/article/14818/
- User Reviews List :
[youzify_reviews user_id="" per_page="5" show_more=""]
user_id : The user id.
per_page: Number of reviews to display.
show_more : Display "Show More" link.
- Verified Users List:
[youzify_verified_users limit="5"]
limit: Number of users to display.
- Login Form Shortcode :
[youzify_login]
- Register Form Shortcode:
[youzify_register]
- Lost Password Form Shortcode:
[youzify_lost_password]
- Get Loggen-in User Avatar Shortcode :
[youzify_account_avatar]
- Display Specific Profile fields data.
[youzify_xprofile_fields user_id="1" fields="1,2,3..." ]
- user_id : The user id.
- fields : List of fields ID's.
- Display Profile Group fields Data :
[youzify_xprofile_group profile_group_id=""]
- profile_group_id : specify the group of fields.
- Author Box Shortcode :
[youzify_author_box user_id="" layout='' meta_type="" statistics_bg="" statistics_border="" networks_type="" networks_format="" cover_overlay="" cover_pattern=""]
- user_id :
Card user ID.
- layout :
Available layouts are : ( youzify-author-v1, youzify-author-v2, youzify-author-v3, youzify-author-v4, youzify-author-v5, youzify-author-v6 )
meta_type :
Options ( username, location, website, email, phone-number )
statistics_bg :
Use the silver statistics bakcground, options ( on, off )
statistics_border :
Separate statitics with borders, available options are : (on, off)
networks_type:
Networks icons color available options are : (colorful, silver, transparent, no-bg )
networks_format :
Networks icons border style , available options are ( flat, radius, circle )
cover_overlay :
Display card cover black overlay , available options are ( on, off)
- Members List:
[youzify_members per_page="5"]
Defines the type of users to return.
active, newest, popular, online, alphabetical, randomactiveThe number of users to display on a page before they are paginated to the next page.
The page number to display.
1The total number of users to return.
false (no limit)Pass a user_id or string of comma separated user_ids to return on these users.
falsePass a user_id or string of comma separated user_ids to exclude those users in the return.
falseLimit the members returned to only friend connections of the logged in user.
falseReturn members that match these search terms
falseOnly return users with this usermeta field.
falseOnly return users where the usermeta value matches. Requires meta_key.
falseFetch extra meta for each user such as their full name, if they are a friend of the logged in user, their last activity time.
true- Groups List:
[youzify_groups per_page="5"]
Defines the type of groups to return.
active, newest, popular, random, alphabetical, most-forum-topics, most-forum-postsactiveThe number of groups to display on a page before they are paginated to the next page.
10The page to display.
1The total number of groups to return.
false (no limit)Return only groups that this user is a member of.
falseReturn only the group that matches this slug
falseReturn only groups that match these search terms
falseReturn only groups that match a meta key and value
falseFetch extra meta for each group such as if the logged in user is a member, or is banned.
truePass a group_id or string of comma separated group_ids to return on these groups.
falsePass a group_id or string of comma separated group_ids to exclude those groups in the return.
falseMethod 1 :
1. Go to the user profile page .
2. Put the mouse above the header area, a new button will appear.
3. Click on "Add Review".

Method 2 :
1. Go to the members directory.
2. Put the mouse above the user header area, a new button will appear.
3. Click on the yellow icon.

1. Go to your FTP and go to folder "wp-content/plugins".
2. Open the file "bp-custom.php" ( if you didn't find it just create a new one ).
3. Paste the code in the page below :
https://gist.github.com/KaineLabs/6e51bdbc2b568d7cc74a55382c0757e5
=======
Infinite Loader Does not work
Please add this snippet on the "bp-custom.php" file
function yzc_add_kleo_load_more_fix() {
  return 'buddypress';
}
add_filter( 'youzify_profile_template_id', 'yzc_add_kleo_load_more_fix' );
add_filter( 'youzify_group_template_id', 'yzc_add_kleo_load_more_fix' );
add_filter( 'youzify_activity_template_id', 'yzc_add_kleo_load_more_fix' );
=======
Single Group Page Error
Please make sure to select Legacy Theme instead of Nouveau theme on the BuddyPress Settings

Can not post image / file / video on wall. It says "Forbidden - You don't have permission to access /activity/post/ on this server" ?
Solution :
You need to disable PHP Mod Security on your server via .htaccess
Open .htaccess file and insert this code
<IfModule mod_security.c>
SecFilterEngine Off
SecFilterScanPOST Off
</IfModule>
Save htaccess. But that code doesnt work to some servers. So you need contact your hosting provider support to disable it.
1. You have to enable the buddypress groups component then you will be able to create and manage groups :
Go to Wordpress Dashboard > Settings > Buddypress then enable “User Groups”.

Now To create a new group there's 3 options :
1. Go to Dashboard > Groups > Add New.

2. Go to the Account Menu > Groups > Create A Group.
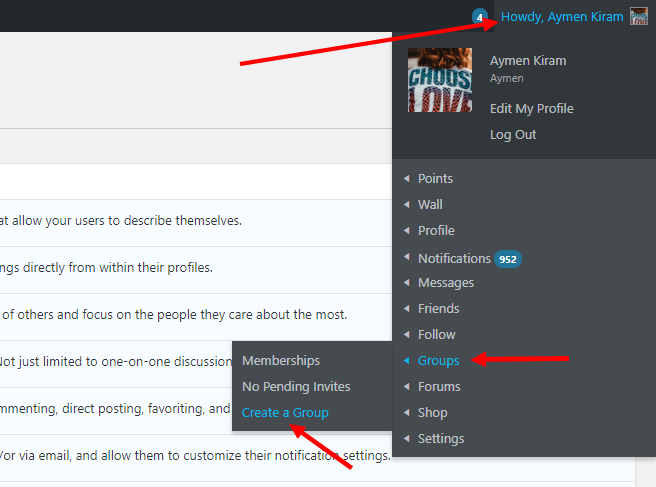
3. Go to the groups directory and click "Create A Group".

Social login settings in membership setting does not show any option to enter keys in facebook, linkedn etc. ??
To fix it, please :
1. Go to Your FTP >> Go to folder wp-content/plugins.
2. Create a file and name it with bp-custom.php.
3. Copy this code on the link below and paste into the file and Save.
https://gist.github.com/KaineLabs/9abf0b62e2a91f830f77875c39952c71
After add the code, clear your browser cache and the check again your site.
Ps: Once the settings appears, just remove the code snippet.
Please use this CSS code
.youzer .yz-post-attachments .yz-wall-link-content .yz-wall-link-thumbnail, .youzer .yz-post-attachments .yz-wall-link-content .yz-wall-link-thumbnail + .yz-wall-link-data {
display: block !important;
}
.logged-in .youzer .activity-meta {
display: inherit !important;
}
Hello,
in this post there's all the things you need on how to setup the "Youzer - Buddypress Edit Activity" Extension.
Index :
Let's Go !
Go to Youzer Panel > General Settings > Edit Activity Settings.

1. Go to Youzer Panel > General Settings > Edit Activity Settings.
2. Scroll to the "Activity Edit Roles" section and select roles that you want to enable the edit button for them.

1. Go to Youzer Panel > General Settings > Edit Activity Settings.
2. Scroll to the "Activity Moderators" section and select roles that you want set as moderators.

1. Go to Youzer Panel > General Settings > Edit Activity Settings.
2. Scroll to the "Editable Activities" section and enable the edit button for the posts that you want.

1. Go to Youzer Panel > General Settings > Edit Activity Settings.
2. Disable the option "Attachments Edition".

1. Go to Youzer Panel > General Settings > Edit Activity Settings.
2. Add time limit by minutes in the field "Disable Editing By Minutes". and leave it empty if you don't wanna set a timeout.

7. How to disable posts comments edition ?
1. Go to Youzer Panel > General Settings > Edit Activity Settings.
2. Disable the option "Comments & Replies Edition".

1. Go to Youzer Panel > General Settings > Edit Activity Settings.
2. Scroll to the section "Groups Settings", then enable or disable posts and comments.

Here's the list of Youzify compatible plugin :
If we tested any plugins in the future and they worked fine we will add them to this list.
1. Click on My Blog > Youzer Panel .

2. Click On "Custom Styling Settings".

To create a new tab, please go to Youzify Panel >> Profile Settings >> Custom Tabs settings
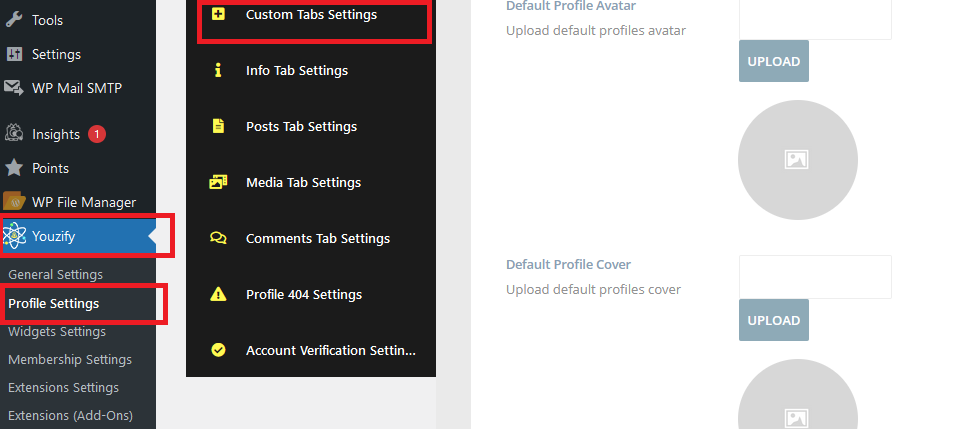
click on the button "Add New Tab" below :
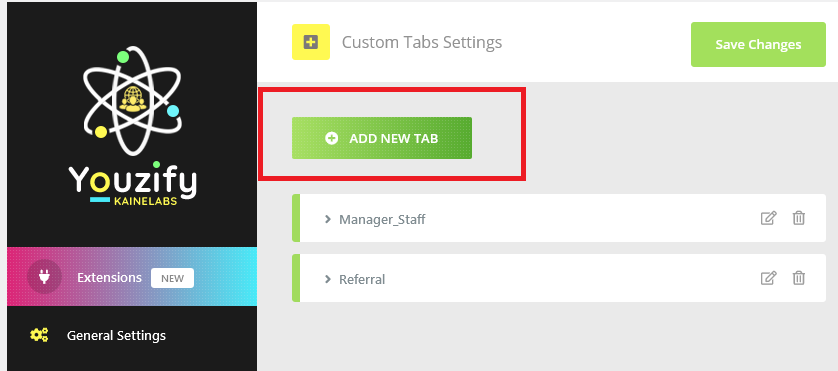
Once you clicked the button above a popup window will show up and it contains these fields :
- if you clicked the option Url a new field will appear:
- if you clicked the option Shortcode 2 new fields will appear:
To Update a tab click on the 'Pencil' Button ( Check the image below ) and Don't Forget To Save Changes.
To Remove a tab click on the 'X' Button ( Check the image below ) and Don't Forget To Save Changes.
2. Access the Options tab.
3. Disable the option > Show the Toolbar for logged out users.
4.Save Changes.

The Activity stram shortcode function will accept a number of parameters that will manipulate the data being returned.
Whether or not to display the activity filter bar area.
Whether or not to display the activity sidebar.
Whether or not to display the activity posting form.
Display the activity posting form to the entered roles. separate roles by comma with no empty spaces.
Whether or not to display activity load more button.
Pre-defined filtering of the activity stream. Show only activity for the scope you pass (based on the logged in user or a user_id you pass).
just-me, friends, groups, favorites, mentions, following<br>Whether or not to display comments along with activity items. Threaded will show comments threaded under the activity. Stream will show comments within the actual stream in chronological order along with activity items.
false, threaded, streamthreadedPass an activity_id or string of comma separated ids to show only these entries.
falseSort the stream chronologically ascending or descending.
ASC, DESCDESCNumber of activity items to show per page.
20Which page to return based on the number per page value.
1The limit on number of activity items that can be returned
falseShow items that have been hidden site wide? For example private or hidden group posts.
falseReturn only activity items that match these search terms
falseUsing filtering you can use the activity loop to return any specific information that has been recorded on the entire site. For example you could use it to return all of the latest comments site wide.
Listed below are the parameters you can use to filter the activity stream.
Limit activity items to a specific user ID. You can also pass in a comma separated string of user ids – see example below.
false (no filter)The object type to filter on (can be any active component ID as well as custom component ID’s)
groups, friends, profile, status, blogsfalse (no filter)The action type to filter on (can be any active component action as well as custom component actions)
new_blog_post, friendship_created, joined_group, created_group, new_forum_topic, activity_update, bbp_topic_create , bbp_reply_create false (no filter)The ID to filter on for a specific object. For example if you used groups as the object you could pass a group_idas the primary_id and restrict to that group.
false (no filter)The secondary ID to filter on for a specific object. For example if you used blogs as the object you could pass a blog_id as the primary_id and a post_id as the secondary_id the list all comments for that post using new_blog_comment as the action.
false (no filter)1. Search for that word inside youzer and buddypress code on how it's written.
2. If that word is being written inside the function __( '', '' ).
Example : __( 'Like', 'youzer' ).
Then use this snippet :
https://gist.github.com/KaineLabs/7cb85161783d83f7a1947df55e5482e9
if it's being written inside the function _x( '', '', '' ).
Example : Like _x( 'Like', 'this is a like button text', 'youzer' )
The use this snippet :
https://gist.github.com/KaineLabs/b4d2e13ec5b5671cf691c204ade4824d
Ps: Note that some words that contains numbers for example "All Members 25", "All Groups 22". Then you should write it like "All Members %s" and "All Groups %s" in order for the translation to works.
In General Write words as they are inside the code.

Hello,
Go to Youzify Panel > Widgets Settings > Custom Widgets Settings, since there's no custom widgets yet you will see this :
Ps: You can Change the order of the Custom Widgets by Drag And Drop.
To create a new widget click on the button below :
Once you clicked the button above a popup window will show up and it contains these fields :
To Update a widget click on the 'Pencil' Button ( Check the image below ) and Don't Forget To Save Changes.
To Remove a widget click on the 'X' Button ( Check the image below ) and Don't Forget To Save Changes.
1. Go to Youzer Panel > Profile Settings > General Setting.
2. Enable the option "Use Profile Effects ?".
P.s : We crop images because we are using a fixed height, and not all the users will upload images with same resolutions. to disable the cropping you can set the slideshow height to "auto" and the problem will be solved but the height of each image will change depending on the uploaded picture !
and here's how to change the slideshow height to auto :

1. Go to Youzer Panel > General Settings > Wall Settings.
2. Go to the section "Attachments Settings".
3. Change the value of the option "Max File Size".
1. Go to Youzer Panel > General Settings > Wall Settings
2. Scroll down to the section "Attachments Settings" you will find all the types of attachments you need !

3. Write the format that you want in the field then hit enter !
4. Save Settings
1. Go to "wp-content/plugins".
2. Open the file "bp-custom.php" ( if you didn't find it just create a new one ).
3. Paste the code in the page below :
https://gist.github.com/KaineLabs/aa8183ee52197525cba03e0001569696#file-yz-onair-theme-fix-php
What is different if translating words by using this way and use snippet?
Actually if you translating Youzify, if you updates your Youzify, your translations will be resetted to Youzify default translation. Except, you backup .po and .mo file, after update your Youzify, replace the it with your backup files.
But if you don't want that way, you can translate some words by using a snippet. Please try this way
1. Please go to your FTP/Cpanel, and go to folder "wpc-ontent/plugins"
2. Create a file and name it with "bp-custom.php"
3. Paste this snippet to the file
https://gist.github.com/KaineLabs/7cb85161783d83f7a1947df55e5482e9#file-yz-translate-like-button-php
4. On line 9, change 'Like' with existing word and on line 10, change 'Upvote' with your new word.
5. if you want translate more words, just copy the code from line 8 to line 12 And do same thing like point 4 but with other words.
6. Save the file
Example if you want to translate multiple words
<?php
/**
 * Translate Like Button.
 */
function yzc_translate_text( $translated_text ) {
    switch ( $translated_text ) {
        case 'Add Friend' :
            $translated_text = __( 'Connect', 'youzify' );
            break;
    }
    switch ( $translated_text ) {
        case 'Unfriend' :
            $translated_text = __( 'Unconnect', 'youzify' );
            break;
    }
    switch ( $translated_text ) {
        case 'Friendship' :
            $translated_text = __( 'My Network', 'youzify' );
            break;
    }
    return $translated_text;
}
add_filter( 'gettext', 'yzc_translate_text', 30 );
By enable Newsletter integration settings, if someone register on your website, their email will be added automatically to your Newsletter subscribers database.
How to Set newsletter Integration
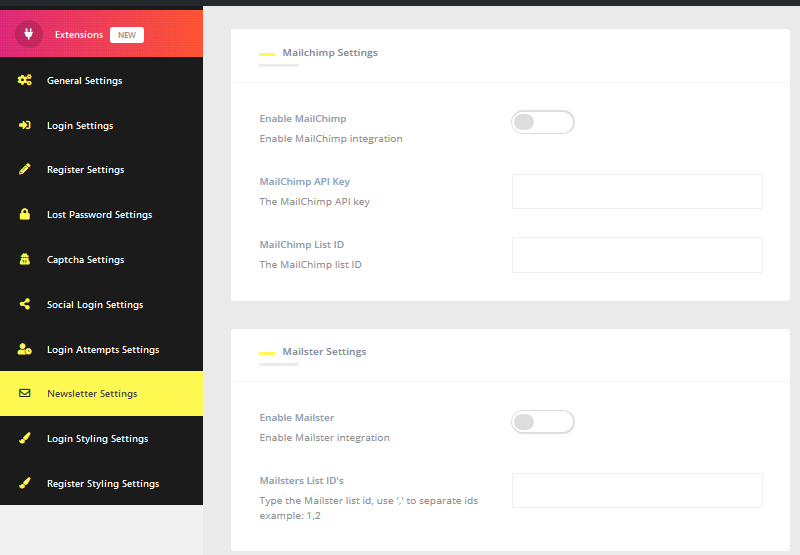
1. Please go to Youzify Panel >> Membership Settings >> Newsletter Settings >> Turn on Enable Mailchimp/Mailster button setting >> Add API Key and ID on the fields there
1. First, login to your account: click here.
2 For your API Key, click on your name at the top right, click Account. Now, click Extras > API Keys, then click the Create A Key button and name your API Key as your want.

3 For your List ID, click on Lists in the menu, if you have no list created, create one and click Settings > List name and defaults. From here, you will see your List ID in red.

Credit to WP Ocean Team for the screenshots
Please do these steps
1. Go to your FTP, and go to folder "wp-content/plugins"
2. Create a PHP file there and name it with "bp-custom.php". But if you already have it, you don't need to create a new one. Just open it
3. Put these snippets on the file and save
For Nextend Social Login Integration, please use this snippet >> https://gist.github.com/KaineLabs/6286d905e603a61f422efba26d6e061f#file-yz-integrate-nextend-plugin-php
For OneAll Social Login Integration, please use this snippet >> https://gist.github.com/KaineLabs/92ff0c66f064db26dd4894a47d78079b#file-yzc_oa_plugin-php
PS: Youzer login form has possibility to integrated with any Social Login plugin. As long as that plugin:
- Works with Buddypress
- Provide shortcode
Please submit a ticket, and our support team will help you to integrate it. :)
If you disabled search engines from indexing your site (under “Settings > Reading” in the WP dashboard), then bbPress will not add any activity entries to the site. Or few hostings automatically disabled it for a reason we do not know. To fix it please use this snippet
add_filter( 'bbp_is_site_public', '__return_true' );<br>
Put it on "bp-custom.php" file in folder "wp-content/plugins". If you do not have the file yet, please create a new one.
Use this CSS code
.yz-wall-options .yz-wall-opts-item:not(.yz-wall-opts-show-all):nth-child(n+6) {
display: inherit !important;
}
.yz-wall-options .yz-wall-opts-item label.yzw-form-show-all {
display:none;
}
Put it on Youzer Panale >> general Settings >> Custom Styling Settings >> Global Custom CSS Box
1. Please go to Youzer Panel >> General Settings >> Wall Settings
2. Scroll down, and you will find " Posts Buttons Settings" box
3. Turn off/on any button you want to enable/disable them. And save

1. Go to https://www.linkedin.com/developer/apps
2. Create a new application by clicking "Create Application".
3. Fill out any required fields such as the application name and description.
4. Put the below url in the OAuth 2.0 Authorized Redirect URLs:
5. Redirect URL:
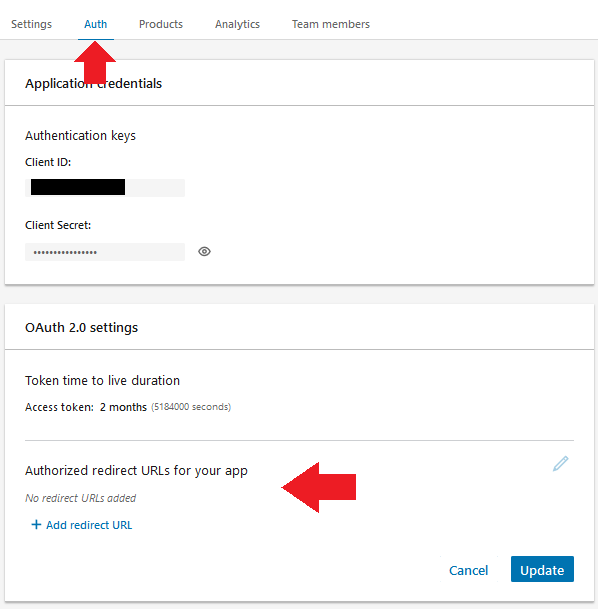
6. Once you have registered, copy the created application credentials ( Client ID and Secret ) .
Note: It would be better if you Verify the App Settings with your Linkedin Page

1. Go to Youzer Panel > Profile Settings > Header Settings.
2. Change meta ( Check images below ).


When users register with social (Facebook, Google), size images are imported erroneously creating a visual problem. But it's only happen on Microsoft Edge browser.
The solution is with using this CSS code
@supports (-ms-ime-align: auto) {
.yz-profile-photo-effect .yz-profile-img img {
position:absolute;
}
}
Put it on Youzer Panel >> General Settings >. Custom Styling Settings >> Profile Styling and Account Styling boxes
Change Group Styling
Please go to Youzify Panel >> General Settings >> Groups Settings. On that settings page, you can change any groups styling like

Change Group Directory Styling
Please go to Youzify Panel >> General Settings >> Groups Directory Settings. On that settings page, you can change any groups styling like

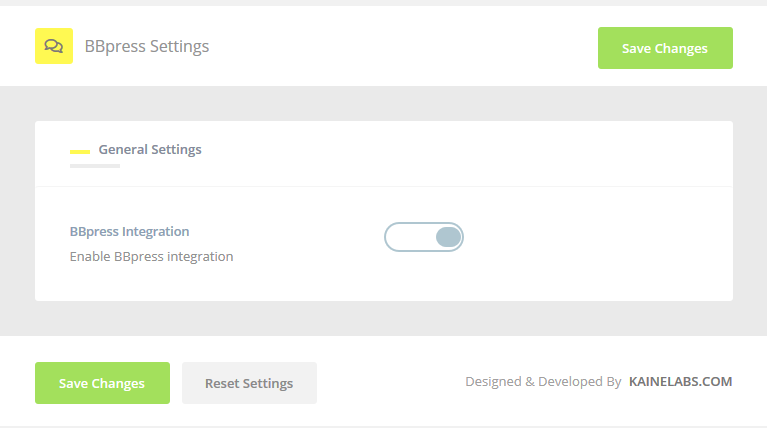
BBPress if powerfull plugin to build a cummunity Forum. What new functions you will get with BBPress Integration:
1. BBPress Forum will has Youzify styling instead of their own styling.
2. Forum tab on Profile Page.
3. Every Group can have their own Forum
4. Forum Topic and Forum Reply Post Types (you can set each new topic created and new replies on BBPress forum can displayed on Activity Stream)
How to integrate it?
1. Please go to Youzify Panel >> General Settings >> BBPress Settings.
2. Enable "BBPress Integration" button and save.
4. To enable/disable Forum Tab, please go to Youzify Panel >> Profile Settings >> Tabs Settings >> Go to "Forum tab", enable it and save.
1. Go to Youzify Panel > Membership Settings > Login Settings.
2. Select logout redirect pages ( Check images below ) .


First, you need to enable Blog Post and Blog Comment Post Type on Youzer Panel >> General Settings >> Wall Settings >> Scroll down until find Control Wall Posts Visibility. And enable those types buttons.

If Blog Post and Blog Comment Post Type does not appear on your Activity Stream although you already enable it on Youzer Panel, then please go to Settings >> Buddypress.
And make sure Site Tracking settings already enabled

1. Go to your Wordpress dashboard.
2. Go to Youzify panel > membership settings > login settings.
3. Activate/Deactivate 'enable Ajax Login' checkbox.
4. Click "save changes" button.

1. Please go to Youzify Panel >> General Settings Reviews Settings
2. On that page you can:
- Enable/Disable reviews settings
- Allow Reviews Edition
- Set Reviews Privacy
- Set reviews per page

3. To enable Reviews Tab on Profile Page, please go to Youzify >> Profile Settings >> tabs Settings >> Enable "Reviews" tab.
And here is some snippets related with review function customziations:
1. Go to "wp-content/plugins".
2. Open the file "bp-custom.php" ( if you didn't find it just create a new one ).
3. Paste the code in the page below :
https://gist.github.com/KaineLabs/055c0883c278ee55360794072aa976a2#file-yzc_enable_gravatar-php
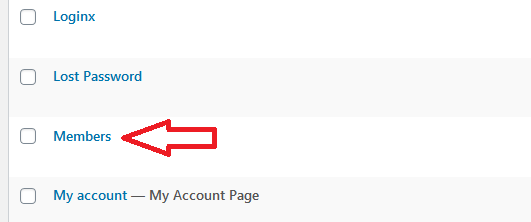
1. First, on your WP Admin dashboard, please go to menu Pages >> All Pages. And then please make sure if you already have "Members" page.
Actually the page should be created automatically if you install Buddypress. But if you don't have it yet, please create a new empty page and name it with "Members" or any title you want.


3. Fill out any required fields such as the application name and description.
4. Put your website domain in the Site URL field.
5. Provide URL's below as the Callback URL's for your application respecting the same order.
5.1 URL: https://yourwebsite.com
5.2 Second Callback URL: https://yourwebsite.com/youzify-auth/social-login/Twitter
6. Register Settings and get Consumer Key and Secret.
Please add this code snippet below to the file "bp-custom.php" in the path "wp-content/plugins" :
https://gist.github.com/KaineLabs/440490a3b4decaf3c6da9b97016d7bd2
Ps: if you didn't find the file "bp-custom.php", just create a new one.
If you find Media system database error like this

It happen because there's a conflict between your Hosting Server and Youzer Media System. Please do these steps to fix it
1. Go to FTP/Cpanel, and go to folder "wp-content/plugins"
2. Create a file and name it with "bp-custom.php" file (if you already have it, please just open it. No need to create a new file one)
3. Put this snippet on the file and save
4. Clear your browser cache and test again. The error will be solved then.
5. Please remove the snippet from the bp-custom.php after the problem solved.
1. Please go to your FTP/Cpanel, and go to folder "wp-content/themes/youractivetheme"
2. Open file "functions.php" and then insert this snippet there and save
function my_custom_member_list_sort( $ret ) {
    $ret['type'] = 'alphabetical';
    return $ret;
}
add_filter( 'bp_after_has_members_parse_args', 'my_custom_member_list_sort' );
3. Download ZIP file from this link >> https://www.dropbox.com/scl/fi/lf4xw9dj7sqm4c3jt3u51/youzify.zip?rlkey=bmhvayl3msqa1kmbdjbvh2mh2&dl=0
4. Upload it into folder "wp-content/themes/youractivetheme". And then extract the file there (you should can see youzify folder, with members sub folder and index.php file inside.
5. Clear your browser and site cache and check again your Members Directory.
Actually we really not recommend you to use multiple Membership System on a single website. Because it will causes some conflicts and will have bad impact to you website performance.
If you want to use another membership system, you can disable Youzify Membership System ( Please check this article >> https://kainelabs.ticksy.com/article/13273/ ). That's mean you will no longer can use Youzify Registration Form, Youzify Login and YouzifyReset Password. But you still can enjoy other Youzifyfeatures. :)
1. Please go to Settings >> General >> And make sure that “Anyone can register” already checked

2. Please go to Youzify Panel >> General Settings >> Scroll down untill find Membership System Settings >> And make sure “Activate Membership System” already turned on

3. Please go to Youzify Panel >> Membership Settings >> Register Settings Tab >> Please make sure “Enable Registration” already turned on

4. The last step, please go to Settings >> Buddypress >> Pages Tab >> Make sure you already choose Register Page.
After install Buddypress on your site, you should get “Register Page” automatically, so you don’t need create a new one.

5. You can find registration page on yourwebsite.com/register
1. Go to Youzify Panel > Profile Settings > Custom tabs Settings.
2. Click on "add new tab".
3. Fill in the infos for you custom tab menu in the popup.


1. Go to the Activity Post you want to Pin.
2. Click on the "3 dots" then click on "Pin" Button.

3. Refresh page and you will see the post pinned at top :

For CURL, please do this steps:
1. Go to yur FTP/Cpanel and create a file on public_html folder, and name it with test.php
2. Copy code below and past it into the file and save

3. Then open to your browser and go to yourwebsite.com/test.php
4. If CURL on your server enabled, so on browser will show "CURL is available on your web server"
5. But if it show "CURL is not available on your web server", you need to contact your hosting server provider and ask them to enable it
For getsizeimage, please do this steps:
1. Go to yur FTP/Cpanel and create a file on public_html folder, and name it with test.php
2. Still on public_html folder pleae upload an image (format JPG or PNG) and name it with test.jpg or test.png
3. Copy code below and past it into the file and save

4. make sure you put the right URL for image uploaded on yourwebsite.com/test.jpg
5. Then open to your browser and go to yourwebsite.com/test.php
6. If getsizeimage on your server enabled, so on browser will show:
Width of image : (number of image size, for example 400)
Height of image : (number of image size, for example 400)
Image type : (number of image type, for example 2)
Image attribute :width="400" height="400
7. But if it show "
Width of image : (no number / blank)
Height of image : (no number / blank)
Image type : (no number / blank)
Image attribute :width=" " height=" "
you need to contact your hosting server provider and ask them to enable it
1. Please go to Youzify Panel >> General Settings >> Scheme Settings
2. Please choose any profile Scheme or Custom Scheme you want and save

By default, Youzify already has Facebook, Instagram, Linkedin, TwitchTV, and Twitter for its own Social Login. But sometimes we received from clients to add more. It can be done by using additional snippets.
1. Go to your FTP, and go to folder "wp-content/plugins"
2. Create a PHP file there and name it with "bp-custom.php". But if you already have it, you don't need to create a new one. Just open it
3. Put these snippets on the file and save
WeChat >> https://gist.github.com/KaineLabs/5a874899131820d9712f92f1dfcda636#file-yzc_add_wechat_network-php
VKontakte >> https://gist.github.com/KaineLabs/948e23e067d4eaaac6c791ebb2330414#file-yzc_add_vk_network-php
How to get key for VKontakte Social Login >> https://nextendweb.com/nextend-social-login-docs/provider-vkontakte/
And then, please go to Youzify Panel >> Membership Settings >> Socil Login Settings. Scroll down to the most bottom of page, and you will see new Social Login settings there.
Note: If you have another Social Login to add on Youzify, please submit a new ticket and our support team will check the possibility to add it into Youzify.
Please also check this artiicle >> https://kainelabs.ticksy.com/article/17310/
You can delete, bookmark or pinned post by click "three dots" button on the right top of each post. After click it, those options will appear.

1. Go to Youzify Panel > Membership Settings > Login Settings.
2. Select Redirect pages for users and admins in Redirect settings ( Check images below ) .

The problem happen becase WP Rocket disable "Heartbeat" system. On the other side, it require by Youzer to run some components on Activity page.
1. Please go to WP Rocket Settings, and find Heartbeat Tab Settings
2. Turn off "Control heartbeat"

<?php
function smquest_bp_activity_bump_comment_posted( $comment_id, $params )
    {
        global $bp, $wpdb;
        extract( $params, EXTR_SKIP );
        $activity_parent = bp_activity_get_specific( array( 'activity_ids' => $activity_id ) );

        if ( !$activity_parent = $activity_parent['activities'][0] )
            return;

        if ( smquest_bp_activity_bump_denied_activity_type_check( $activity_parent->type ) )
            return;

        if ( !smquest_bp_activity_bump_denied_user_check() )
            return;
        //be nice and save the date_recorded
        if ( !bp_activity_get_meta( $activity_id, 'bp_activity_bump_date_recorded') )
            bp_activity_update_meta( $activity_id, 'bp_activity_bump_date_recorded', $activity_parent->date_recorded );
        $activity = new BP_Activity_Activity( $activity_id );
        $activity->date_recorded = gmdate( "Y-m-d H:i:s" );
        if ( !$activity->save() )
            return false;
    }
add_action( 'bp_activity_comment_posted', 'smquest_bp_activity_bump_comment_posted', 1, 2 );
function smquest_bp_activity_bump_time_since( $content, $activity )     {
        global $bp;
        if ( !$bumpdate = bp_activity_get_meta( $activity->id, 'bp_activity_bump_date_recorded') )
            return $content;
        $content = '' . sprintf( __( ' updated %s', 'bp-activity-bump' ), bp_core_time_since( $activity->date_recorded ) ) . '';
        return apply_filters( 'etivite_bp_activity_bump_time_since', '' . sprintf( __( ' %s', 'buddypress' ), bp_core_time_since( $bumpdate ) ) . ' · ' . $content, $activity->date_recorded, $bumpdate, $content );
    }
add_filter( 'bp_activity_time_since', 'smquest_bp_activity_bump_time_since', 1, 2 );
function smquest_bp_activity_bump_denied_activity_type_check( $type )
    {
       $types = (array) maybe_unserialize( get_option( 'bp_activity_bump_denied_activity_types') );
       return in_array( $type, apply_filters( 'smquest_bp_activity_bump_denied_activity_types', $types ) );
    }
function smquest_bp_activity_bump_denied_user_check()     {
        global $bp;
        //all, super, wp_cap
        $types = maybe_unserialize( get_option( 'bp_activity_bump_denied_user_types') );
        if ( $types && ( $types['super_admin'] || $types['user_cap'] ) )
            {
                if ( current_user_can( $types['user_cap'] ) )
                    return true;
                if ( $types['super_admin'] && $bp->loggedin_user->is_super_admin )
                    return true;
                return false;
            }

        return true;
    }
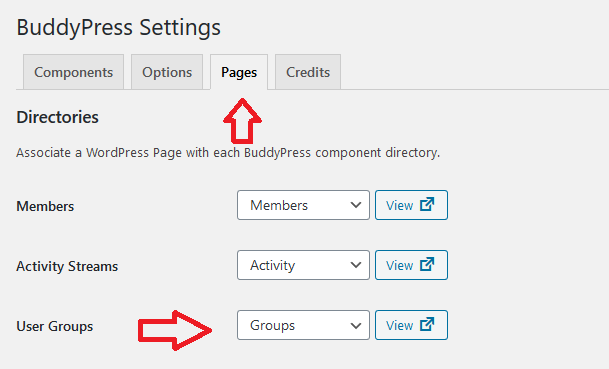
1. First, on your WP Admin dashboard, please go to menu Pages >> All Pages. And then please make sure if you already have "Groups" page.
Actually the page should be created automatically if you install Buddypress. But if you don't have it yet, please create a new empty page and name it with "Groups" or any title you want.

2. And then, please go to Settings >> Buddypress >> Pages Tab. And then set User Groups to your Group Page. And "click Save Settings"
1. Go to "wp-content/plugins".
2. Open the file "bp-custom.php" ( if you didn't find it just create a new one ).
3. Paste the code in the page below :
https://gist.github.com/KaineLabs/b01070a34aea9512dcba6761045878eb#file-yzc_motors_theme_fix-php
1. Make sure "Cover Image Uploads" is being activated on the Buddypress settings page.

2. Go to Account Settings.
3. Click on the icon below ( Profile Cover ) :

1. Go to Youzify Panel > Membership Settings > Login Settings.
2. Select Form fields layouts, and you may change fields settings ( Check images below ) .


As part of our services for our valued clients, we created some snippets to add some extra features that by default is not available both on Buddypress and Youzify.
Please check if one of these snippets is usefull for you, but if you can not find the what you need, you can open a new ticket. Our support team will check the possibility if we can create a new snippet for you.
How to use the snippet?
1. Please go to your FTP/Cpanel, and go to folder "wp-content/plugins"
2. Create a new PHP file and name it with "bp-custom.php"
3. Put the snippet there and save the file
Snippet List
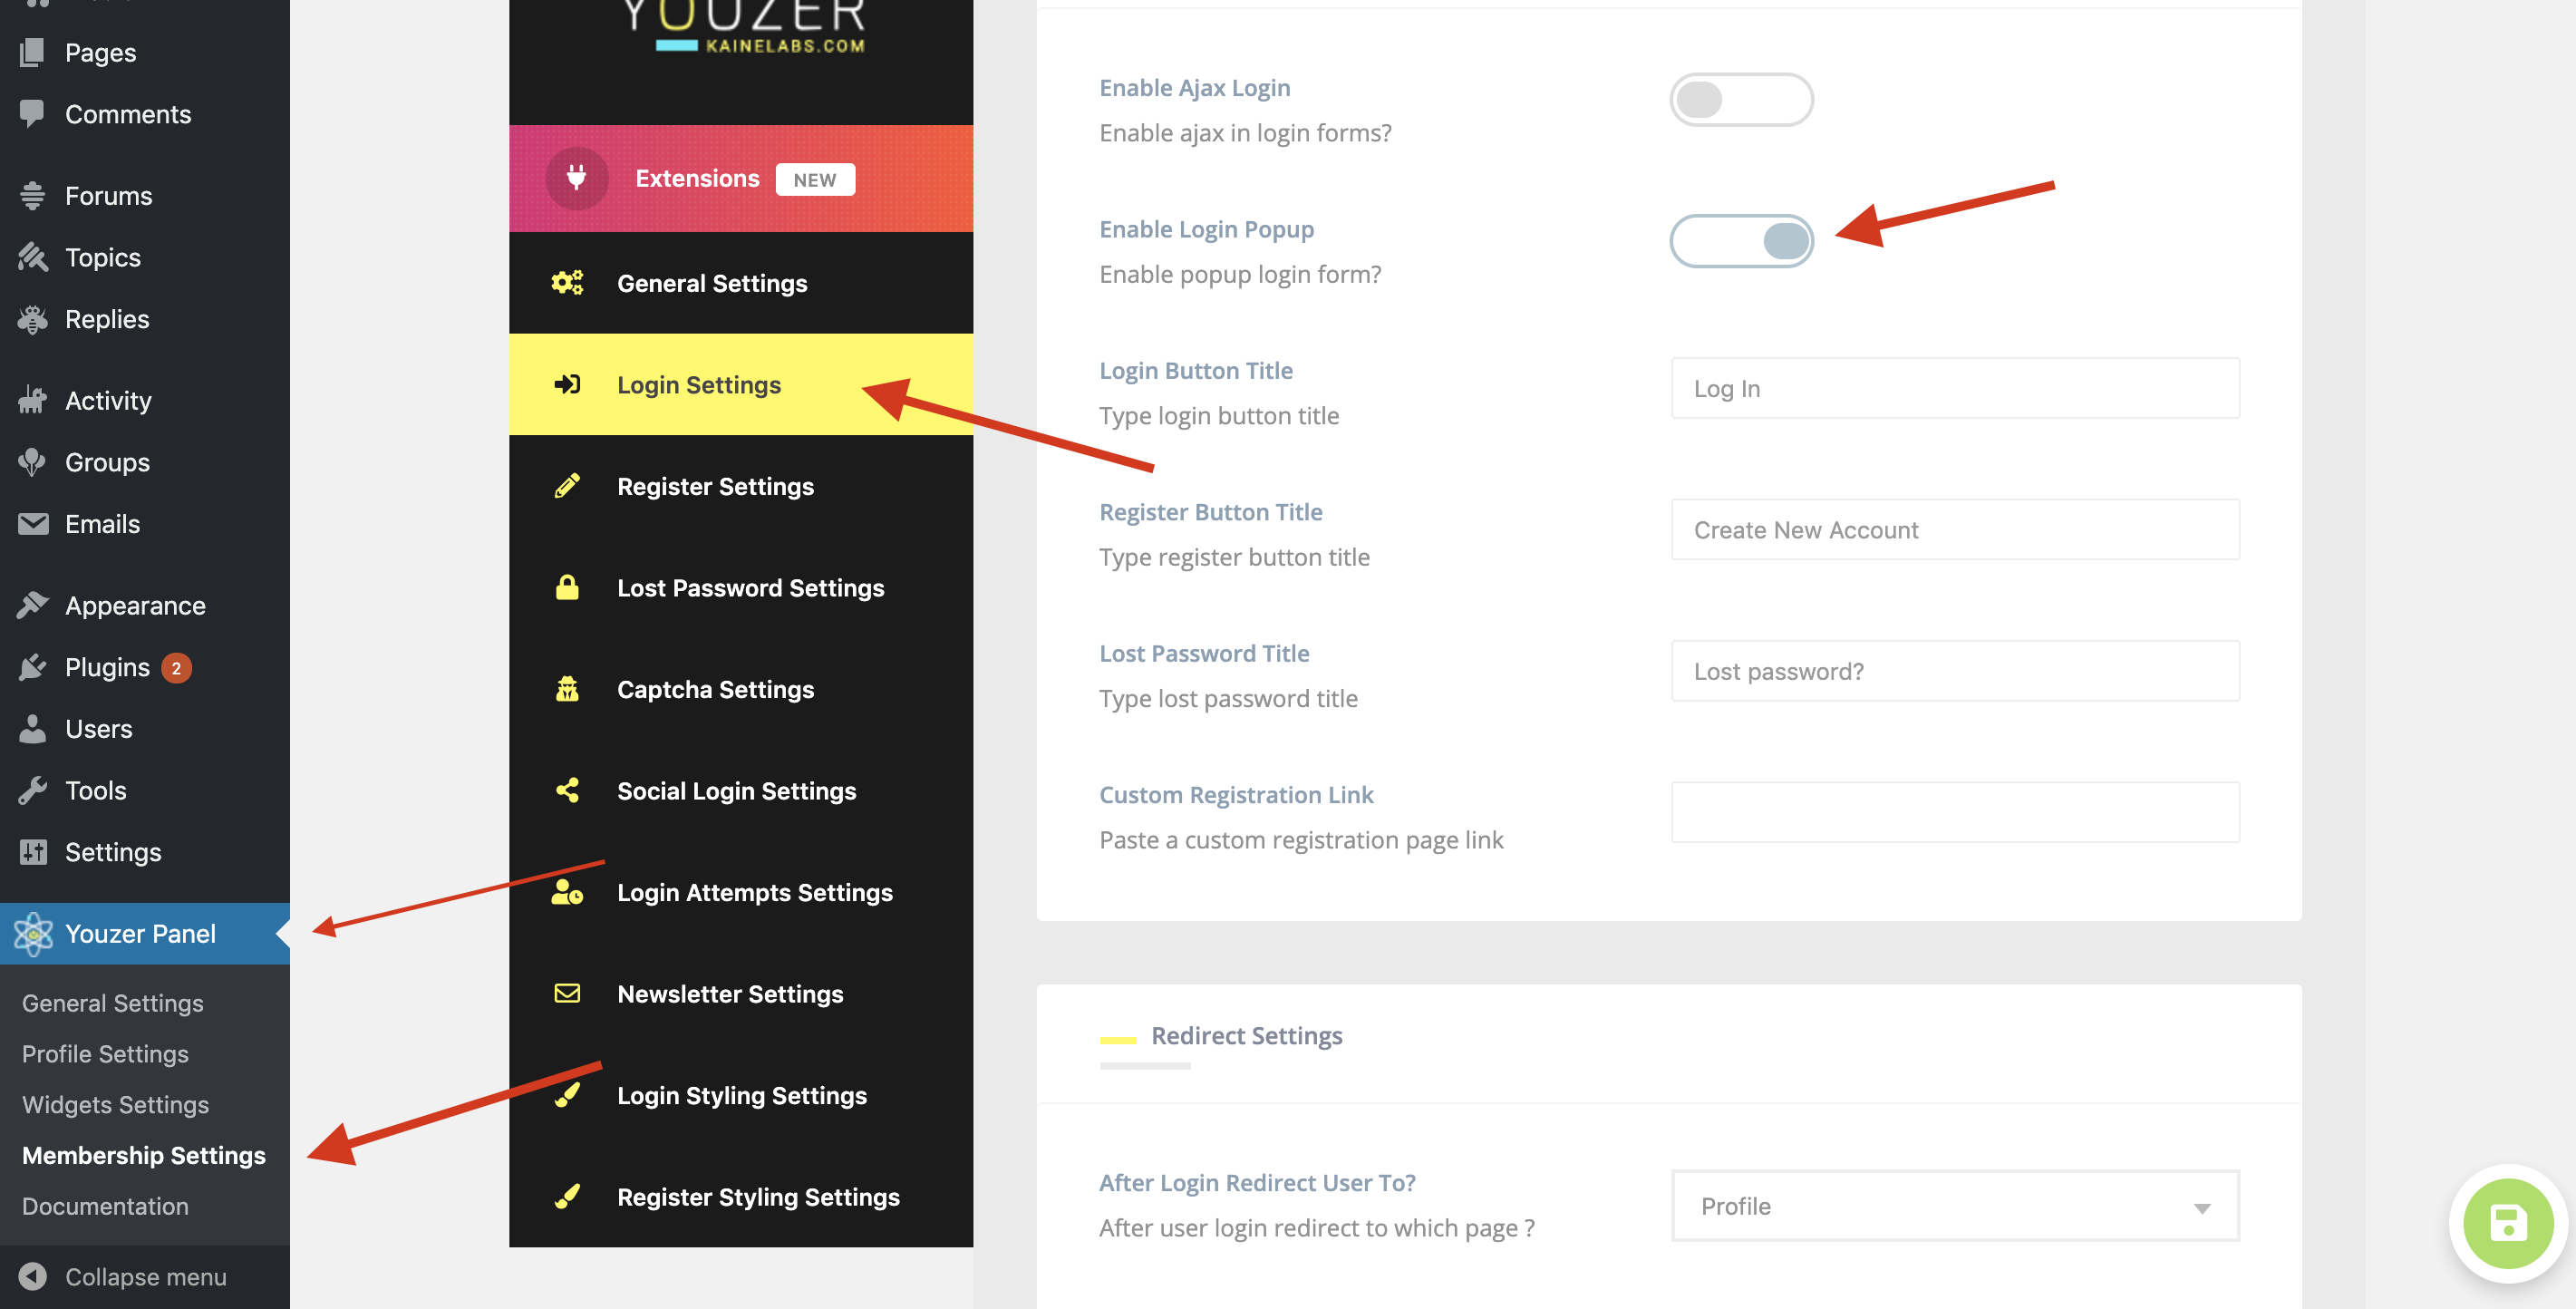
Enable Popup Login Settings
1. Go to your Wordpress dashboard.
2. Go to Youzify panel > membership settings > login settings.
3. Activate/Deactivate 'enable login popup' checkbox.
4. Click "save changes" button.
Make Login Popup Link into Main Menu
1. Get your login page ID. Go to wordpress dashboard, Pages > all pages. Find your login page and move your pointer on it. hover mouse on the "edit link". Just hover (dont click). then in bellow you will see login page ID. (see image attached bellow . remember it.
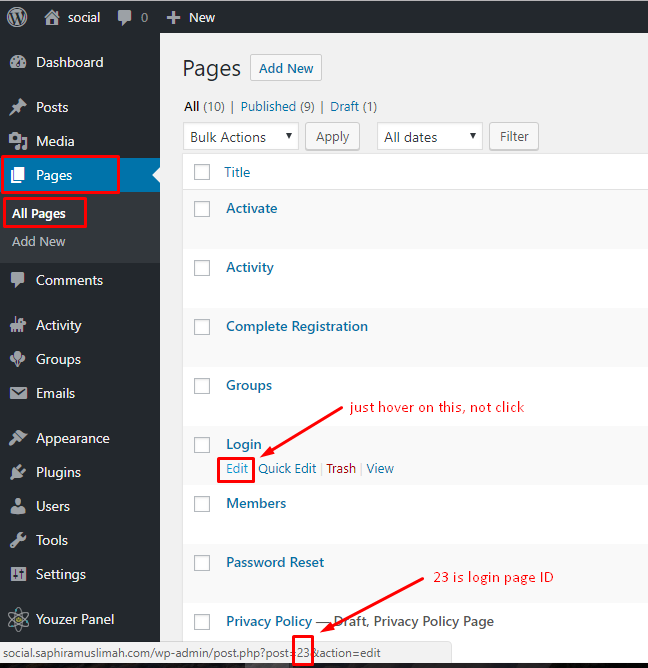
NOTE : if you didn't create yet, you can create login page first then do step above.
2. Open this link bellow :
https://gist.github.com/KaineLabs/e68fb2a7a031f7e9e4a93d40b14b0af9
Put code to bp-custom.php in /wp-content/plugins/
NOTE : if you didn't have it yet, you can create by yourself. Just login your file manager via hosting control panel or from FTP cliend. Go to /wp-content/plugins. Create new file, named it bp-custom.php
next, change 1212 in line $login_page_id = 1212; with your login page ID that you get in step 1.
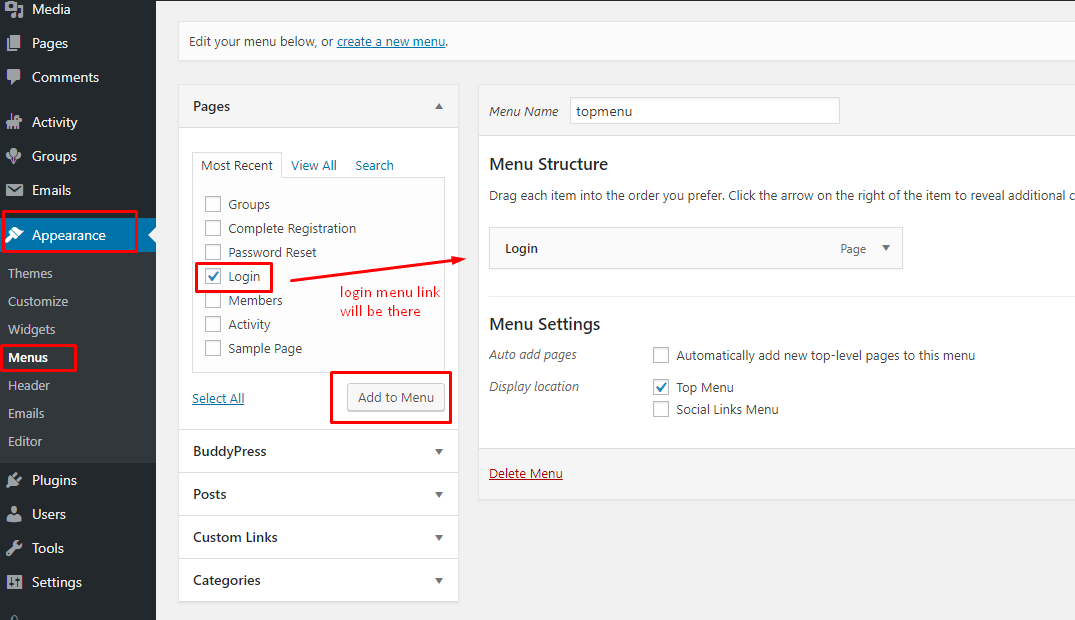
3. After that, go to your wordpress dashboard, go to appearance > menu.
Create your menu and insert your login page.
See how to add to menu in image attached bellow.
For new account
https://gist.github.com/KaineLabs/df94e3578ab9710fe411b64c1c1cae9a
For old account
https://gist.github.com/KaineLabs/b099ebdb04065c870096f70904f9c306
1. Login your wordpress dashboard
2. Go to users -> Profile Fields
3. Choose field that you want to make "default" then click "edit button".

4. In "requirement" box, choose "Required" option.
5. Click "update" button

1. Go to your wordpress dashboard
2. Go to Youzify Panel > Membership Settings
3. Go to "Login settings"
4. In "General Settings" section, scroll down until you find "custom registration link".
5. Fill the form with your custom registration link.

You want to use the WooCommerce integration. But you just don't want to use the My Account, Checkout, and other WooCommerce Template overrides. How can I disable these?
Please do these steps
1. Please go to your FTP/Cpanel
2. Go to folder "wp-content/plugins" and create a new file there. Name it with "bp-custom.php" (if you already have that file, please just open it. No need to create a new one).
3. Please put this snippet on the file and save
<?php
add_filter( 'youzify_wc_enable_my_account_redirect', '__return_false' );
add_filter( 'youzify_woocommerce_enable_redirects', '__return_false' );
/**
 * Disable Profile Woocommerce Tabs.
 */
function yzc_disable_profile_woocommerce_tab( $tabs ) {
    // Add Here the list of pages you want to disable.
    $pages = array( 'checkout', 'cart' );
    foreach ( $pages as $page ) {
        if ( isset( $tabs[ $page ] ) ) {
            unset( $tabs[ $page ] );         }
    }
    return $tabs;
}
add_filter( 'youzify_woocommerce_sub_tabs', 'yzc_disable_profile_woocommerce_tab' );
add_filter( 'youzify_supported_wc_pages', 'yzc_disable_profile_woocommerce_tab' );
If you already have "bp-custom.php" file with other snippet there, please do not copy the code
After put the snippet, please clear your browser cache and if you use any cache plugin, please clear it too. And then test again.
1. Please go to Youzify Panel >> Membership Settings >> General Settings.
2. And then, Enable "Hide Dashboard For Subscribers" button and save

Here's a list of buddypress available slugs :
define ( 'BP_ACTIVITY_SLUG', 'streams' );
define ( 'BP_BLOGS_SLUG', 'journals' );
define ( 'BP_MEMBERS_SLUG', 'users' );
define ( 'BP_FRIENDS_SLUG', 'peeps' );
define ( 'BP_GROUPS_SLUG', 'gatherings' );
define ( 'BP_MESSAGES_SLUG', 'notes' );
define ( 'BP_WIRE_SLUG', 'pinboard' );
define ( 'BP_XPROFILE_SLUG', 'info' );
/* Some other non-component slugs */
define ( 'BP_REGISTER_SLUG', 'signup' );
define ( 'BP_ACTIVATION_SLUG', 'enable' );
define ( 'BP_SEARCH_SLUG', 'find' );
define ( 'BP_HOME_BLOG_SLUG', 'news' );
Add it to the file "bp-custom.php" in the path "wp-content/plugins".
Ps: if you didn't find the file "bp-custom.php", just create a new one.
Please put CSS below to Youzify Panel >> general Settings >> Custom Styling Settings >> Members Directory Styling Settings box
[data-yztooltip]::after {
  visibility: unset;
  opacity: 100;
  bottom: -150%;
  color: #000;
  font-size: 12px;
  font-weight: 600;
  padding: 0px;
  background: transparent;
  white-space: nowrap;
  white-space: inherit;
}
[data-yztooltip]::before {
   border-top-color: transparent !important;
}
.yzm-user-statistics .yz-data-item {
   padding: 0px 25px 2px 25px !important;
}
.yzm-user-statistics {
   margin-bottom:35px;
}
#yz-members-list .is-current-user.yz-show-cover .yzm-user-actions {
    height: 221px !important;
}
Please note, this CSS only can works fine if you only show 4 statistics or less on the member card.
1. Go to "wp-content/plugins".
2. Open the file "bp-custom.php" ( if you didn't find it just create a new one ).
3. Paste the code in the page below :
<?php
add_filter( 'bp_email_use_wp_mail', '__return_true' );
<?php
if ( ! defined( 'BP_AVATAR_FULL_WIDTH' ) )
    define( 'BP_AVATAR_FULL_WIDTH', 500 ); //change this with your desired full

if ( ! defined( 'BP_AVATAR_FULL_HEIGHT' ) )
    define( 'BP_AVATAR_FULL_HEIGHT', 500 ); //change this to default height for full avatar
1. Please go to your FTP/CPanel, and go to folder "wp-content/plugins"
2. Create a new file and name it with bp-custom.php. If you don't have it, please create a new one.
3. Put the snippet on the file
4. Save the file
It might because your remain members never login into your site yet. That's why they won't appear on your member page. There's only 3 ways to solve the count of members issue
1. By asking your members to verify and logged in into your site or as admin, you can reset their passwords and then login to activate their account one by one (but you may ask for permission to them). I know this will take some effort but we think you can try that way.
2. Try this plugin >> https://buddydev.com/plugins/bp-autologin-on-activation/
3. Use this snippet code
https://gist.github.com/shanebp/b73343e9c9a6509d2bbc47de80c881c1
Paste the snippet on bp-custom.php file (you need to create a new file one) and upload it into wp-content/plugins folder.
Please check your members page, once all members already appear then delete the snippet code.
1. Go to https://dev.twitch.tv/console/apps/create
2. Fill out any required fields such as the application name and Category. For category, please choose Website Integration.
3. Put the below url as OAuth redirect_uri Authorized Redirect URLs:
Redirect URL: https://yourwebsite.com/yz-auth/social-login/TwitchTV
4. Click "Create Button"


Emoji
1. Please go to Youzer Panel >> General Settings >> Emoji Settings
2. Enable/disable Emoji on any section you want

Bookmarks
1. Please go to Youzer Panel >> General Settings >> Bookmarks Settings
2. Enable/disable Bookmarks or set the bookmark privacy as you want

Actually Youzify compatible with almost hosting server system and provide. But actually Youzify has some troubles with WP Engine. But don't worry, we already created some snippets to fix the issue. Please do these steps
1. Go to your FTP, and go to folder "wp-content/plugins"
2. Create a PHP file there and name it with "bp-custom.php". But if you already have it, you don't need to create a new one. Just open it
3. Put these snippets on the file and save
Fix Activity and Upload error >> https://gist.github.com/KaineLabs/ac97b95c90c496ff445f24e9e859adba#file-yz_fix_wpengine_scripts_fix-php
Fix Login and Reset Password error >> https://gist.github.com/KaineLabs/9328e334a75a6170fcd8438c252c4eed#file-yzc_wpengine_change_login_url_form-php
Fix Comments (comment button can not be clicked) >>
add_filter( 'wpe_heartbeat_allowed_pages', function( $pages ) {
    global $pagenow;
    $pages[] =  $pagenow;
    return $pages;
});
How to show WP Foro New Replie and New Topics show on Activity page like BBPres?
Please go to older "wp-content/plugins" and create a file and name it with "bp-custom.php" And then put these snippet to the file and save
Since WordPress 5.5, "Lazy Loading" became part of the core. This feature makes the pages load very fast because images and videos won't be loaded until the user starts scrolling on the page.This feature will bring very significant impact for your Activity page performance and speed.
Umm! you didn't like that feature?!
It's okay, we added a new setting option "Lazy Load" o turn on/off this feature in Youzer Panel > Generel Settings > Generel Settings.

Youzer components (header, tabs etc) dissapear on "Answers" page.
Please use this CSS plugin to fix it
.bp-user.domande.answers .yz_effect {
visibility: inherit !important;
}
OR
.bp-use.answers .yz_effect {
visibility: inherit !important;
}
1. Go to Youzer Panel > Membership Settings > Login Settings.
2. Check to disable from Enable Form Cover in Header Settings( Check images below ) .

1. Go to "wp-content/plugins".
2. Open the file "bp-custom.php" ( if you didn't find it just create a new one ).
3. Paste the code in the page below :
https://gist.github.com/KaineLabs/4b698fcb3d342969b874257803c770f3#file-yzc_woffice_theme_fix-php
1. Please go to Youzify Panel >> General Settings >> Custom Styling Settings

2. There's 7 columns where you put the CSS. Each column will make CSS only works on specific section
3. Please dont forget to make sure that "enable CSS" button already turned on. And save after put the CSS
4. If you use some cache system, please clear your cache and also clear your browser cache.
You can change account confirmation email by following guide bellow:
1. Go to your file manager (via FTP or file manager)
2. Go to /public_html/wp-content/plugins/
3. Open file name bp-custom.php (If you don't have it yet, you can create by yourself)
4. Add code bellow to your bp-custom.php
/**
* Change Confirmation Message.
*/
function yzc_translate_account_activation_msg( $translated_text ) {
switch ( $translated_text ) {
case 'You have successfully created your account! To begin using this site you will need to activate your account via the email we have just sent to your address.' :
$translated_text = __( 'your-text-here', 'youzify' );
break;
}
return $translated_text;
}
add_filter( 'gettext', 'yzc_translate_account_activation_msg', 30 );
5. change "your-text-here" with message that you want to use
As part of our services for our valued clients, we created some snippets to add some extra features that by default is not available both on Buddypress and Youzify.
Please check if one of these snippets is usefull for you, but if you can not find the what you need, you can open a new ticket. Our support team will check the possibility if we can create a new snippet for you.
How to use the snippet?
1. Please go to your FTP/Cpanel, and go to folder "wp-content/plugins"
2. Create a new PHP file and name it with "bp-custom.php"
3. Put the snippet there and save the file
Snippet List
Please do these steps
1. Go to your FTP, and go to folder "wp-content/plugins"
2. Create a PHP file there and name it with "bp-custom.php". But if you already have it, you don't need to create a new one. Just open it
3. Put these snippets on the file
4. On line 7, please change 'type your new message here' with any text you want. And then save the file.
As part of our services for our valued clients, we created some snippets to add some extra features that by default is not available both on Buddypress and Youzify.
Please check if one of these snippets is usefull for you, but if you can not find the what you need, you can open a new ticket. Our support team will check the possibility if we can create a new snippet for you.
How to use the snippet?
1. Please go to your FTP/Cpanel, and go to folder "wp-content/plugins"
2. Create a new PHP file and name it with "bp-custom.php"
3. Put the snippet there and save the file
Snippet List:
Youzer has 24 Post Type you can choose. You can enable or disable any post type you want easily. Please do thiese steps
1. Go toYouzer Panel >> General Settings >> Wall Settings
2. Scroll down, and you will find "Control Wall Posts Visibility" settings.

3. Turn on any button type for any post type you want to disabled. Or let them Turned off for Enabled them.
1. First, on your WP Admin dashboard, please go to menu Pages >> All Pages. And then please make sure if you already have "Activity" page.
Actually the page should be created automatically if you install Buddypress. But if you don't have it yet, please create a new empty page and name it with "Activity" or any title you want.

2. And then, please go to Settings >> Buddypress >> Pages Tab. And then set Activity Streams to your Activity Page. And "click Save Settings"

If you got issue with wrong image orientation especially user who use IOS based phone.
You can use one of the plugins bellow :
1. Fix Image Rotation : https://wordpress.org/plugins/fix-image-rotation/
2. IOS Image Fixer : https://wordpress.org/plugins/ios-images-fixer/
Hope it helps !
1. Please go to Settings >> Buddypress
2. On components tab, uncheck “Activity Streams” to disable Activity Page.

1. Go to your wordpress dashboard
2. Go to Youzify panel -> Membership Settings
3. Go to "register Settings"
4. Scroll down until you find "Term And Privacy Policy Settings" section
5. Enable "Display Note" Option
6. Fill "Term Url" box with url of your term page
7. Fill "Privacy Policy Url" box with url of your privacy policy page

1. Buddypress Installed & Active
2. Supported PHP Version is: PHP 7.2
3. CURL and getimageize Enabled (if it does not enabled yet, please contact your hosting server provider)
1. Please go to Users >> Profile Fields

2. Choose Fields Group Tab
3. Click Add New Field

4. Fill the Name and Description (optional). Also choose Field Type and you also can set the field Visibility and Requeirement.
5. Save

You already install WP Mail SMTP and email sent successfully. But Notification email still not being sent.
Then please use tnis code
<?php
add_filter( 'bp_email_use_wp_mail', '__return_true' );
Put it on bp-custom.php file and upload to directory wp-content/plugins. If you dont have it yet, please create a new one.
Please try to register again. But after registration, you need to wait 1 - 5 minutes untill email activation sent to your email. because first email usually does come slower.
1. Please go to Youzify Panel >> General Settings >> General Settings Tab
2. You will find "Buttons Style" and "Tab Icon Style" option on "General Settings" box
3. Choose any style you want.And save

PS: For few themes, this option is not work because some CSS conflict. Please submit a new ticket, and our support team will help you to fix it.
1. Go to "wp-content/plugins".
2. Open the file "bp-custom.php" ( if you didn't find it just create a new one ).
3. Paste the code in the page below :
https://gist.github.com/KaineLabs/084784adb05a6f047677f9113764ffc5#file-yzc_reset_widgets-php
4. Refresh your browser twice on Profile Structure settings
5. Once you see the widgets has been reset successfully, please remove the snippet.
You can optimize Youzify Database, optimize BP Xprofile Fields, and Optimize Youzify Media on this Patches Settings.
Please go to Youzify Panel >> General Settings >> Patches Settings, and click "Update Button" there. Wait few minutes untill it finish.
For Media Patch Optimization, you need to activate CURL and Getimagesize on your hosting server. It installed and activated on almost hosting server. But if you find that it does not installed/activated yet, you can contact your hosting provider and ask them to install it on your server.
Also, you need to post at least an image on your Activity page to patch the Youzify Media.
1. Please go to Youzify Panel >> General Settings >> Scroll down untill find Membership System Settings >> And make sure “Activate Membership System” already turned on
2. Please go to Menu Pages >> All Pages. And check if you already have "Activate" page or not. If you do not have it, please create a new empty page and name it with "Activate" or any title you want.
3. Please go to Settings >> Buddypress >> Pages Tab >> Choose page you want to set as Activate page. And click save button.

Please do these steps
1. Go to your FTP, and go to folder "wp-content/plugins"
2. Create a PHP file there and name it with "bp-custom.php". But if you already have it, you don't need to create a new one. Just open it
3. Put these snippets on the file
4. Save the file
Please note, the Woocommerce is a standalone plugin and it separated with Youzify. You have to install the plugin first here to make it can be integrated with Youzify >> https://wordpress.org/plugins/woocommerce/
What new functions you will get with Woocommerce Integration:
1. Shop Tab on Profile Page
2. All Woocommerce Activites will redirect to Profile Page. So your members can do any transaction activities from their profile pages
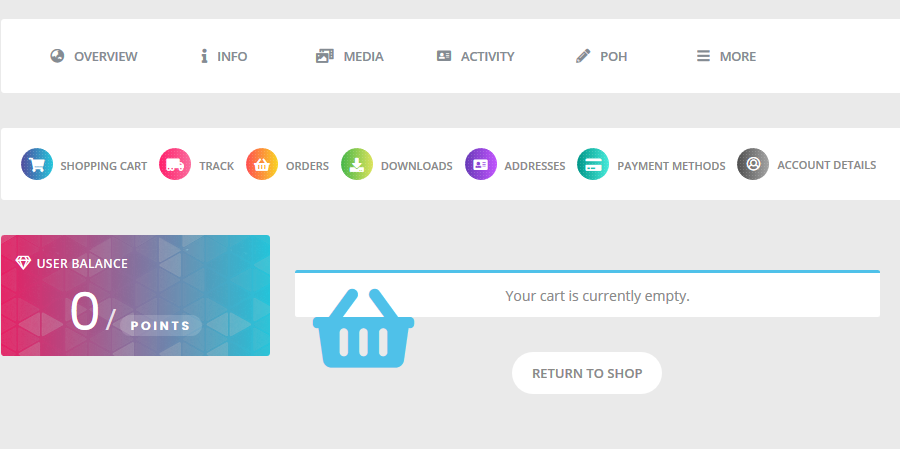
3. Purchase Post Type (you can set each purchase/transactions displayed on Activity Stream).
How to integrate it?
1. Please go to Youzify Panel >> General Settings >> Woocomemerce Settings.
2. Enable "Woocommerce Integration" button and save.


1. Go to your Wordpress dashboard.
2. Go to Youzify panel > membership settings > login attempts settings.
3. Activate/Deactivate 'enable limit login' checkbox.
4. To lock user after specific number of retries, you can set the value in 'Allowed Login Retries' field.
5. Short Lockouts Number - here you can set how many times short lockouts should be applied to a user, it will take number of seconds from 'Short Lockouts Duration' field.
6. Long Lockouts duration - You can use this field to lock users for very long time after number of retries.
7. Click "save changes" button.
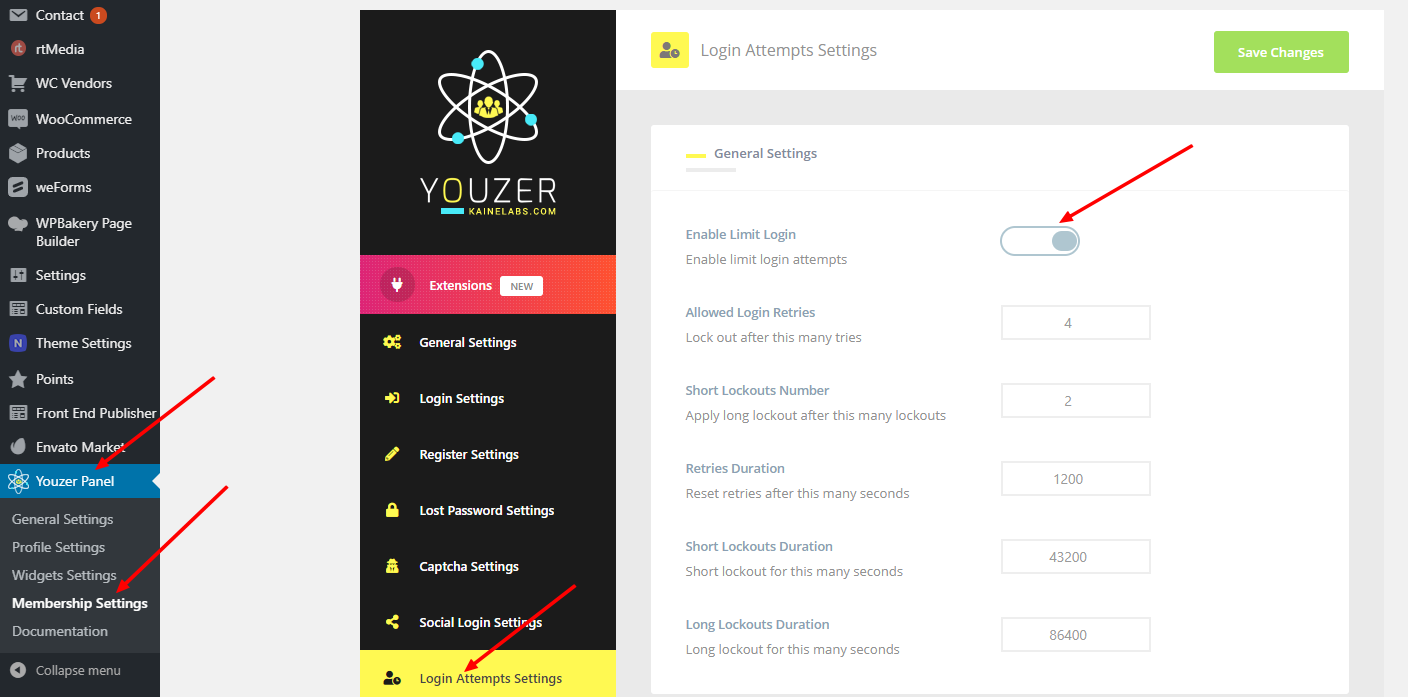
Please do these steps
1. Go to your FTP, and go to folder "wp-content/plugins"
2. Create a PHP file there and name it with "bp-custom.php". But if you already have it, you don't need to create a new one. Just open it
3. Put these snippets on the file and save
For Nextend Social Login Integration, please use this snippet >> https://gist.github.com/KaineLabs/6286d905e603a61f422efba26d6e061f#file-yz-integrate-nextend-plugin-php
For OneAll Social Login Integration, please use this snippet >> https://gist.github.com/KaineLabs/92ff0c66f064db26dd4894a47d78079b#file-yzc_oa_plugin-php
PS: Youzify login form has possibility to integrated with any Social Login plugin. As long as that plugin:
- Works with Buddypress
- Provide shortcode
Please submit a ticket, and our support team will help you to integrate it. :)
Use this snippet code.
function yzc_remove_profile_cover_dimensions() {
remove_filter( 'bp_attachments_get_cover_image_dimensions', 'yz_attachments_get_cover_image_dimensions' );
}
add_action( 'plugins_loaded', 'yzc_remove_profile_cover_dimensions' );
Put it on bp-custom.php file and upload on wp-content/plugins folder.
To show Instagram posts, you will need:
To display your Instragram posts on your site, you have to create an Instragram application and connect it with the site. Please follow these steps:


2. Click Products, locate the Instagram product, and click Set Up to add it to your app
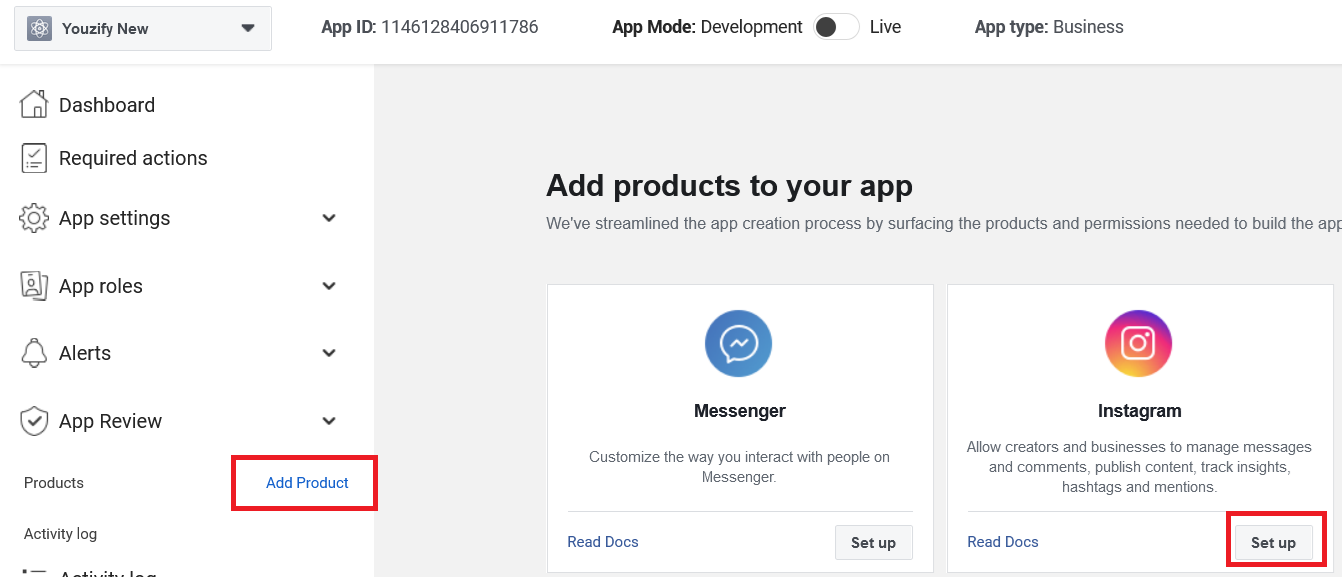
3. Please setup Basic settings including provide Privacy Policy URL, Terms of Service URL, App Domain, etc

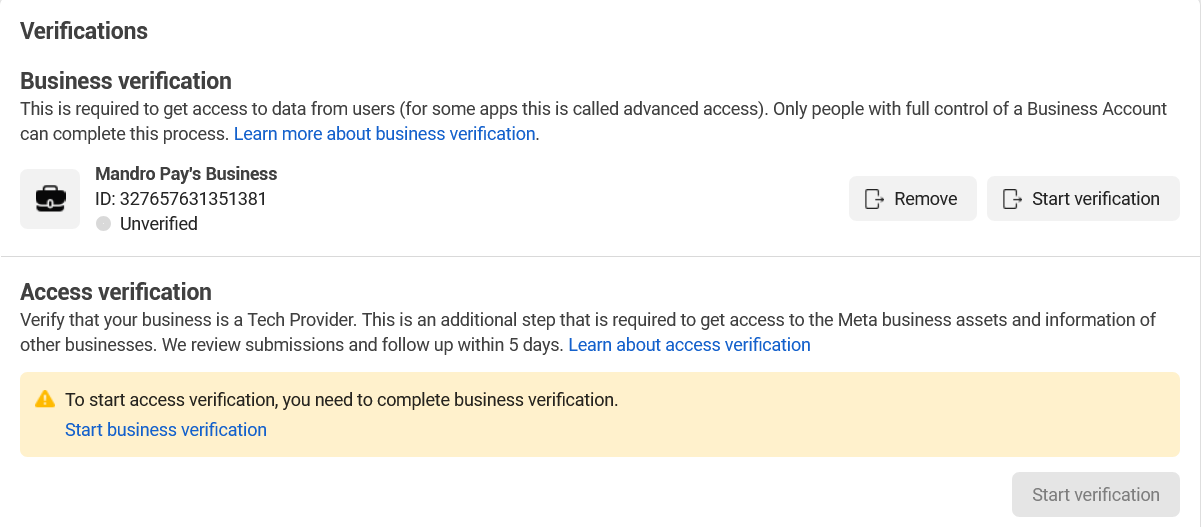
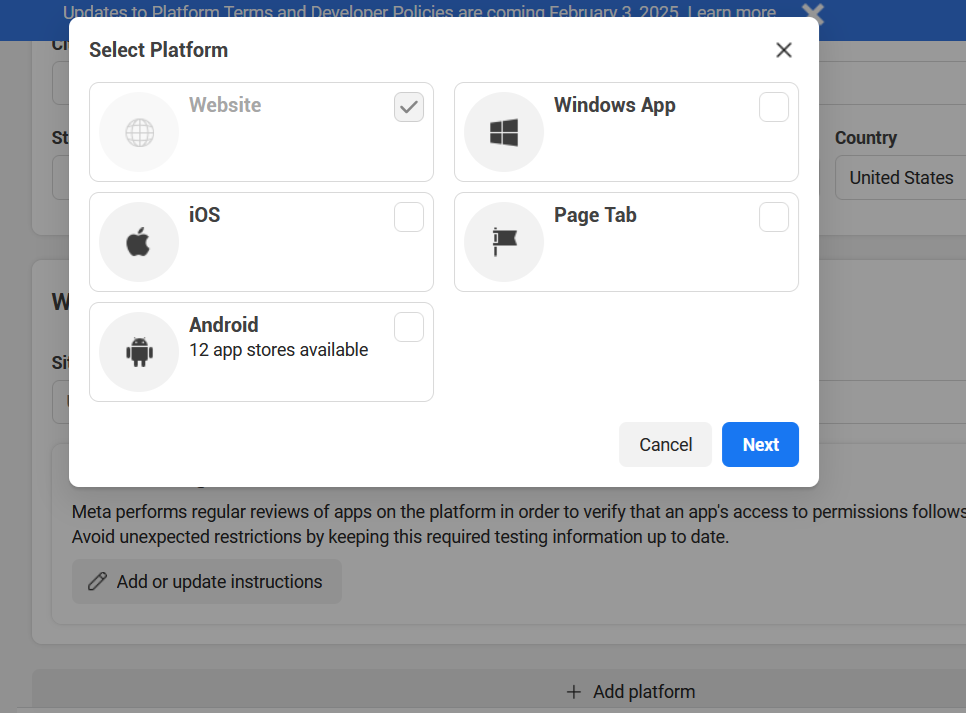
1. Set "App Mode" to "Live". The option is on top of the page
2. Select "API setup Instagram Login"
3. Click "Add account" button and login with your Instagram account
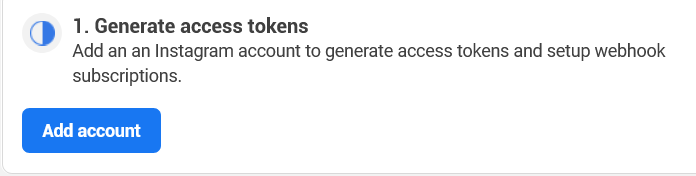
4. Add Callback URL, Verify token and Redirect URL. Please click "Configure Webhooks" and :setup: button
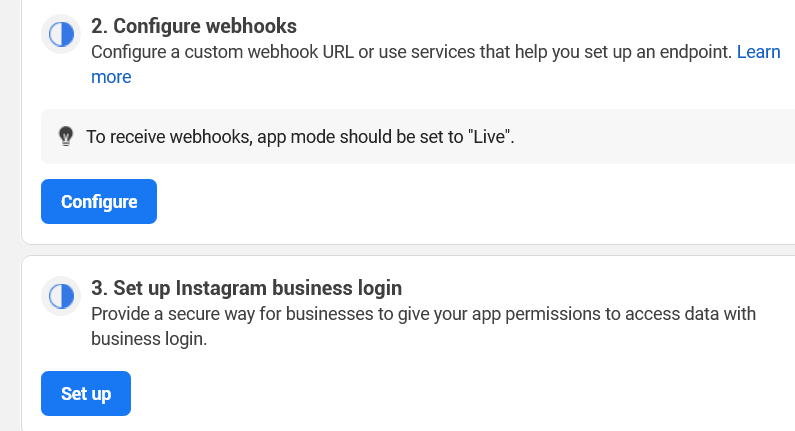
5 Copy Instagram app ID and Instagram app secret. Paste it on Youzify Instagram settings panel

To use your Instagram application, it has to be in Live Mode or your Instagram user's account has to be added to it as a test user.
Your application doesn't have to be Live to allow you test it. All you need is to add a test user. To do so, please do as follows:
1. Go to Youzify Panel > Membership Settings > Lost Password Settings
2. Check enable/disable in Enable Form Cover ( Check image below ) .

myCred is an intelligent and adaptive points management system that allows you to build and manage a broad range of digital rewards including points, ranks and, badges on your WordPress powered website.
What new functions you will get with myCred Integration:
1. Point History Tab with Youzify Styling
2. User balances widget on Profile Page
3. User badges widget on Profile Page

4. Show user badges on Members Card on Members Directory
How to integrate it?
1. Please go to Youzify Panel >> General Settings >> myCred Settings.
2. Turn on myCred integration button. Also you can enable/disable badges
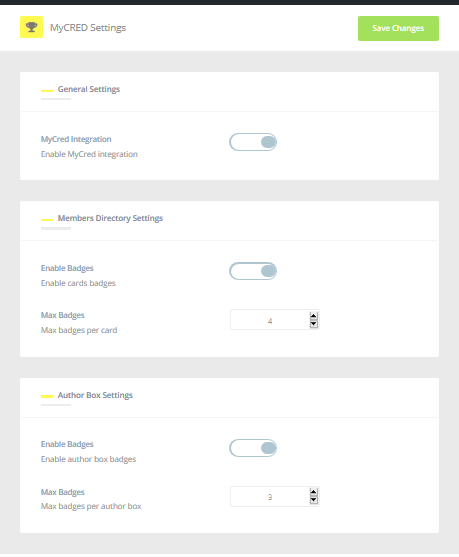
3. Go to Points >> Settings >> Buddypress Tab >> set Points Histoty Show in profile (it's optional. You can disable it if you want)

BuddyPress MyCRED Integration
for their actions on youzify features, and set custom points for adding content and custom points for removing content of each wall post type, profile widget field, account verification, social networks and more.
Please check more informations here >> https://www.kainelabs.com/downloads/mycred-integration/
We don't add Captcha on Login Form. But actually you will not need it as we have Login Limit Attempts on the Login system. :)
Please check this article to know how to setup Limit Login Attempts >> https://kainelabs.ticksy.com/article/15010
Youzer profile contain 3 main sections: Header, Navbar, and Content. in this topic we will guide you on how to change the layout of each one of them.
01. How to change Header Style?
You can choose from 14 Header styles: 08 Horizontal Layouts, 06 Vertical Layouts.
You can change the header layout by checking this below:
https://kainelabs.ticksy.com/article/15072/
02. How to change Navbar Layout?
You can change the navbar layout by checking this below:
https://kainelabs.ticksy.com/article/15075/
03. How to change content layout?
Go to Youzer Panel > Profile Settings > Profile Structure.
Now you can choose from 3 layouts:
- 2 Columns : Content + Left Sidebar
- 2 Columns: Content + Right Sidebar
- 3 Columns: Content + 2 Sidebars

If you selected the "3 Columns" layout, a new options box will appear:

1. The first option is to set a different columns layout for profile tabs that requires more space.
2. The second option "Vertical Header Position", in case you are using a vertical header layout you can choose which sidebar you wanna place the header the left side or the right side.
- If you select 3 columns layout and you found that the page width is small, you can go to "Youzer Panel > General Settings > Pages Content Width" and increase the width into 1300px or any other value you want.

1. Go to Youzify Panel > Profile Settings > Header Settings.
2. Enable/disable stats of header, and change its settings ( Check images below ).


1. Go to "wp-content/plugins".
2. Open the file "bp-custom.php" ( if you didn't find it just create a new one ).
3. Paste the code in the page below :
https://gist.github.com/KaineLabs/fe373ac322473c991d0d0b3272ffc1d7#file-yz-entrepreneur-theme-fix-php
1. Please go to your FTP/Cpanel, and then go to folder wp-content/plugins
2. Create a new file and name it with bp-custom.php file. But if you already have it, you only open it.
3. Copy snippet code form link below into the file
https://gist.github.com/KaineLabs/c0dfe6d07c64c1ab0d34046e7853251a
4. Save
As part of our services for our valued clients, we created some snippets to add some extra features that by default is not available both on Buddypress and Youzify.
Please check if one of these snippets is usefull for you, but if you can not find the what you need, you can open a new ticket. Our support team will check the possibility if we can create a new snippet for you.
How to use the snippet?
1. Please go to your FTP/Cpanel, and go to folder "wp-content/plugins"
2. Create a new PHP file and name it with "bp-custom.php"
3. Put the snippet there and save the file
Snippet List
1. Go to Youzer Panel > Profile Settings > Header Settings.
2. Select Form layouts ( Check images below ).


1. Go to Youzify Panel > Profile Settings > Tabs Settings.
2. Shoose your settings for tabs, and change menu title, icon, order, visibility as shown in image below

1. Please go to Youzify Panel >> General Settings >> General Settings Tab
2. You will find "Pages Background" color option on "General Settings" box
3. Click the color option, and choose any color you want. And then click save

1. Go to https://www.youzify.com
2. Click on "My Account" Page then click on your transaction "View Details and Downloads".

3. Scroll Down and you will find the license key in front of your purchased product.

1. Go to Youzify Panel > Membership Settings > Login Styling Settings
2. Select your custom styling ( Check images below ) .

If you enable Live Notifications feature, your member will always get any notifications as long as he still on Youzer Pages

It comes with a cool design and a notification sound effect when a new notification is added.
You can control the interval period for checking for new notifications or even disable that feature from the Youzer Panel > General Settings > Notifications Settings.
If you are using a shared host or a small hosting plan and you chose a fast interval like 5-15 seconds the POST requests can cause high resource usage. To avoid this, the interval can be modified to lower your server resource usage.
Please do these steps
1. Go to your FTP, and go to folder "wp-content/plugins"
2. Create a PHP file there and name it with "bp-custom.php". But if you already have it, you don't need to create a new one. Just open it
3. Put these snippets on the file
4. Please go to line 34 - 38 on the snippet and you will see list of Roles and the slugs that included there. You can edit, remove or add new roles as you need.
5. Save the file
Please use this snippet
/**
 * Redirect "wp-login.php" Page To Youzer Login Page.
 */
function yz_redirect_wplogin_to_youzer_login_page() {

    if ( isset( $_GET['action'] ) && ( $_GET['action'] == 'logout' || $_GET['action'] == 'lostpassword' || $_GET['action'] == 'rp' || $_GET['action'] == 'bp-resend-activation' ) ) {
        return;
    }
    global $pagenow;

    if ( 'wp-login.php' == $pagenow && $_SERVER['REQUEST_METHOD'] == 'GET' ) {
        // Get Login Page Url.
        $login_url = 'add-your-custom-login-page-url-here';
        // Redirect !!
        wp_redirect( $login_url );
        exit();
    }
}
add_action( 'init', 'yz_redirect_wplogin_to_youzer_login_page' );
PS:
1. Go to Youzify Panel > Membership Settings > General Settings
2. Select Reset password page from dropdown ( Check image below ) .

One of most important thing after installing Youzify, you need to setup basic require BP settings to make some important functions like Friendship, Send Private Message, Activity Stream etc enabled.
On your WP admin dashboard, please go to Settings >> Buddypress. And then go to "Components" tab and you can enable them

As part of our services for our valued clients, we created some snippets to add some extra features that by default is not available both on Buddypress and Youzer.
Please check if one of these snippets is usefull for you, but if you can not find the what you need, you can open a new ticket. Our support team will check the possibility if we can create a new snippet for you.
How to use the snippet?
1. Please go to your FTP/Cpanel, and go to folder "wp-content/plugins"
2. Create a new PHP file and name it with "bp-custom.php"
3. Put the snippet there and save the file
Snippet List
Please do these steps
1. Go to your FTP, and go to folder "wp-content/plugins"
2. Create a PHP file there and name it with "bp-custom.php". But if you already have it, you don't need to create a new one. Just open it
3. Put these snippets on the file
4. On line 7, please change 'yoururl' with any URL you want. And then save the file.
You can edit some structure of Youzify pages (Activity, Profile, members directory etc) by override Youzify template files. You need to create a directory called ‘youzify’ inside your WordPress theme or Child Theme folder and placing all the template files you want to change inside that folder (preserving directories structure).
So your directory will look something like this:
"/wp-content/themes/your-theme/youzify/"
Example:
Let’s say you want to customize some text on Buddypress members directory page, you will be copying the file index.php which is located here:
"/wp-content/plugins/youzify/includes/public/templates/members/"
to here:
"/wp-content/themes/your-theme/youzify/members/"
Ps: You will find all Youzify templates on the path "youzify/includes/public/templates/"
Update: Since Youzify 3.0.0 version, We added support for bbPress Override template. You just need to create a folder named bbPress inside youziy folder.
1. Please go to Youzify Panel >> General Settings >> General Settings Tab
2. You will find "Pages Content Width" option on "General Settings" box
3. Put any number you want there without "px". And save.

PS:
1. Go to https://code.google.com/apis/console/
2. Create a new application by clicking "Create a new project".
3. Klik hamburger button on the left top, click APIs & Services

4. Click Credentials and click OAuth Client ID

5. Click Configure Consent Screen
6. Clic Create Button

7. Fill all required fields there and save
8. Back again to menu Click Create Credentials and click OAuth Client ID
9. Choose Web Application on Application Type and click "Add URI" button under "Authorize Redirect URI:"
10. Add https://yourwebsite/youzify-auth/social-login/Google and click create. You will get App ID and App Secret then

1. First, you will need install BBPress on your website. You can download the plugin here >> https://wordpress.org/plugins/bbpress/
2. And then, please go to Youzify Panel >> General Settings >> BBPress Settings. And make sure BBPress integration button already turned on.

3. Please go to your group, and go to Manage Tab (please note, this tab only visible for Group Admin).
4. And then, please "Forum" sub tab, and check "Yes. I want this group to have a forum."
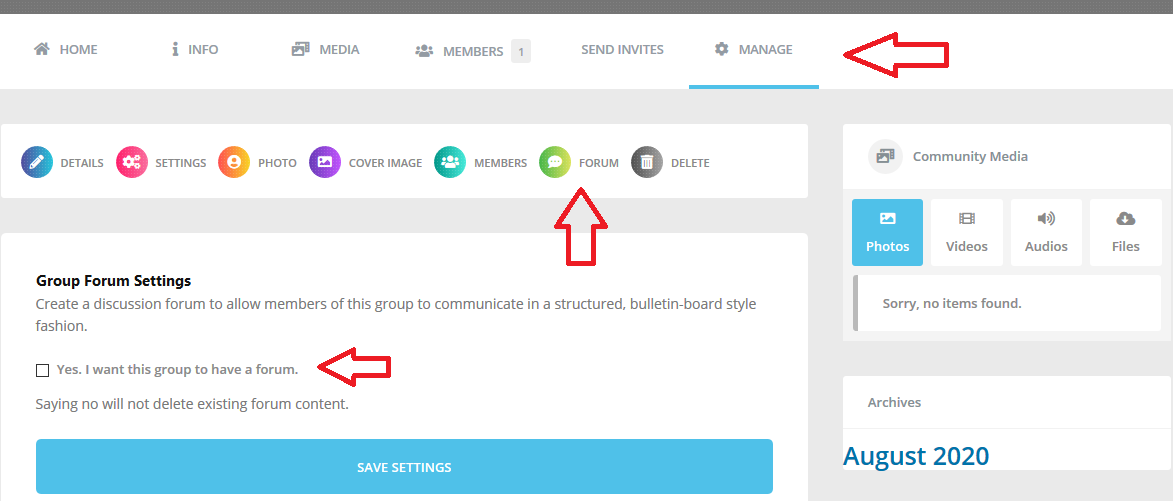
4. Save
Please do these steps
1. Go to your FTP, and go to folder "wp-content/plugins"
2. Create a PHP file there and name it with "bp-custom.php". But if you already have it, you don't need to create a new one. Just open it
3. Put these snippets on the file
4. On line 7, please replace 'www.kainelabs.com' with any URL you want.
5. Save the file
1. Go to wp-content/theme/arkane
2. Open file function.php
3. Find this code and REMOVE it
define('BP_DEFAULT_COMPONENT', 'profile' );
4. Find these codes on line 243 and REMOVE it

5. File this code on line 637 and REMOVE it

Once you update your theme into newest version, all issues will happen again. so do same steps like tutorial above and it will be fixed again.
First, you need to get Captcha Site Key and Captcha Secret key
1. Go to this site >> https://www.google.com/recaptcha
2. Click v3 Admin Console menu. Please do not click "Get Started" button as it will bring you to reCaptcha Enterprise dashboard

3. Login with your Google Account
4. Once you already entering Google Captcha Account, please Register a New Site by clicking + on the right top of dashboard

5. Fill Label, Domain etc.
6. Select reCaptcha Challenge (V2). You can choose "I'm not a robot" or "Invisible reCaptcha badge"
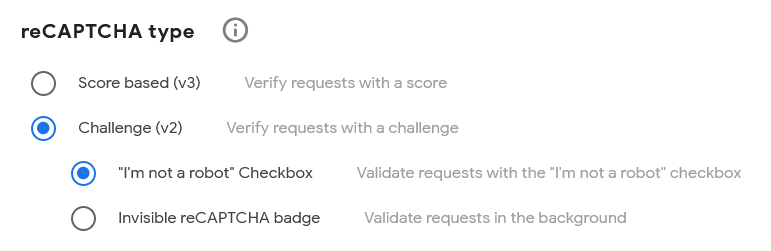
6. Click Submit and you will get Captcha Site Key and Captcha Secret key
And then, go back to your dashboard admin site
1. Please go to Youzify Panel >> Membership Settings >> Captcha Settings Tab
2. Enable Captcha, and then select "reCAPTCHA v2
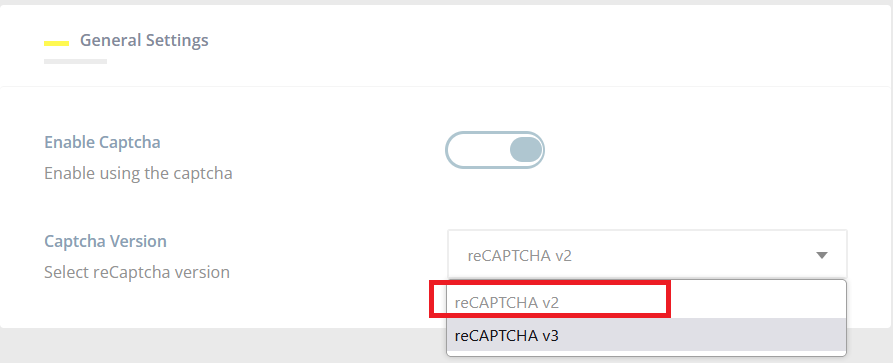
3. Add Site Key and Secret Key to the reCAPTCHA v2 Settings box. And then Save.
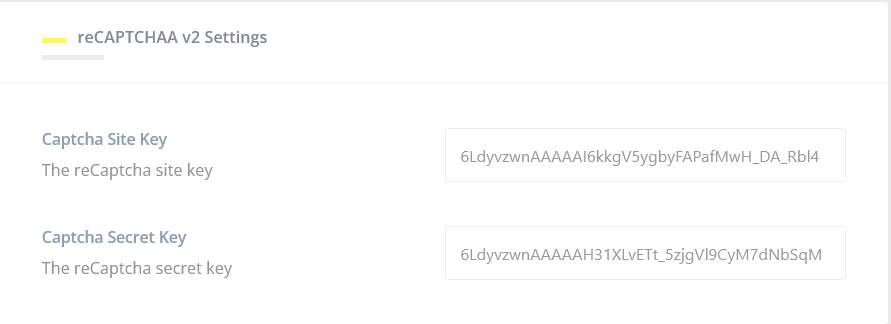
1. Go to https://youzify.com/ and log in to your account.
2. Click on the "My Account" page then click on your transaction "View Details and Downloads".

3. Scroll Down to the "Products" section and you will find the download Link Below.
Ps: If your license was expired you won't be able to see the download link till you renew your license.

1. Youzify Panel >> Membership Settings >> Socia Login Settings Tab
2. Then Turn off the “Enable e-mail confirmation” button
3. Save

1. Go to your wordpress dashboard
2. Go to youzer panel -> Membership Settings
3. Go to "register Settings"
4. Scroll down until you find "Term And Privacy Policy Settings" section
5. Enable "Display Note" Option
6. Fill "Term Url" box with url of your term page
7. Fill "Privacy Policy Url" box with url of your privacy policy page
Please do these steps
1. Go to your FTP, and go to folder "wp-content/plugins"
2. Create a PHP file there and name it with "bp-custom.php". But if you already have it, you don't need to create a new one. Just open it
3. Put these snippets on the file
4. On line 7 of the snippet, you can replace 'content' with any text you want.
5. Save the file
1. Please download BP Follow plugin here >> https://github.com/r-a-y/buddypress-followers
Please note, the official and newest version of BP Follow only availabel on the link above. Please do not download and install BP Follow plugin from another source including from WordPress plugin library.
Click "Code" button and then clock "Download ZIP"

2. And then, install it on your website and activate it.
3. Once you activate it, Follows system will be added automatically. And then, you can see Follow / Unfollow button on other members Profile Page or Members Card on Member Directory
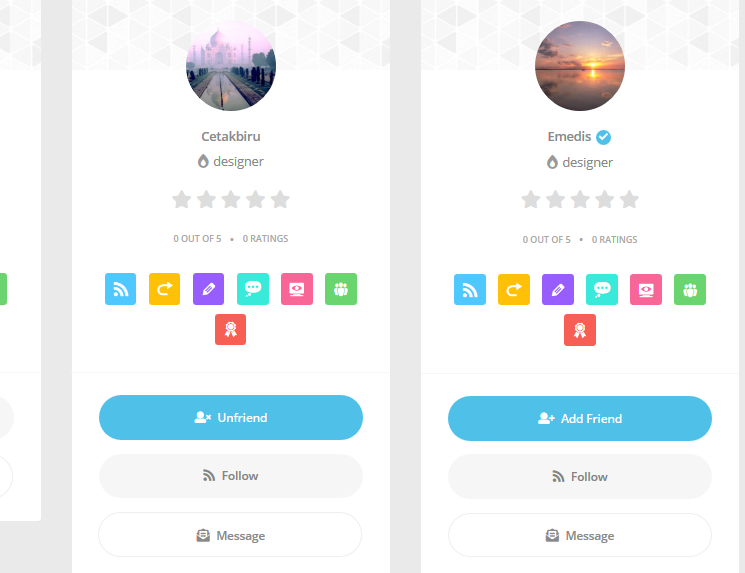
Here's how to redirect non logged in members to Login Page if they try to access Youzer Pages:
1. Go to your FTP/CPanel, and go to folder "wp-content/plugins".
2. Open the file "bp-custom.php" ( if you didn't find it just create a new one ).
3. Paste the code below :
or this if you want to include the Activity page too
A. General
B. Login Form
C. Social Login
D. Registration Form
E. Reset Password
F. Activation Account Page
Issues :
1. Go to "wp-content/plugins".
2. Open the file "bp-custom.php" ( if you didn't find it just create a new one ).
3. Paste the code in the page below :
https://gist.github.com/KaineLabs/0d11294410fc74d40df329f27c357161#file-yzc_michigan_theme_fix-php
1. Please go to Youzer Panel >> General Settings >> Wall Settings
2. And then, scroll down until find Filters Settings box
3. Switch off to disable Youzer Activity Filter, Display Wall Filter, Display Activity Filter

If you find Review system database error like this
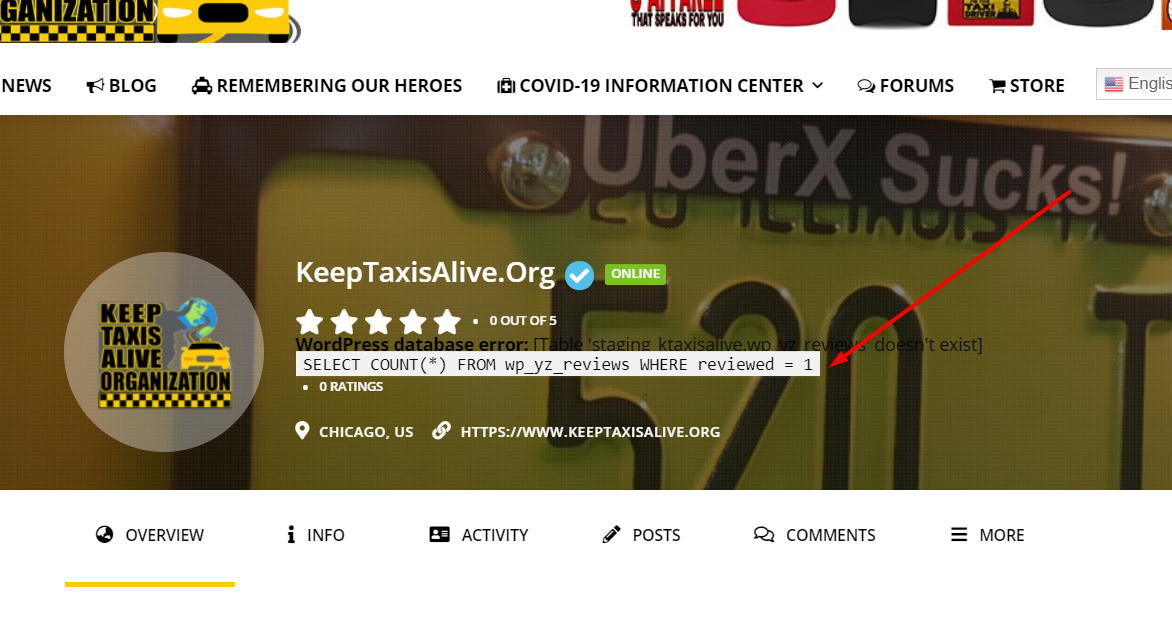
It happen because there's a conflict between your Hosting Server and Youzer Reviews System. Please do these steps to fix it
1. Go to FTP/Cpanel, and go to folder "wp-content/plugins"
2. Create a file and name it with "bp-custom.php" file (if you already have it, please just open it. No need to create a new file one)
3. Put this snippet on the file and save
4. Clear your browser cache and test again. The error will be solved then.
5. Please remove the snippet from the bp-custom.php after the problem solved.
1. Go to "wp-content/plugins".
2. Open the file "bp-custom.php" ( if you didn't find it just create a new one ).
3. Paste the code in the page below :
https://gist.github.com/KaineLabs/03077b8c159e650b8cc40586ea95ffb5#file-yz-socialize-theme-fix-php
On the Members page, if one of sub tabs tab is selected (Member Types or another tabs like friends or following), then you reload the page (or alternatively, go to another page and then come back to the Members one), the same tab keeps being selected.
But the problem is, Instead of show the selected sub tab, it will show "All Members".
To fix it, please do these steps
1. Go to your FTP/CPanel, and go to folder "wp-content/plugins"
2. Create a new file there and name it with "bp-custom.php" file
3. Put this snippet on the file and save
https://gist.github.com/KaineLabs/066ca62d2cb600a260cf9dc20058d986
4. Clear your cache and go again to members Directory and test it again
When you post image on Activity Page but you get empty or blank, please check on that post if Privacy function (Accoutn before Time Stamp) is appear or not

1. Please go to your FTP/Cpanel, and go to folder "wpc-ontent/plugins"
2. Create a new file and name it with "bp-custom.php" file (if you already have it, please just open it. No need to create a new one)
3. Put this snippet on the file and save
Please use this code
define( 'BP_MESSAGES_AUTOCOMPLETE_ALL', true );
Put it on bp-custom.php file and upload it on wp-content/plugins. If you dont have the file yet, please create a new one. The autocomplete should appear then.

1. Go to Youzify Panel > Profile Settings > Navbar Settings.
2. change navbar layout and icon style ( Check images below ).


To make statistic numbers on members card always displayed directly. No need to hover your mouse to the icon

[data-yztooltip]::after {
  visibility: unset;
  opacity: 100;
  bottom: -150%;
  color: #000;
  font-size: 12px;
  font-weight: 600;
  padding: 0px;
  background: transparent;
  white-space: nowrap;
  white-space: inherit;
}
[data-yztooltip]::before {
   border-top-color: transparent !important;
}
.yzm-user-statistics .yz-data-item {
   padding: 0px 25px 2px 25px !important;
}
.yzm-user-statistics {
   margin-bottom:35px;
}
#yz-members-list .is-current-user {
    display: none !important;
}Some of Youzify widgets is not compatible with Grid Card Feature of Woffice theme. The author already solved it by add class --> "widget box" to each widget main parent.
1. Please go Appearance >> Customize
2. Select Plugin Options >> Youzify
3. Disable Style Customizations and Icon Replacement

First, please make sure to enable Poll post type on Youzify Panel >> General Settings >> Wall Settings

https://gist.github.com/KaineLabs/561e4b99ae7c315a2c5dbffebd9f6958
To know where to put the snippet, please check this article
https://kainelabs.ticksy.com/article/17309/
1. Please go to Users >> Member Types
2. Please fill all required fields there (Member Type ID, Singular Name, Plural Name etc)
3. To show Member Types filter on the Members Directory, you need to check "Has Diectory View" and fill the "Custom Type Directory Slug"

Please use this snippet
<?php
add_action('bp_ajax_querystring','bpdev_exclude_users',20,2);
function bpdev_exclude_users($qs=false,$object=false){
 //list of users to exclude
 $excluded_user=bp_loggedin_user_id();//comma separated ids of users whom you want to exclude
 if($object!='members')//hide for members only
 return $qs;
 $args=wp_parse_args($qs);
 //check if we are searching  or we are listing friends?, do not exclude in this case
 if(!empty($args['user_id'])||!empty($args['search_terms']))
 return $qs;
 if(!empty($args['exclude']))
 $args['exclude']=$args['exclude'].','.$excluded_user;
 else
 $args['exclude']=$excluded_user;
 $qs=build_query($args);
 return $qs;
}
Please check this article to know how to add the PHP snippet
To change Font on Youzify pages, you can achieve it by using CSS. Please do these steps:
1. First, please install this plugin on your website
https://wordpress.org/plugins/olympus-google-fonts/
2. After the plugin installed, please go to Appearance >> Customize >> Google Fonts >> Advanced Settings >> Loads Font Only >> Choose any font you want and click Published.
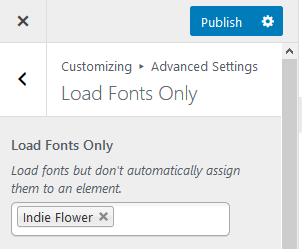
3. Next step, please go to Google Font, and choose any font you want. Here is the link:
4. Click "+ Select This Style"
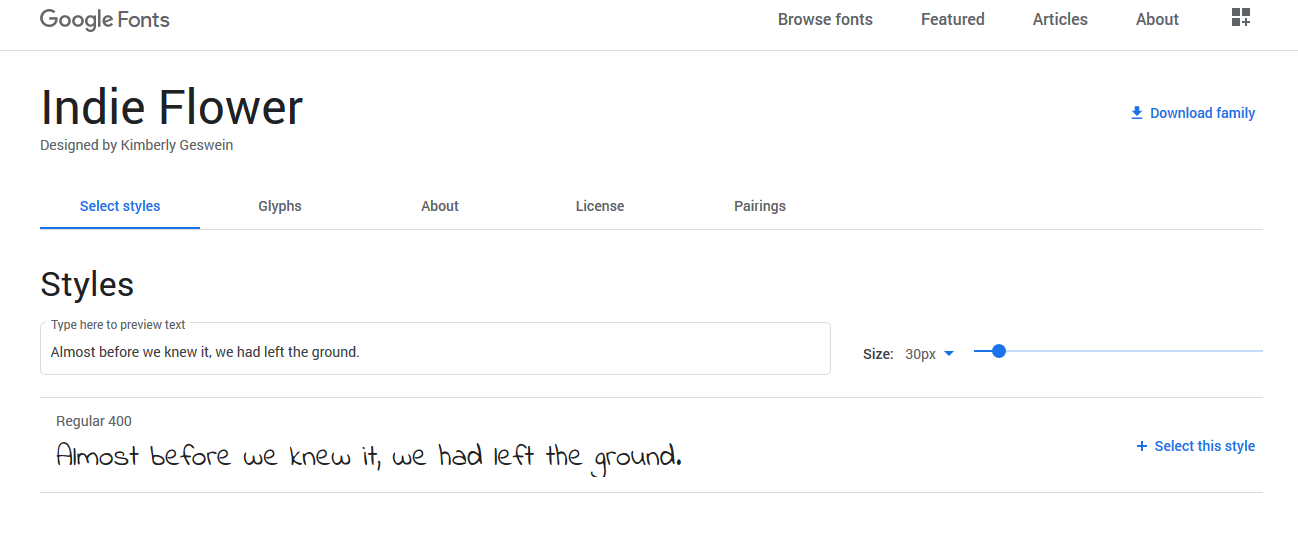
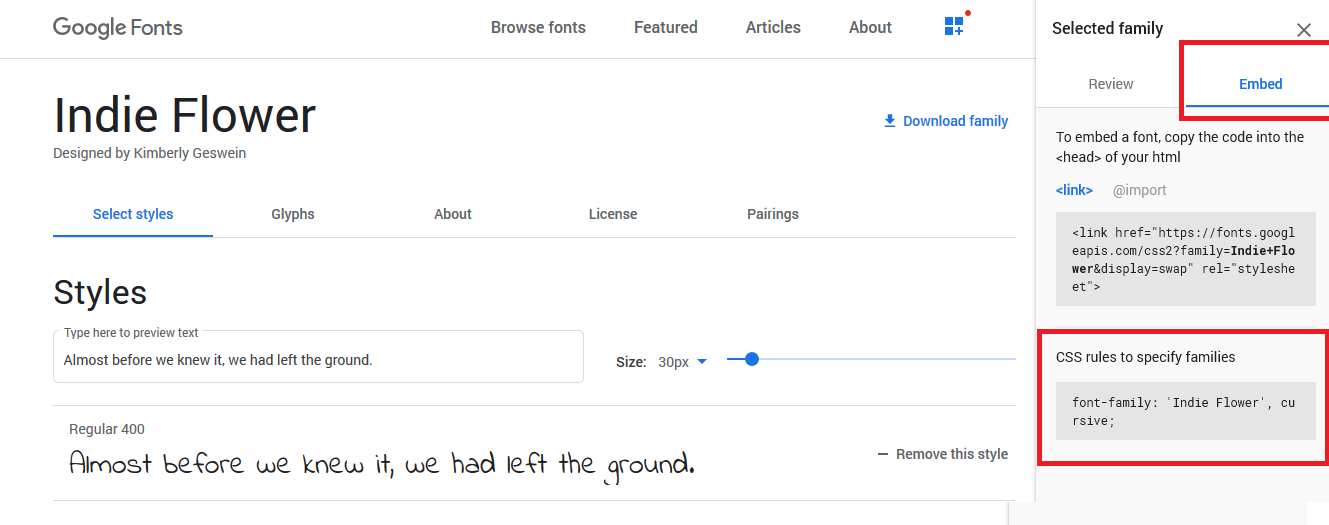
6. And then copy entire CSS code from link below and put it on Youzify Panel > General Settings > Custom Styling Settings.
https://gist.github.com/KaineLabs/ec0324a09a4bd7cf079ba197f7c0f679
To know how to put Custom CSS, please check this article
https://kainelabs.ticksy.com/article/16375/
7. And then, replace
font-family: 'Open Sans', sans-serif;
With font CSS rules you have copied before. For example:
font-family: 'Indie Flower', cursive;
8 Save the settings, and then clear your browser cache and site cache (if you use any cache plugin).
1. Please go to your FTP/CPanel, and go to folder "wp-content/plugins"
2. Create a new file and name it with "bp-custom.php" file in folder "wp-content/plugins". If you already have it, please just open it.
3. Put this snippet on the file. Change "en" on line 3 of snippet with your language WordPress code, and save.
<?php
/** Change Recaptha language */
add_filter('wp_head', 'recapthca_language');
function recapthca_language(){
    $rl = '<script src="https://www.google.com/recaptcha/api.js?hl=en"></script>';
    echo $rl;
}
1. Please go to your FTP/CPanel, and go to folder "wp-content/plugins"
2. Create a file there, and name it with "bp-custom.php" file (if you already have it, please create a new one).
3. Put this snippet int the file and save
4. Please go to Appearance >> Menu. Click Screen option button on the top right of your screen. Then check "BuddyPress"
5. Then "BuddyPress" category will appear on your left side. Open it, then check "Notifications" and "Messages" and cClick "Add to menu" button.
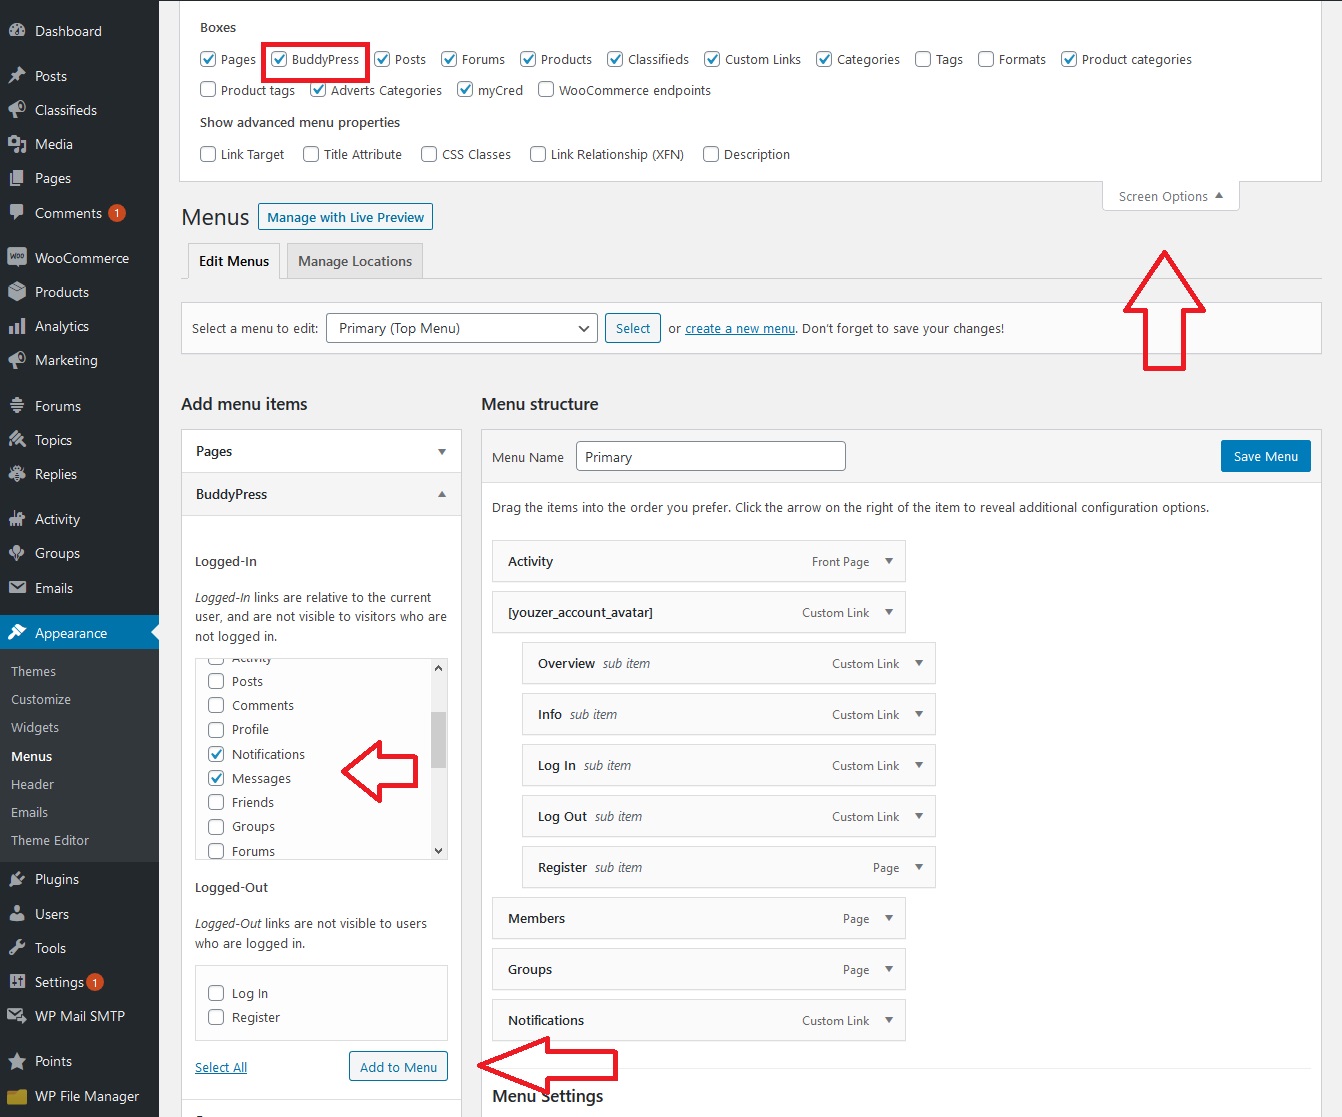
6. If youw ant to change "Notifications" and "Messages" menu from texts to icons, Put CSS below on Youzer Panel >> General Settings >> Custom Styling Setting
.bp-notifications-nav a, .bp-messages-nav a {
    font-size: 0px !important;
}
.bp-notifications-nav a span, .bp-messages-nav a span {
    font-size: 10px;
}
.bp-menu.bp-notifications-nav a::before {
    content: "\f0f3" !important;
    font-size: 20px;
    font-family: "Font Awesome 5 Free" !important;
}
.bp-menu.bp-messages-nav a::before {
    content: "\f0e0" !important;
    font-size: 20px;
    font-family: "Font Awesome 5 Free" !important;
}1. You need go to Single Activity Post where the media uploaded. Please click "link" icon on the media to go there.


1. Please go to your FTP/Cpanel, and go to folder "wp-content/plugins"
2. Create a new file and name it with "bp-custom.php". If you already have the file, please just open it. No need to create a new file.
3. put this snippet into the file and save
https://kainelabs.ticksy.com/article/16432/
4. Clear your plugin cache (if you install it) and your browser. And please test to post a URL again.
1. Please go to your Cpanel/FTP, and go to folder "wp-content/plugins"
2. Create a new file and name it with "bp-custom.php"
3. Paste this file into the folder
function add_users_to_bpgroup() {
    if( bp_is_active('groups') ):
        if( isset( $_GET['action'] ) && isset( $_GET['bp_gid'] ) && isset( $_GET['users'] ) ) {
            $group_id = $_GET['bp_gid'];
            $users = $_GET['users'];
            foreach ( $users as $user_id) {
                groups_join_group( intval($group_id), $user_id );
            }
        }

    endif;
};
add_action ( 'load-users.php', 'add_users_to_bpgroup', 999 );

function add_users_to_bpgroup_js() { ?>
<script type="text/javascript" charset="utf-8">
    jQuery("select[name='action']").append(jQuery('<option value="groupadd">Add to Group</option>'));
    jQuery("#doaction").click(function(e){
        if(jQuery("select[name='action'] :selected").val()=="groupadd") { e.preventDefault();
            gid=prompt("Enter a Group ID","1");
            jQuery(".wrap form").append('<input type="hidden" name="bp_gid" value="'+gid+'" />').submit();
        }
    });
</script>
<?php
};
add_action( 'admin_footer', 'add_users_to_bpgroup_js', 999 );
4. The JavaScript portion of the snippet adds a new item to the Bulk Actions drown-down menu named Add to BP Group.

5. Select the users you want to add to a group and select Add to BP Group. A prompt appears asking for the Buddy Group ID you want to assign the users to.
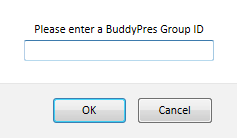
6. To locate the Group ID, click on the Groups admin menu and click on the group’s name. The URL will look something like this admin.php?page=bp-groups&gid=357&action=edit and the ID is the number that appears after gid=. After entering the ID number, click the Ok button. All of the users you selected will be assigned to that group.
1. Go to https://developers.facebook.com/apps
2. Click Add a New App button
3. Fill in Display Name and Contact Email and click Create App ID button

4. Find Facebook Login product and click Set up button below it

5. Click Web from available platforms

6. Provide your Site URL, click Save and then Continue

7. Skip all next steps by clicking Next button
8. Now, from the left menu select Settings under Facebook Login product

9. Go to Facebook Login > Settings > Valid OAuth redirect URIs:
10. Put this OAuth URL : https://yourwebsite.com/youzify-auth/social-login/Facebook
11. You have to also provide a link to your site’s privacy policy. It’s required to go live
12. To do that, please select Settings » Basic from the left menu
13. Fill in Privacy Policy URL and click Save Changes

14. You application is currently in development mode. We have to make it live to allow users log in with it
15. Click OFF in top right corner, choose Category and click Confirm
16. When your app is live, you should see green ON switch

Put snippet code below into "bp-custom.php" file in folder "wp-content/plugins". If you dont have it, please create a new one
<?php
add_action( 'wp_footer', 'add_comment_hide_show' );
function add_comment_hide_show() {
?>
<style>
.activity-comments ul li[id^="acomment-"]{display: none;}
</style>
<script type="text/javascript">
jQuery(function($) {
setInterval(function() {
$('.activity-meta').each(function() {
if( !$(this).find('.show-comments').length ){
var html = '<a href="#" class="button bp-primary-action show-comments">Show/Hide Comments</a>';
$(this).find('.button.acomment-reply').after(html);
}
});
}, 500);
$('body').on('click', '.show-comments', function(e) {
e.preventDefault();
var obj = $(this).closest('.activity-content').next('.activity-comments').find('ul li[id^="acomment-"]');
obj.slideToggle();
return false;
});
});
</script>
<?php
}
/**
* Set Activity Comments Length.
*/
function yzc_set_activity_comments_length() {
?> <script type="text/javascript">window.yz_comments_length = 2;</script> <?php
}
add_action( 'wp_head' , 'yzc_set_activity_comments_length', 999 );
1. Please go to Youzify Panel >> General Settings >> Wall Settings
2. Select any Sidebar Layout on the Activity Stream layout box

3. To add widgets on the Sidebar, please go to Appearance >> Widgets. Drag n drop any widgets you want to the Activity Stream box

1. First, as Admin, you need to turn on "Allow Private Profiles" on Youzify Panel >> Profile Settings >> General Settings.

2. And then, your members can select Private options on their own Account Settings page. He want to make their Profile Page as Private or not.

PS: Set Profile Page as private mean, the Profile Pages only visible form Friends only.
To show up filter (nav, sort by, search box, create group etc) show on Groups Directory shortcode, please add this parameter
show_filter="true"
So the shortcode will be like
[youzer_groups per_page="5" show_filter="true"]
1. Go to "wp-content/plugins".
2. Open the file "bp-custom.php" ( if you didn't find it just create a new one ).
3. Paste the code in the page below :
https://gist.github.com/KaineLabs/61e2a7408e1e8200eb14f317e776e003
1. Please go to Youzify Panel >> General Settings >> Groups Directory Settings
2. Scroll down until find Header Settings box and you can change the background color and title there

To edit background color and title of Members Directory header, please check this article >> https://kainelabs.ticksy.com/article/17377/
Some social login such as VKontakte and Linkedn, do not allow us to grab email data. So members must fill email manually on the registration process.
1. Please do not delete "Complete Registration" page. It generated automatically after install BuddyPress and Youziy. But if you already remove it or you can not find it on your site, please create a new page and name it with any title and slug you want.
2. Please use this snippet
https://gist.github.com/KaineLabs/6de307dcf9027530069580d7fa0b563a
To know how to add the snippet, please check this article
https://kainelabs.ticksy.com/article/17309/
3. On the line 18 of the snippet, please replace
9805
with your Complete Registration page ID
4. To know how to get the page ID, please check this article
https://athemes.com/tutorials/wordpress-page-id-and-post-id/
5. Save the file and test again
Please go to Users >> Member Type >> Select your member Type. And then make sure Icon and Icon Background already selected

1. Please go to Users >> Members Type, and make sure you already check "Show on Member" for all Members

2. And it will show automatically on the Profile Header
Please add this snippet on the "bp-custom.php" file inside folder "wp-content/plugins". If you don't have it yet, please create a new one.
<?php

function yzc_add_themes_load_more_fix() {
  return 'buddypress';
}
add_filter( 'youzify_profile_template_id', 'yzc_add_themes_load_more_fix' );
add_filter( 'youzify_group_template_id', 'yzc_add_themes_load_more_fix' );
add_filter( 'youzify_activity_template_id', 'yzc_add_themes_load_more_fix' );
Some mobile devices such as Samsung Galaxy A51, Redmi Note, amsung Galaxy A32, has different resolution with other mobile devices. To fix it, please use this CSS
@media only screen and (min-width: 412px) and (max-width: 767px) {
   .youzify-page-main-content {width: 390px;}
}
Please check this article to know where you need to put the CSS >> https://kainelabs.ticksy.com/article/16375/
For some dynamic words, such as login button, register button, lost password, etc, it can not be translated automatically by using WPML. It requires a snippet to be achieved.

Please do these steps to implement it:
1. Go to your FTP/CPanel, and go to folder "wp-content/plugins"
2. Create a new file there and name it with "bp-custom.php"
3. Put this snippet on the file
https://gist.github.com/KaineLabs/73ba3d3577c83c29397199b92241d203
4. For this code on the snippet
if ( defined( 'ICL_LANGUAGE_CODE' ) && 'hr' == ICL_LANGUAGE_CODE ) {
please change 'hr' with your WordPress language code. For example, if you want to translate the words in Indonesian, so you need to change 'hr' with 'id'. Please check the complete list of the codes here:
https://wpastra.com/docs/complete-list-wordpress-locale-codes/
5. For this code on the snippet
add_filter( 'option_yz_login_lostpswd_title', 'yzc_translare_dynamic_words' );
Change "yz_login_lostpswd_title" with option ID of Dynamic Words you want to change. Please make sure replace only "yz_login_lostpswd_title", do not replace the "options_". It still required.
To check complete list ID of the Dynamic Words, please check this link:
https://kainelabs.ticksy.com/article/16635
6. Save the file
1. Please just duplicate the snippet and put below existing snippet on the bp-custom.php
2. But please note, do not duplicate the PHP tag
<?php
Just duplicate the snippet starting from code
function yzc_translare_dynamic_words( $value )
3. Change this code on the duplicate snippet with another else.
yzc_translare_dynamic_words
Because you only able to have 1 function code on a single bp-cusom.php. For example, change it as
yzc_translare_dynamic_words2
Please check the screenshot below to see an example of how to implement multiple dynamic words translation

Hello Everyone,
Hope you are doing fine.
Please follow the steps below to upgrade safely from Youzer to Youzify.
0. Take a full backup of the site and make sure all Youzer patches from old versions already done (Very Important).
1. Keep old Youzer active ( This step is important to copy old sidebars on Youzify activation ).
2. Deactivate All Youzer Old Add-ons.
3. If you are using bp-custom.php, we will need to avoid making the site going down because of missing functions by disabling it temporarily. You can disable it by renaming the file from "bp-custom.php" to "bp-custom-backup.php". But don't worry we will re-enable it back after few steps.
4. Install Youzify and activate it.
5. Deactivate Youzer.
6. Go to tab Youzify panel > General Settings > Upgrade Youzer to Youzify ( tab ) in the bottom and run all the patches once by one, don't run 2 patches at the same time.
7. Take a quick look at the site to confirm that everything is okay. in case you found any issues please reach our support team at kainelabs.ticksy.com, and we will be very happy to help you as quickly as possible.
8. Go to kainelabs.com and download new addons, and install them as we changed the name of the files that's why they need to be updated manually but after that, you can update them automatically as always.
9. Delete Youzer and all old Youzer add-ons.
10. if you are using any Youzer shortcodes, please change them with the newest ones. Please check this article >> https://kainelabs.ticksy.com/article/13189/
11. If you are using Youzer custom snippets, go to the file "bp-custom-backup.php" we renamed in step 3 and change all the prefixes below if found:
- Change the prefix "yz_" into "youzify_"
- Change the prefix "youzer_" into "youzify_"
- Change the prefix "yz-" to "youzify-"
Once you finish editing the prefixes you can now rename the file "bp-custom-backup.php" into "bp-custom.php" again.
12. If you use custom template Override inside the folder "wp-content/themes/your active theme", please change folder name "youzer" with "youzify". Please check this article >> https://kainelabs.ticksy.com/article/15450/
For any problems regarding this upgrade, we are here to help. don't hesitate to contact us.
We will be by your side till you get everything working fine 100%.
Ps: You can reach our support team, and we will be happy to change them.
Stay safe.
Best Regards, KaineLabs Team.
1. Please go Appearance >> Customize
2. Select Plugin Options >> Youzify
3. Disable Style Customizations and Icon Replacement
1. Please use this snippet
<?php
if ( ! defined( 'BP_AVATAR_THUMB_WIDTH' ) )
    define( 'BP_AVATAR_THUMB_WIDTH', 200 ); //change this with your desired thumb width

if ( ! defined( 'BP_AVATAR_THUMB_HEIGHT' ) )
    define( 'BP_AVATAR_THUMB_HEIGHT', 200 ); //change this with your desired thumb height
Put it on "bp-custom.php" file in folder "wp-content/plugins". If you don have it yet, please create a new one
2. Put this CSS on Youzify Panel >> General Settings >> Custom Styling Settings
.widget_bp_core_members_widget .item-avatar img {
    width: 50px;
}1. Go to youzify.com and access your account.
2. Go to "My Account" and click "View Licenses".

3. Click "Manage Sites".

4.Then you can deactivate your current active site or add another one if you have more licenses.

Please use this CSS to fix it
body .youzer .gp-video-wrapper iframe {
height: 100% !important;
}
Put it on Youzer Panel >> General Settungs >> Custom Styling Settings
# Version 3.5.7 7 February, 2025
    - Fix post won't show on Private Group
    - Compatible with PHP 8.3
# Version 3.5.6 15 January, 2025
    - Fix post won't show on Private Group
    - Compatible with Youzify Story (upcoming add-on)
# Version 3.5.5 12 November, 2024
    - Fix Woocommerce Integration Bug
    - Compatible with BuddyPress 14
    - Fix bug in Private Group (new posts won't show)
    - Fix bug in translation
    - Compatible with Post Schedule add-on
# Version 3.5.4 25 July, 2024
    - Fix Google Social Login bug
# Version 3.5.3 18 July, 2024
    - Fix patches bug
# Version 3.5.2 16 July, 2024
    - Compatible with BuddyPress 14
    - Increased security for many functions
    - Fixed Reviews Tab and some Widgets
# Version 3.5.1 10 July, 2024
     - Fix: Privacy option can not be saved
# Version 3.5.0 25 May, 2024
     New feature - New Profile Header Statistics:
     - Activity Posts Count
     - Activity Comments Count
     - BBpress Forum Posts Count
     - BBpress Forum Comments Count
     - WooCommerce Products Count
     Fix: Social Login Cache
# Version 3.4.9 3 March, 2024
     New feature - LMS Integration (Support Tutor LMS, LifterLMS, LearnDash, LearnPress)
     Fix some PHP bugs
# Version 3.4.8 16 January, 2024
     Fix - Woocommerce Integration Bugs
     Fix - Error on Login Page
     Order Tab Feature for Create New Post Tab (Require Front-end Submission add-on)
# Version 3.4.7 10 January, 2024
     Fix - Direct Upload cover and avatar bug
# Version 3.4.6 6 January, 2024
     Fix - Fix some styling issues
# Version 3.4.5 31 December, 2023
     Fix - Profile Tab URL issue
     Fix - Conflict with BP Follow
     Fix - Widget Media System
# Version 3.4.4 27 December, 2023
     Make all Youzify add-ons works with BP 12
# Version 3.4.3 20 December, 2023
     Fix - Profile default tab option
     Fix - Gamipress integration error
     Fix - Some errors because incompatibility with BuddyPress 12
# Version 3.4.1 18 December, 2023
     Fix - login page error
     Fix - hidden profile tabs
# Version 3.4.0 15 December, 2023
     Compatible with BuddyPress 12
# Version 3.3.9 11 September, 2023
     New Feature - Tutor LMS Integration
     Fix Few Bugs and Incompatibilities with PHP 8.1
# Version 3.3.8 1 August, 2023
     Fix - Wall Settings Page Error for some type of server
     Fix - White Screen Issue on Account Settings Page for some type of server
# Version 3.3.7 29 July, 2023
     Fix - Handling Long usernames in the account settings header
# Version 3.3.6 28 July, 2023
     Reduce file size
     New Feature - Email Registration restriction Feature
     New Feature - Profile Picture and Image Cover Direct Upload from Profile Page
# Version 3.3.5 21 June, 2023
     Fix - Some incompatibility issues with PHP 8.X
     New Feature - Dark Theme
     New Feature - reCAPTCHA v3 Integration
# Version 3.3.4 21 May, 2023
     Fix - Some incompatibility issues with PHP 8.X
     New Feature - Location Tag / Check in Post
# Version 3.3.3 November 22, 2022
     Fix -  Fixed Comments Count
     Fix -  Fixed Comments Tab
     Fix -  GamiPress badges list is not fully shown
# Version 3.3.2 September, 2022
    Fix -  Fixed some bugs and incompatibility with PHP 8.X
# Version 3.3.1 July 19, 2022
    Improvement - Security Improvments
    Fix -  Fixed Bugs
# Version 3.3.0 January 05, 2022
    Fix - Media Widget Assign Menu Bug (Related with Advance Albums add-0n)
# Version 3.2.9 January 02, 2021
    Fix - Share feature not working if groups disabled
# Version 3.2.8 December 15, 2021
    Fix - Membership shortcodes for not logged-in users.
    Fix - Profile groups missing styling.
    Fix - show more button activity shows duplicated attachments
# Version 3.2.7 November 29, 2021
    Fix - Membership shortcodes for not logged-in users.
    Fix - Profile groups missing styling.
    Fix - Share in some groups not working.
# Version 3.2.6 October 23, 2021
    Fix - Registration Shortcode.
    Fix - GamiPress Balance Total.
    Fix - Members Directory Meta Styling.
# Version 3.2.5 October 05, 2021
    Fix - GamiPress & MyCred Conflict.
# Version 3.2.4 October 04, 2021
    New - GamiPress Integration.
    New - GamiPress User Badges Widgets.
    New - GamiPress User Balance Widget.
    New - GamiPress User Badges Tabs.
    Fix - Live Notifications.
# Version 3.2.3 September 21, 2021
    Fix - Profile Quote Widget Breaks.
    Fix - Profile Media Tabs Slugs.
    Fix - Hide Duplicated BBpress Activity Filters.
# Version 3.2.2 September 18, 2021
    Fix - Registration by invitation when registration is disabled.
# Version 3.2.1 September 13, 2021
    Fix - Show Polls Resuts for non logged-in Users
    Fix - Hide Vote Button for non logged-in users
# Version 3.2.0 September 11, 2021
    [New] Advanced Polls System.
    [New] Activity Poll Post Type.
    [New] Allow users to select multiple vote options.
    [New] Enbale / Disable Polls Images.
    [New] Force Polls Images Upload.
    [New] Limit Poll Options.
    [New] Set Default Poll Options Mode ( Single / Multiple ).
    [New] Enable / Disable Voting Results Visibility.
    [New] Enable / Disable Poll Voters.
    [New] Enbale / Disable Polls Revoting.
    [New] Set Maximum Voters Number to Show
    [New] Set Default PolL Post View ( Form or Results )
    [New] Compatible with Youzify Fron-end Submission add-on
    [New] Poll Form Settings - Poll Options from Youzify Panel > General Settings > Wall Setting > Polls Form Settings.
    [New] Poll Post Settings - Poll Options from Youzify Panel > General Settings > Wall    Setting > Polls Post Settings.
    [Fix] Pinned Posts Shows up for all users.
    [Fix] Account Settings Bug.
# Version 3.1.9 August 10, 2021
    Fix - Directory Search bug
    Fix - Header background color bug
    Remove youzify_media from Posts Category
    Old directory hear layout option. Please check this article >> https://kainelabs.ticksy.com/article/17354/
# Version 3.1.8 August 5, 2021
    Compatible with New Addon: BuddyPress Advanced Members Search ( Link: https://youzify.com/downloads/buddypress-advanced-members-search/ )
    New - Members Directory Design.
    New - Groups Directory Design.
    New - Activity Stream 3 Columns Layout.
    New - Activity with Left Sidebar Layout
    New Option - Change Activity Layout from Youzify Panel > General Settings > Wall Settings.
    New Option - Set Members Direcoty Header Options from Youzify Panel > General Settings > Members Directory Settings.
    New Option - Set Groups Direcoty Header Options from Youzify Panel > General Settings > Members Directory Settings.
    Fix - Live Notification Notice.
    Fix - Instagram Widget Videos.
    Fix - Media Lightbox.
# Version 3.1.6 July 1, 2021
    Compatible with New Addon: BuddyPress Amazon S3 (https://youzify.com/downloads/buddypress-amazon-s3-integration/)
    Fix - Some widgets bugs
# Version 3.1.5 June 21, 2021
    Fix - Bugs on activity stream
# Version 3.1.4 June 20, 2021
    Added - BuddyPress 8.0 Compatibility.
    Added - Invitations Support.
    Improved - Inputs Security.
    Improved - New Youzify Hooks
    Fix - Registration Visibility Field.
# Version 3.1.3 June 01, 2021
    Fix - Hashtag System
    Change some structure codes to make Youzify fully compatible with BuddyPress Amazon S3 add-on
# Version 3.1.2 May 05, 2021
    Fix - Messages CSS
# Version 3.1.1 May 02, 2021
    Improved - Social Login System.
    Improved - Activity Upload System.
    Added - TikTok Social Media Icon.
    Fix - Pinned Posts.
    Fix - WooCommerce Select Box Conflict.
# Version 3.1.0 April 05, 2021
    Improved - Registration Shortcode.
    Fix - Registration Widget.
    Fix - Tagging Friends Notification Count.
# Version 3.0.9 March 23, 2021
    Fix - Some shortcodes not working properly.
    Fix - Groups Templates.
    Fix - Upgrade Patch.
    Fix - Profile Activity Filter.
# Version 3.0.8 March 10, 2021
    Fix - CSS fixes for activity stream.
    Fix - Registration template error if membership system is disabled.
# Version 3.0.7 March 03, 2021
    Fix: Activity Lightbox not working on the first click.
    Fix: Patch does not work if the membership system is disabled.
# Version 3.0.6 March 01, 2021
    Fix: Activity Form Emoji Button.
# Version 3.0.5 February 28, 2021
    Fix: Activity comment styling messed up after clicking the emoji icon.
# Version 3.0.4 February 27, 2021
    New: Added new hooks before and after Youzify init.
    Fix: We added lost password hook second parameter.
# Version 3.0.3 February 26, 2021
    Fix: Emoji Button Not working on first click.
    Fix: Custom tabs {username} tag not working.
    Fix: Groups sidebar duplicated.
# Version 3.0.2 February 25, 2021
    Fix: Activity Form Emoji Dropdown
# Version 3.0.1 February 24, 2021
    Fix: About Me upload not working.
    Fix: WooCommerce error on activation.
    Fix: Shortcodes brackets removed after saving settings.
# Version 3.0.0 February 23, 2021
    Notice 1: We changed the name of Youzer to Youzify.
    Notice 2: We added a new settings tab called Move Youzer to Youzify on General Settings that will help you move all Youzer data to Youzify), to upgrade safely please follow the steps on this topic: https://kainelabs.ticksy.com/article/16887
    Notice 3: 90% of our addons do not require Youzify(formerly Youzer) anymore and they are compatible with Buddypress Legacy & Nouveau Theme, BuddyBoss Theme & Plugin.
    New: Added BuddyPress Member Types Support.
    New: Display BuddyPress Member Types on Members Directory.
    New: Overriding Templates Supports Now BBpress Templates.
    New: Improved Structure with Improved Performance.
    Fix: Fixed PHP/CSS/JS Bugs
# Version 2.6.2 October 10, 2020
    Fix: PHP Bugs
# Version 2.6.1 October 08, 2020
    Notice 1: - We released 2 new patches to move profile, activity, and messages media from Youzer Media System to WML. You can find the patches on Youzer Panel > General Settings > Patches Settings.
    Notice 2: If you are using "Youzer - Edit Activity Extension", "Youzer - Buddypress Moderation", Youzer - Social Share", "Youzer - Activity Reactions" make sure to update to the new versions that are compatible with this new update.
    New: Youzer now is using Wordpress Media Library.
    New: New Youzer cropping sizes for all Youzer placements to offer a huge speed optimization.
    New: Better upload folder organization by Members, Groups, User ID, Group ID, Years, and Months.
    New: New improved activity attachments structure that is much more faster than the old method.
    New: Save the uploaded files into a temporary folder and don't upload them to Wordpress Media Library till the user submit the forms.
    New: Disabling WordPress default cropping sizes for Youzer media to save space.
    New Option: Enable / Disable compressing new uploaded images from Youzer Panel > General Settings Page > General Settings Tab > Optimization Settings Section.
    New Option: Set Compression Quality Percentage from Youzer Panel > General Settings Page > General Settings Tab > Optimization Settings Section.
    New: Compressed transparent images are not now showing a black background anymore.
    Notice: We hide the Youzer media from WML for both views ( List + Grid ), but we will offer a custom page soon where you can see all the uploaded media on your site and each media with its location on the site and many other details that will help you keep everything under control!
    Improvement: PHP and JS and CSS.
    Fix: PHP bugs.
# Version 2.6.0 Septembre 05, 2020
    Fix: Upload Avatar and Cover pages not working.
# Version 2.5.9 Septembre 04, 2020
    New: Lazy Loading on all Youzer Images in Profile, Groups, Activity, MyCred Badges..., this feature will load images only when they appear in the browser viewport for a faster page load time.
    Improvement: We removed KaineLabs copyright notice from the account settings pages.
    New: Added new setting option "Lazy Load" in Youzer Panel > Genereal Settings to turn on/off this feature.
    New: Compatible with WordPress 5.5.1.
    Fix: Hidden Widgets Still Appearing on the widgets settings page.
    Fix: Reviews Pop-up overlay stay appearing after adding review.
    Fix: Activity form upload video pop-up shows only images files.
    Fix Tablet and Mobile views CSS for the new profile layout.
    Fix : CSS & JS Bugs.
# Version 2.5.8 August 27, 2020
    Improvement: Better Modals Popup UX.
    Improvement: Forcing HTTPS for Live Preview Image URL.
    Notice : if you are using "Youzer - Edit Activity Extension" or "Youzer - Buddypress Moderation" make sure to update to the new version that will support the new modals popup structure.
# Version 2.5.7 August 25, 2020
    New: New Profile Layout : Content + Left Sidebar
    New: New Profile Layout : Content + Right Sidebar
    New: 3 Columns ( Content + 2 Sidebars )
    Improvement: Better profile structure page UI and UX to make the drag and drop easier.
    Improvement: Once you click these following posts types ( Photo, Video, File, Slideshow) the upload button will be clicked automatically.
# Version 2.5.6 August 16, 2020
    New : Compatible with Wordpress 5.5
    Fix : JS Erros
# Version 2.5.5 August 15, 2020
    Fix: Js Erros
# Version 2.5.4 August 12, 2020
    New Feature: Comments GIFs.
    Re-design: New Activity GIF form Design.
    New Translation: New French translation provided by Virginie( Thank you so much Virginie )
    New : Comment Form Icons tool-tips.
# Version 2.5.3 August 02, 2020
    New Feature: Live Notifications
# Version 2.5.2 July 27, 2020
    Check this topic for a detailed change log: https://youzer.kainelabs.com/youzer-v2-5-2-the-new-share-posts-feature-is-finally-here/
    New Feature: "Share Posts" Feature.
    New: New activity statistics layout.
    Fix : Social Login.
# Version 2.5.1 July 02, 2020
    Updated : Chinese Translation Updated By DING ( His Website : https://www.iyapa.com ) - Thank you so much Ding ^^.
    Fix : Capitalization issues.
    Fix : groups shortcode parametres.
    Fix : Groups members pagination not working.
    Fix : Recent posts widget title not working.
    Fix : Activity form "Post In" filter opens automatically.
    Fix : Reviews tools not working.
# Version 2.5.0 June 02, 2020
    Fix : Youzer Panel Styling Not Working.
    Fix : Blog comment not appearing.
    Fix : Media Video Light Box Not Working.
# Version 2.4.9 May 19, 2020
    Fix : Instagram Registration Steps.
    Fix : Instagram Widget.
    Fix : Error After registration on Multisite.
    Fix : Embeds On Groups.
    Fix : User Tags Notification Action.
# Version 2.4.8 April 13, 2020
    Upgrade : New Social Login API & New Callback Urls for All Networks.
    Fix : Group Media Tab.
    Fix : Lost Password Page Not Working.
# Version 2.4.7 April 02, 2020
    Fix : Media Widget Privacy.
    Fix : Mycred Settings Not Working.
    Fix : [yz_xprofile_group] Shortcode.
    Fix : Shop & Badges tabs Settings Not Working.
# Version 2.4.6 March 26, 2020
    Fix : Uploading Cover HTTP Error.
# Version 2.4.5 March 24, 2020
    Fix : Custom Widget {username} variable not working.
    Change : Upload Attachments button in messages.
# Version 2.4.4 March 23, 2020
    Fix : Woocomerce Activity Posts Not Working.
    Fix : Blog Posts Appears Twice.
    Fix : Activity Filter Not Working.
# Version 2.4.3 March 22, 2020
    Fix : Media Embeds.
    Fix : Membership Widgets Disappeared.
    Fix : Follows Tab Disappeared.
    Fix : Media Privacy.
    Fix : Hashtags Shortcodes.
# Version 2.4.2 March 20, 2020
    Fix: Activate Page Blank.
    Fix: Live preview apostrophes turning into slashes.
# Version 2.4.1 March 18, 2020
    Fix : Sticky Posts on shortcodes not working.
    Fix : Header Statistics Hide Follower/Following Options.
    Fix : Youzer Panel Width and background options not working.
# Version 2.4.0 March 16, 2020
    Notice 1 : First of all install the new patch "Optimize Youzer Database".
    Notice 2 : Install the second patch "Upgrade media system database".
    Notice 3 : We released a new version of all the extensions, because we changed the whole youzer structure so all the new extensions needs to be updated in order to be compatible with the new update.
    Notice 4 : New Admin Page “Extensions Settings” it will contains all the add-ons settings pages for a better organization also you will need to enter the license key for the extensions in order to unlock settings and receive new automatic updates.
    New : Fast Youzer Version.
    New : Comments Attachments.
    New : Messages Attachments.
    Fix : Too many Bugs, Css & js Issues.
    New : Woocommerce Stripe Payment Gateway is now supported.
    Change : Activity Tab slug is back to "activity" instead of "wall".
    Improved: Images SEO : all new uploaded images will keep their real name instead of random number.
# Version 2.3.9 November 25, 2019
    Fix: Woocommrece Redirect Issues.
    Fix : Activity Page Bug.
# Version 2.3.8 November 24, 2019
    New : Compatible with BBpress 2.6.2
    Fix : Rtmedia Comments Compatibility.
    Fix : JS & CSS Bugs.
# Version 2.3.7 November 21, 2019
    Fix : Missing Activity Delete Button.
    Fix : Css Bugs.
    Update : Youzer - Edit Activities Extension Compatible with Youzer 2.3.7.
    Update : Youzer - Buddypress Moderation Extension - Adding Automatic Updates Feature.
# Version 2.3.6 November 17, 2019
    New : Overriding Templates Supports Now Child Themes.
    Fix : Css & Js Issues.
# Version 2.3.5 November 15, 2019
    New Extension : Buddypress Moderation : https://www.kainelabs.com/downloads/buddypress-moderation-plugin/
    New : Compatible with Wordpress 5.3
    New : Compatible with Buddypress 5.0.0
    New : Activity Search Box.
    New : New Comments Section Design.
    New : Mobile View Design for many elements.
    New : Activity Moderation : Set community forbidden words
    New : Shortcode : Groups List [youzer_groups per_page="5"]
    New : Mycred Balance Support Decimals Now.
    New : Wall Embed Videos are now responsive.
    Improvement : Improved Performance for many functions.
    Theme Compatibility : KLEO - Pro Community Focused, Multi-Purpose BuddyPress Theme
    Theme Compatibility : Enfold - Responsive Multi-Purpose Theme
    Theme Compatibility : Bimber - Viral Magazine WordPress Theme
    Fix : Project Categories & Tags Enter to not work on mobiles.
    Fix : Page width option not working.
    Fix : Activity Form - Paste Link Preview.
    Fix : Giphy Image Remains After Posting.
    Fix : Moods not working after translation.
# Version 2.3.4 September 02, 2019
    Notice : if you are using "Youzer - Edit Activity Extension" make sure to update to the new version that will support the new added features.
    New Feature : Posts Privacy.
    New Feature : Posts Mood.
    New Feature : Tag Friends on posts.
    New : Chinese Translation By June - 微谈NZ - nz.vtalk360.com ( Thank you so much June )
    New : Turkish Translation By Frank jackson ( Thank you so much Mr Frank ).
    New : Project description widget supports wordpress editor now.
    New : Override Youzer Templates from your theme by creating a folder named "youzer".
    New : New Activity Posts Comments Design.
    Improvement : Open Activity Posts & Comments, Messages Links in new tab.
    Improvement : Improved Performance for many functions.
     Fix : Removing "@" from the user full name on the profile settings page.
    Fix : Update Profile Posts Count on changing post author.
    Fix : Logout Link Not working when login popup option activated.
    Fix : RTmedia media tab conflict with youzer.
    Fix : Change password link in profile not working.
    Fix : Likes Notifications.
    Fix : Portfolio title do not accept apostrophes.
    Fix : Slideshow Conflicts.
# Version 2.3.3 July 11, 2019
    Fix : Profile Buttons Disappeared
# Version 2.3.2 July 10, 2019
    Notice 1 : Make Sure to run the New Media Migration process from Youzer Panel > General Settings > Patches Settings.
    Notice 2 : if you are using hashtags widgets please delete them and add them again because we fixed a hashtags counting issue.
    Notice 3 : if you are using any one of our extensions we just released a new version of all the extensions to make them compatible with the current version 2.3.2 and also we added an automatic updates feature for all of them.
    New : New Users Media System ( Photos, Videos, Audios, Files )..
    New : New Groups Media System ( Photos, Videos, Audios, Files )
    New : New Account Settings Design with Easy Access To All Pages Menus ( Profile Settings, Account Settings, Widgets Settings ).
    New : Account Settings Page - Email & Password : Change Registration Account E-mail & Password.
    New : New Profile Widget : Media Widget.
    New : New Profile Tab : Media.
    New : New Wordpress Widget : Media Widget ( Community Media, User Media, Group Media, Displayed Group Media, Logged-in User Media ) .
    New : New Shortcode : Community Media  [youzer_media].
    New : Set Email, Phone, Address Websites Fields from Youzer Panel > Widgets Settings > Info Boxes Settings.
    New : Youzer Panel > General Settings > Media Settings : Set Groups Media Settings.
    New : Youzer Panel > Widgets Settings > Media Settings : Set Profile Media Settings.
    New : Youzer Panel > Profile Settings > Media Tab Settings : Set Profile Media Tab Settings.
    Improvement : About me widget biography & video widget description fields supports wordpress editor now !
    Fix : Activity Shortcode Pagination.
    Fix : Social Login Name Issue.
    Fix : Hashtags Widgets.
    Fix : CSS & JS.
# Version 2.3.1 June 17, 2019
    Fix : Emojis Not working after adding the hashtag feature.
    Fix : Improved KLEO Theme Integration Styling.
    Fix : CSS & PHP BUG.
# Version 2.3.0 June 13, 2019
    New : New Extension : Buddypress Profile Completeness : https://www.kainelabs.com/downloads/buddypress-profile-completeness/
    New : Hashtags Support All languages.
    New : Posts Support Multiple Embeds.
    New : Youzer is now Compatible with The Kleo Theme : https://themeforest.net/item/kleo-pro-community-focused-multipurpose-buddypress-theme/6776630
    Fix : Reviews Form Action Buttons Disappeared.
    Fix : Hashtags include name not working on some hosts.
    Fix : CSS & JS Bugs.
# Version 2.2.9 June 06, 2019
    New : Hashtags Feature : Supported on Posts & Comments & Replies.
    New : widget “Community Hashtags Cloud” ( filter : popular, random ).
    New : widget “Hashtags List” ( filter : Popular, Trending Today, Trending Last Week, Trending Last Month ).
    New : Shortcode : [youzer_hashtags] => Hashtags List With Count.
    New : Shortcode : [youzer_community_hashtags] => Hashtags Cloud
    New : Improved Wall Functions.
    Fix : Duplicated Blog Posts Issue.
# Version 2.2.8 May 30, 2019
    Fix: Dismiss New Extension Notice.
# Version 2.2.7 May 30, 2019
    New : Compatible with The New Extension : Youzer- Buddypress Edit Activity : https://www.kainelabs.com/downloads/buddypress-edit-activity/
    New : Activity Shortcode new 4 option show_filter, load_more, show_form, form_roles.
    New : Verified Users Shortcode new option "order_by" accepts : id, random ...
    New : Improved Css & Js.
    Fix : Improved English Translation By Mr Greeg.
    Fix : Login Redirect to urls.
    Fix : Profile Header Not Appearing On PHP version 7.3
# Version 2.2.6 May 18, 2019
    New : Social Login Works for existing accounts with same e-mails ( Thanks Isis For all your help ^^ ).
    New : Compatible with "MYCRED BP GROUP LEADERBOARDS" Plugin.
    New : Advanced Activity Stream Shortcode [youzer_activity] too many new options fully customizable: https://kainelabs.ticksy.com/article/14818/
    Fix : Twitch Social Login Bugs.
# Version 2.2.5 May 14, 2019
    New : Social Login Network : Twitch
    New : Members Directory Ajaxed Pagination ( No refresh required ).
    Fix : Fixing social login error.
    Fix : Login & Register Shortcode
    Fix : Profile Widgets Animation Effects
    Fix : Css & PHP Bugs.
# Version 2.2.4 May 12, 2019
    New : Giphy Integration.
    New : New wall Post Type "Gif".
    New : Compatible with Wordpress 5.2 .
    New : Compatible with Buddypress 4.3.0 .
    New : Spanish Translation By Alexey, here's his site : https://www.traductions.es/ ( Thank you so much Mr Alexey ^^ )
    New : New Social Login Updates API Version.
    Fix : Woocommerce profile shop tab appears for all users.
    Fix : Verified Users Widget.
    Fix : Css & Js Bugs.
# Version 2.2.3 April 25, 2019
    New : Youzer is now Compatible with The Crumina Theme : https://themeforest.net/item/olympus-responsive-community-social-network-wordpress-theme/22788499
    New : All the activity friendship and groups buttons are now being served with ajax no refresh required.
    New : You can use the following tags inside the custom tab content : the tag {displayed_user} will be replaced by the displayed profile user id. and the tag {logged_in_user} will be replaced by the logged-in user id.
    New : Youzer shortcodes are now supported in Gutenberg.
    New : Compatible with Woocommerce 3.6.1
    New : Compatible with Buddypress Username Changer Plugin.
    New : Compatible with Buddypress Account Deactivator Plugin.
    New : Compatible with Buddypress Block Members Plugin.
    Fix : Improved Arabic Translation By Anass6666, here's his site : https://thefood.info ( Thank you so much Mr Anass ^^ )
    Fix : Website Link not working.
    Fix : Info boxes privacy not working.
    Fix : Follows Page Styling.
    Fix : Woocommerce Supports Third Party Plugins Pages.
    Fix : Posts Count On Multisite.
    Fix : Instagram Deleting Accounts.
    Fix : Elementor Bug.
    Fix : Private Groups Bookmarks Not working.
    Fix : PHP & Js & Css Bugs.
# Version 2.2.2 March 29, 2019
    New : Youzer is now Compatible with The Aardvark Theme : https://themeforest.net/item/aardvark-buddypress-membership-community-theme/21281062
    New : Arabic Translation By alhrms, Here's his site : https://tajmiel.com ( Thank you so much Mr alhrms ^^ )
    Fix : Profile Settings Default Tab Not saving settings.
    Fix : Profile Header Second Meta Not Working.
    Fix : PHP & Js & Css Bugs.
# Version 2.2.1 March 23, 2019
    Fix: Solving the Wordpress Backend Slowness issue.
    Ps: The slow down issue was caused by our system that keeps checking for new updates each second. and the cache was not working for hosts that were not able to access our updates xml file. so we disabled it for now till we found a better solution.
# Version 2.2.0 March 23, 2019
    New : Improved Performance & Speed.
    New : Infinite Wall Scroll.
    New : Smooth wall Posts Effect.
    New : Profile Info & Contact Info Moved into Buddypress Xprofile.
    New : Shortcode : Get Xprofile fields [yz_xprofile_fields user_id="1" fields="1,2,3..."]
    New : Shortcode : Get Xprofile Group Fields [yz_xprofile_group profile_group_id=""]
    New : You can use the following tags inside the custom widgets content : the tag {displayed_user} will be replaced by the displayed profile user id. and the tag {logged_in_user} will be replaced by the logged-in user id.
    Update : Changing the shortocde "[yz_custom_information]" with [yz_xprofile_group]
    New : Compatible with Wordpress 5.1.1
    New : Compatible with Buddypress 4.2.0
    New : Compatible with Mycred 1.8.2
    Fix : Social Login - Twitter Fix.
    Fix : PHP & Js & Css Bugs.
# Version 2.1.9 January 16, 2019
    Fix : Reset Password Not Working.
    Fix : Social Login Avatars Not Working.
    Fix : Site Crash When you enable Woocommerce integration.
    Fix : Woocommerce Integration : Shop Tab Link Not working outside of the buddypress pages.
    Fix : Woocommerce Integration : Ajax Cart and Checkout Links Not Working.
    Fix : Custom Scheme Not working.
# Version 2.1.8 January 06, 2019
    New : Compatible with Wordpress 5.0.1
    New : Compatible with Buddypress 4.1.0
    New : Woocommerce Integration.
    New : Activity Live Posting Without Refresh.
    New : Shortcode : Members List [youzer_members per_page="5"]
    New : Shortcode : User Basic Information [yz_basic_information user_id="1"]
    New : Making the upload folder customizable.
    New : Custom Hooks.
    New : Improved Account Settings Structure.
    New : Custom Hook to Disable Profile Slideshow Auto Loop.
    Fix : Private Posts Showing in follows tab.
    Fix : Ajax Login Redirects Admins to Login Form Again ( Yaay Finally !! )
    Fix : Activity Mentions Not Working. ( Yaay Finally !! )
    Fix : Improving Speed & Performance.
    Fix : Changing the function "getimagesize" to an alternative solution.
    Fix : Default Profile Tab Not Working Properly.
    Fix : Multisite Social Login.
    Fix : Google Plus Social Login.
    Fix : Wall Link Post - HTTPS.
    Fix : Missing Icons.
    Fix : 404 Profile Page.
    Fix : New Post User Default Pattern Cover Flow.
    Fix : RTmedia Lightbox.
    Fix : Custom Styling.
    Fix : Css Issues.
# Version 2.1.7 October 11, 2018
    New : French Translation By Johann Le Niniven ( Thank you so much Johann ^^ )
    New : Persian Translation By Lily Aman ( Thank you so much lily ^^ )
    Fix : Info Tab Widgets Edit Url.
    Fix : Disable User Reviews/Ratings System By Default.
    Fix : Css issues.
# Version 2.1.6 October 08, 2018
    New : User Reviews/Ratings System.
    New : Shortcode : Activity Stream [youzer_activity sidebar="false/true"]
    New : Shortcode : Users Reviews List [youzer_user_reviews limit="5"]
    New : Shortcode : Verified Users List [youzer_verified_users limit="5"]
    New : New Statistics Options ( Posts, Comments, Views, Followers, Following, Points )
    New : Fontawesome 5 integration With Over Than 1300 Icons.
    New : Adding Quick Edit Button to The Profile Widgets Head.
    New : New Profile Widget : User Reviews.
    New : New Wordpress Widget : Verified Users.
    New : New Members Directory Statistics Options ( Followers, Following, Points )
    New : Serve Friendship Requests and Follows Requests Through Ajax.
    Fix : CSS/JS Issues.
    Fix : PHP Bugs.
# Version 2.1.5 August 31, 2018
    Fix : Profile Subn navigation icons not working !
    Fix : Open Privacy and Terms links in a new tabs.
    Fix : Make Slideshow Image appear on one image only also.
    Fix : Adding rel="nofollow noopener" to links.
    Fix : Making Captcha Language Customizable.
# Version 2.1.4 August 31, 2018
    New : RTL Support.
    Fix : Fixing offline status in widgets.
    Fix : Activity slideshow not working.
    Fix : Bookmarks function not working !
    Fix : Settings Current Page xprofile fields color not working.
    New : Styling the BP Followers Widget.
# Version 2.1.3 August 18, 2018
    New : Post Widget - Allow Users To Remove The Post After Choosing It.
    New : Quotes Accept Now Line Breaks.
    New : Add the Filter To Disable Instagram and Flickr Cache.
    New : Project Widget - Making The URL Clickable.
    New : New Filters For Developpers.
    Fix : Saving Widgets Settings For New Users.
    Fix : Following Feature Not Working Correctly On Youzer 2.1.2.
    Fix : General Styling Options not working.
    Fix : URL Preview Not Working.
    Fix : Wall Upload Image Preview Not working .
    Fix : Emojis Filter Tabs Not Working.
    Fix : ScrollBar On Groups.
    Fix : Groups Content Hidden.
    Fix : Following & Activity Tabs Icons Are Not Working on The Colorful Tabs Icons Option.
    Fix : Members Directory - Country, City Custom Meta showing 404 error.
    Fix : Css Bugs.
# Version 2.1.2 August 07, 2018
    Fix : Following Feature Not Working On Youzer 2.1.1
    Fix : Settings Current Page Title Color.
    Fix : Favorite Tab icon not appearing for the colorful option.
    Fix : Custom Styling Options Not working.
    Fix : Improved Styling Function to Reduce Database Calls For Inactive Styles.
# Version 2.1.1 August 03, 2018
    New : Activity Reactions ( Paid Extension ).
    Fix : Fixing getimagesize() function.
    Fix : Services Widget Not working.
    Fix : Removing Invalid Facebook Scopes.
    Fix : Fixing Redirecting Issue.
    Fix : Fixing Groups Members Count Format for Big Numbers.
# Version 2.1.0 July 28, 2018
    New Feature : Bookmark/Save Activities ( Ajaxed ).
    New Feature : User Export Personal Data, Profile Widgets Data. ( Under Account Settings Page )
    New : Set Bookmarked/Saved Activities Tab Privacy.
    New : Compatible with Buddypress Followers Plugin ( URL: https://github.com/r-a-y/buddypress-followers ).
        * Following / Followers tabs to user profile pages
        * Follow / Unfollow buttons on user profile pages and in the members directory
        * A new "Following" activity directory tab
        * An "Activity > Following" subnav tab to a user's profile page
        * Menu items to the WP Toolbar
    New : Images Compression System.
    New : Improved Performance by Using Caching System.
    New : New Custom Styling System to Reduce Database Requests.
    New : Improved User Accounts Front-end Pages to Support third-party plugins pages!
    New : Extending The Profile Activity to Handle More Tabs.
    New : Add Members Directory Loading Icon On Ajax Calls.
    Fix : Translation Not Working !
    Fix : Hiding User Tools Out Side Of Members Directory.
    Fix : Social Networks Not Saving !
    Fix : Ads not saving !
    Fix : Social Login Database Not Being Created.
    Fix : Memberships Pages Not Working !
    Fix : Js & PHP & Css Bugs.
# Version 2.0.9.1 July 09, 2018
    New : New Shortcode [yz_custom_information] to display the user custum fields data.
    Fix : Fixing the checking for buddypress existence function !
# Version 2.0.9 July 08, 2018
    # New : Member Types ( Paid Extension ).
    # New : Social Share ( Paid Extension ).
    # New : MyCRED Integration ( Paid Extension ).
    # New : New Update Notifier.
    # New : New Admin Youzer Extensions Page.
    # Fix : Fixing Css Bugs.
    # Fix : Fixing PHP Bugs.
# Version 2.0.8 June 23, 2018
    # Fix : Multisite Posts Tab.
    # Fix : Group Description Html Tags.
    # Fix : Open Graph Description Issue.
    # Fix : Sync Social Media Profile avatar.
    # Fix : Activity User Default Cover Post.
    # Fix : Multisite Activity Post Thumbnail
    # Fix : Installing Youzer Without Buddypress Error.
    # Fix : Members & Groups Directory Search Form Disappear On Mobile View.
# Version 2.0.7 June 10, 2018
    # New : BBpress Integration
    # New : MyCRED Integration ( Balance, Badges, Levels )
    # New : Open Graph Support ( Profiles / Groups )
    # New : User MyCRED Balance Widget
    # New : Group Admins Widget
    # New : Group Moderators Widget
    # New : Reset Password Widget
    # New : Reset Password Shortcode [youzer_lost_password]
    # New : Compatible with  3.1.0
    # Fix : Forcing Buddypress Legacy Theme
    # Fix : Social Login
    # Fix : Instagram Widget
    # Fix : Groups - Members Pagination
    # Fix : Live Url Preview
    # Fix : Changing 'infos' to 'info'
    # Fix : Fixing Attachments size float numbers issue.
    # Fix : Duplicated Preview Urls.
# Version 2.0.6 April 02, 2018
    # New : Sticky Posts System ( Activity / Groups )
    # New : Adding User Status to The Profile Header ( Online / Offline )
    # New : Mailster Newsletter Integration ( Sync With Registration form )
    # New : Limit Navbar Menus and display the rest under "More" drop down menu !
    # New : Wall Live Url Preview before posting
    # New : Adding Activity Custom Posts types Support
    # New : Unlimited Header Custom Meta
    # New : Unlimited User Cards Meta
    # New : Unlimited User Tags Widget
    # New : Adding Biography field the "infos tab"
    # New : Wordpress Navigation Shortcode to display account avatar [youzer_account_avatar]
    # New : Adding to many actions and filters for further customization purpose
    # Fixed Bug : Fixing Instagram API.
    # Fixed Bug : Safari - Account Page Buttons Not working.
# Version 2.0.5 February 21, 2018
    # New : Mailchimp Newsletter Integration ( Sync With Registration form ).
    # New : New Shortcode "[youzer_login]" for login form.
    # New : New Shortcode "[youzer_register]" for registration form.
    # New : New Widget "Youzer Registration Form".
    # New : New Widget "Group Description".
    # New : Set Custom Members Directory Cards Meta Field.
    # New : Social Login Redirect Sync with Normal Login.
    # New : Making Header "Website" Link Clickable.
    # New : Making "Website Box Info" Link Clickable.
    # Update : Defined Scripts & Styles Version to Avoid Caching Issues On Updates.
    # Fixed Bug : Fix Account Settings Builders issue on Mirosoft Edge Browser & Safari.
    # Fixed Bug : Members Directory Search on Android.
    # Fixed Bug : Login & Reset Password Pages Not being Saved in Youzer Panel.
# Version 2.0.4 January 29, 2018
    # New : Ajax Login.
    # New : Login Popup Form ( Ajax / Normal Data Submition ).
    # New : Set Default Profiles Cover.
    # New : Set Default Profiles Avatar.
    # New : Set Default Groups Cover.
    # New : Set Default Groups Avatar.
    # New : Custom Registration Page Url.
    # New : Linking Authors Widgets With Profiles.
    # New : Enable/Disable Account Scroll To top button.
    # New : Admin Panel - Fixed "Save Setings" Button.
    # New : Compatible With Buddypress 2.9.3
    # Update : Removing unnecessary files and scripts and styles.
    # Update : Merging Youzer & Logy Panels.
    # Fixed Bug : Ajaxed Posts & Comments Paginations Links.
# Version 2.0.3 January 11, 2018
    # New : Verified Accounts Badges System.
    # New : Real Time Accounts Verification ( No Refresh Required ).
    # New : Unlimited Verified Badges Color.
    # New : Mark User Accounts Verified/Unverified from Profile, Members Directory, Widgets ...
    # New : Russian Translation By Aslan Patov ( Thank you so much Aslan ^^ )
    # New : Enable/Disable Posts Likes.
    # New : Enable/Disable Posts Deletion.
    # New : Enable/Disable Posts Comments.
    # New : Enable/Disable Posts Comments Replies.
    # New : Profile Services Widget : Vertical / Horizontal Layouts.
    # New : Wall Attachments - Set Allowed Maximum File Size.
    # New : Wall Attachments - Set Allowed Image Extentions.
    # New : Wall Attachments - Set Allowed Video Extentions.
    # New : Wall Attachments - Set Allowed Audio Extentions.
    # New : Wall Attachments - Set Allowed File Extentions.
    # New : Set Slideshow's Slides Height Type Fixed / Auto.
    # New : Adding Plugin "Setting" & "About" Pages url in plugins page.
    # New : Improving Many Functions Performance.
    # New : Enable/Disable Activity Page Filter Bar.
    # Fixed Bug : Register Form Captcha.
    # Fixed Bug : Menu Dropdown in safari.
    # Fixed Bug : Empty Social networks Notice.
# Version 2.0.2 December 30, 2017
    # New : Adding Emoji into Posts, Comments, Messages .
    # New : New Settings tab named "Emoji Settings" in the general settings page.
    # New : Germany Translation By Tom Gleitsmann ( Thank you so much Tom ^^ )
    # New : Added all website pages to redirect after user login options.
    # New : Added all website pages to redirect after admin login options.
    # New : Improving messages conversations page design.
    # New : Adding Login button to lost password form.
    # New : Remove unnecessary scripts.
    # New : Profile Navbar: set icons above title option ( for the people that want to earn more space ).
    # Fixed Bug : 'Social Login' login issue.
    # Fixed Bug : 'Custom Widgets' Notices.
    # Fixed Bug : the new "set default tab admin message".
    # Update : Change login url to youzer login page in the activate account form.
# Version 2.0.1 December 25, 2017
    # New : Set Default Profile Tab.
    # New : Delete Profile Tabs.
    # New : Control All Tabs Titles.
    # New : Control All Tabs Icons.
    # New : Control All Tabs Orders.
    # New : Control All Tabs Visibility.
    # New : Show/Hide Tabs Count.
    # New : "Profile Subtabs Settings" appears only if you have any third party buddypress plugins installed.
    # New : Adding 'My Profile' page to buddypress Tab in wordpress navigation menu builder.
    # Update : Change Profile Page title to 'Profile Settings'.
    # Update : Change Settings Page title to 'Account Settings'.
    # Fixed Bug : Instagram Zoom Issue.
    # Fixed Bug : Deleting All Custom widgets at once.
    # Fixed Bug : Remove Flickr ID issue.
    # Fixed Bug : Global Activities Slideshow.
    # Fixed Bug : Third Party Plugins Tabs Notice.
How to show Asgaros New Replies and New Topics show on Activity page like BBPres Integration?
1. Please install Asgaros Buddypress integration plugin here >> https://www.asgaros.de/support/topic/buddypress-integration-v0-1/
2. After integration plugin installed, please go to folder "wp-content/plugins" and create a file and name it with "bp-custom.php" And then put these snippet to the file and save
<?php
/**
 * Add Activity New Allowed Actions.
 */
function yzc_add_show_everything_filter_actions( $actions ) {

    $actions[] = 'asgaros-forum-post';
    $actions[] = 'asgaros-forum-topic';
    return $actions;
}
add_filter( 'yz_wall_show_everything_filter_actions', 'yzc_add_show_everything_filter_actions' );
/**
 * Enable Activity Asgaros Posts Visibility.
 */
function yz_enable_asgaros_activity_posts( $post_types ) {
    $post_types['asgaros-forum-post'] = 'on';
    $post_types['asgaros-forum-topic'] = 'on';
    return $post_types;
}
add_filter( 'yz_wall_post_types_visibility','yz_enable_asgaros_activity_posts' );
3. Save the file.
On the Profile Fields setting, Click edit to any field you want to show on the Registration Form. And then, check "Use this field in the site registration form."

Please go to Youzify Panel >> General Settings. And you can see Buttons Style and Tab Icons Style settings

For login page, you can use our login shortcode on one of the languages. For example, you have a website with langauge English (en) and Croatia (hr).
On the Croatian language, you can set it up on Youzify Panel >> Membership Settings, but for English, you can use our login shortcode below:
[youzify_login]
Please check screenshots below


After setup the login page, you will need translate some Dynamic Words like Register, Login, Lost Password etc. Please check this article to find how set it up
Why these informations won't appear? How to set them up?
You can set them up on Youzify Panel >> Widgets Settings >> Info Boxes Settings.
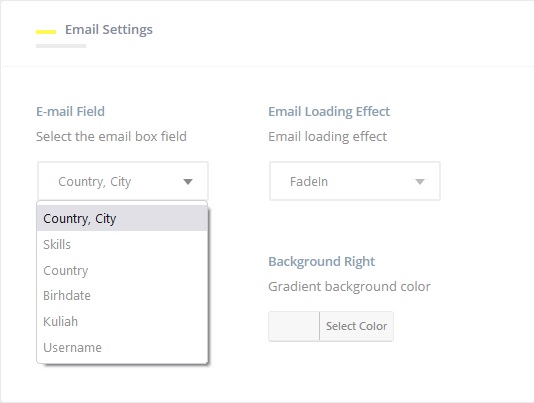
On that settings, you can connect any Profile Fields you want. The fields will appear as Email, Address, Website, and Phone Number widgets.
And please note, your members need to fill their fields that connected with the Info Boxes. And you as admin need to create required Profile Fields first before it can be connected with the Info Boxes widget.
Please go to Youzify Panel >> General Settings >> Wall Settings. You cans select

To know how to add widgets on the sidebar(s), please check this article
You can enable or disable Social Login email confirmation on Youzify Panel >> Membership Settings >> Social Login Settings.
By enable social login email confirmation, if user register on your website by using Social Login, they need to activate their account by clicking link that sent to their email. They can not login until they activate their account or admin activate it

If you create a Dropdown Field Type in profile field group and mark it as REQUIRED, it doesn't show warning message to members If you click save changes without filling the required select field, it is not getting saved but it also doesn't give any errors.
 To fix this issue, please use this CSS
#youzify .youzify select {  display: block !important;  opacity: 0;  position: relative;  top: 45px;  margin: 0;  border: 0;  padding: 0; height: 1px;
}
Put the CSS on Youzify Panel >> General Settings >> Custom Styling Settings
Plase use this snippet
define( 'BP_ENABLE_MULTIBLOG', true );
Put it on "bp-custom.php" in folder "wp-content/plugins". If you dont have it please create a new file. After put the snippet, please clear your website cache.
And then, please add this snippet also on same file if you want to enable multisite Blog system
https://gist.github.com/KaineLabs/023c4fcea9de2703b06b94dfd4f40e0e
Smart Author - It will show you yourself author box profile. But you need to login first. If you are in oggedout condition, so it will show author box from default user.
Static Author - It will show you author box profile from exact user. You can set the user ID on the widget settings

Please use this snippet
https://gist.github.com/KaineLabs/05b81666631cf207ff0a219275c35e1b
Put it on "bp-custom.php" file in folder "wp-content/plugins". If you don't have it yet, please create a new one.
To make comments form always appear (members don't need to click Comments to show it), please use this CSS
.activity-comments form {
    display: block !important;
}
Please put it on Youzer Panel >> General Settings >> Custom Styling Settings >> Global CSS Box (please make sure to tur on the "Enable CSS" button first.
1. Membership Settings > Login Settings > General Settings
- Login Button Title
logy_login_signin_btn_title
- Register Button Title
logy_login_register_btn_title
- Lost Password Button Title
logy_login_lostpswd_title
2. Membership Settings > Login Settings > Header Settings
- Form Title
logy_login_form_title
- Form Subtitle
logy_login_form_subtitle
3. Membership Settings > Register Settings > General Settings
- Register Button Title
logy_signup_register_btn_title
- Login Button Title
logy_signup_signin_btn_title
4. Membership Settings > Lost Password Settings > General Settings
- Form Title
logy_lostpswd_form_title
- Form Subtitle
logy_lostpswd_form_subtitle
- Reset Button Title
logy_lostpswd_submit_btn_title
Please use this snippet
1. Change yz_redirect_author_page_to_bp_profile with youzify_redirect_author_page_to_bp_profile
and
yz_edit_author_link_url with youzify_edit_author_link_url
2. To know where you should put the snippet, please check this article
https://kainelabs.ticksy.com/article/17309/
3. Clear your browser and site cache and check again
This plugin can help you to receive notice if every Youzify newest update be released and make you able to update it by only one-click action.
Please download the plugin from this link:
https://envato.com/market-plugin/
The plugin can be installed from a ZIP file via the WordPress Dashboard.
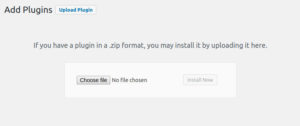
The plugin Settings Page allows you to configure your Envato API Personal Token. This API Token is generated from build.envato.com and will allow WordPress to securely receive item updates.
After setup the tokens, you will always receive notice on the Plugin Page Menu of your WP Dashboard. You also can click "Update" button to update Youzify.
Almost of this issue happen because conflict with 3rd party plugin or snippet to change default WP Admin / WP Login URL.
Please remove the snippet / plugin and to hide your default WP Admin URL, please use this CSS
https://gist.github.com/KaineLabs/577d094c67e585729da12cdddde9ffb8
On the line 17 line, please change
'add-your-custom-login-page-url-here';
with your login page URL
To know where you have to put the snippet, please check this article
https://kainelabs.ticksy.com/article/17309/
Purchase post does not appoear on the Activity Stream although Woocommerce Integration Settings already enabled.
1. As admin, please make sure "New Purchase" post type already enabled on Youzer Panel >> General Settings >> Wall Setting

2. Your Members need to enable "Activity Stream Purchases" permission on their "Account Privacy Settings" page

1. Please create a new WordPress Page
2. Use this shortcode
[youzify_members member_type="member type ID" ]
Change "member type ID" with any Member Type you want

3. Save the page
4. To show the Tab Filters only for specific members you want, you can use this CSS
For single members type
.youzify-members-directory-shortcode .item-list-tabs ul li {
    display: none;
}
.youzify-members-directory-shortcode .item-list-tabs #members-membertypeid{
    display: block;
}
For multiple members type
.youzify-members-directory-shortcode .item-list-tabs ul li {
    display: none;
}
.youzfy-members-directory-shortcode .item-list-tabs #members-membertypeid1, .yz-members-directory-shortcode .item-list-tabs #members-membertypeid2 {
    display: block;
}
1. Please go to your FTP/CPanel, and go to folder "wp-content/plugins"
2. Create a new PHP there and name it with "bp-custom.php". If you already have it, no need to create again. Just open it
3. Paste the snippet on the page and save
PS: On a single "bp-custom.php" file, you only can add one PHP tag code only where it put on the most top of file
<?php
If you want to add multiple snippets, please copy the snippet only.
Alternative
If you don't want to use "bp-custom.php" file, you can use third-party plugin
Please go to folder "wp-content/plugins" and open file "bp-custom.php". If you don't have it please create a new one
And the put this snippet into the file
<?php
// Function to change email address
add_filter( 'wp_mail_from', 'wpb_sender_email' );
function wpb_sender_email( $original_email_address ) {
    return '[email protected]';
}

// Function to change sender name
add_filter( 'wp_mail_from_name', 'wpb_sender_name' );
function wpb_sender_name( $original_email_from ) {
    return 'Mr Sultrio';
}
Change '[email protected]' with any email you want and change 'Mr Sultrio' with any name you want.
1. Please go to Youzify Panel >> General Settings >> Members Directory Settings
2. Scroll down until find Header Settings box and you can change the background color and title there

To edit background color and title of Groups Directory header, please check this article >> https://kainelabs.ticksy.com/article/17376/
Please put this code on file "bp-custom.php" file in folder "wp-content/plugins". If you don't have it yet, please create a new one.
<?php
add_action( 'wp_footer', 'add_comment_hide_show' );
function add_comment_hide_show() {
    ?>
    <style>
        .activity-comments ul li[id^="acomment-"]{display: none;}
    </style>
    <script type="text/javascript">
        jQuery(function($) {
            setInterval(function() {
                $('.activity-meta').each(function() {
                    if( !$(this).find('.show-comments').length ){
                        var html = '<a href="#" class="button bp-primary-action show-comments">Show/Hide Comments</a>';
                        $(this).find('.button.acomment-reply').after(html);
                    }
                });
            }, 500);
            $('body').on('click', '.show-comments', function(e) {
                e.preventDefault();
                var obj = $(this).closest('.activity-content').next('.activity-comments').find('ul li[id^="acomment-"]');
                obj.slideToggle();
                return false;
            });
        });
    </script>
    <?php
}
Please use this CSS
.bp-user.bookmarks .youzify_effect {
    visibility: inherit !important;
}
Put it on Youzify Panel >> General Settings > Custom Styling Settings
Please use this snippet fot fix it
function yzc_disable_youzer_template() {
    if (bp_is_register_page()) {
        remove_filter( 'template_include', 'youzify_template', 999 );
        remove_action( 'bp_init', 'youzify_bp_overload_templates' );
        remove_filter( 'bp_get_theme_compat_url', 'youzify_buddypress_assets_path' );
        add_filter( 'youzify_deregister_bp_styles', '__return_false' );
    }
}
add_action( 'bp_init', 'yzc_disable_youzer_template', 9 );
Put it on "bp-custom.php" file inside folder "wp-content/plugins". If you don't have the file yet, please create a new file.
1. Please use this snippet
https://gist.github.com/KaineLabs/67734d0d639b30df35765b168acdbe01
Please follow instructions on this article to know where you should put it
https://kainelabs.ticksy.com/article/17309/
2. And then, please use this CSS
.not-logged-in #youzify-wall-nav #activity-all a::before {
    content: '\f57e';
    display: inline-block;
    font-family: "Font Awesome 5 Free" !important;
    background: -webkit-linear-gradient(right,#24c6dc ,#514a9d) !important;
    padding: 10px;
    margin-right: 5px;
    font-size: 15px !important;
    border-radius: 20px;
}
.not-logged-in .youzify div.item-list-tabs li#activity-filter-select .youzify-activity-show-filter i, .youzify div.item-list-tabs li.youzify-activity-show-search .youzify-activity-show-search-form i {
    width: 42px;
    height: 42px;
    line-height: 42px;
    text-align: center;
    border-radius: 3px;
    margin-left: 8px;
    cursor: pointer;
    display: inline-block;
    vertical-align: middle;
}
.not-logged-in .youzify div.item-list-tabs li.youzify-activity-show-search {
    float: right;
    margin-top: 2px;
}
.not-logged-in .youzify div.item-list-tabs li .youzify-dropdown-area {
    right: 0;
    top: 111px;
    z-index: 99;
    width: 334px;
    padding: 15px;
    display: none;
    background: #f6f6f6;
    text-align: center;
    position: absolute;
    border-bottom-left-radius: 5px;
    border-bottom-right-radius: 5px;
    box-shadow: 0 1px 1px 0 rgba(0,0,0,.1);
}
.not-logged-in #youzify-wall-nav .item-list-tabs li#activity-filter-select label {
   display: inline-block;
   background: #a4aaca;
   padding: 15px;
   border-radius: 3px;
   margin: 0;
   margin-bottom: 0px;
   font-size: 13px;
   line-height: 15px;
   color: #fff;
   width: 100%;
   text-align: center;
   margin-bottom: 13px;
}
Please follow instructions on this article to know where you should put the
https://kainelabs.ticksy.com/article/16375/
1. Please go to your FTP/CPanel, and go to folder "wp-content/plugins"
2. Create a new file and name it with "bp-custom.php" file. If you already have it, no need to create a new one. Please just open it
3. Put snippet from the link below on the file
https://gist.github.com/KaineLabs/2cc8898e1d6b04a85d8fb30058a0734a
4. You can change Name Tab, Slug, Position, URL etc on that snippet and save the file.
1. Go to menu Users >> All Users
2. Select members you want to assign
3. Select Memebr Type Dropdown option
4. Click Change Button

Please use this snippet:
function yzc_change_lost_password_link( $action, $form ) {
    if ( $form == 'lost_password' && !isset($_GET['action'])) {
        $action = 'https://yourwebsite.com/yourcustomlogin/?action=lostpassword';
    }
    return $action;
}
add_filter( 'youzify_membership_form_action', 'yzc_change_lost_password_link', 100, 2 );
PS:
- Change "yourwebsite.com" with yourwebsiteurl
- Change "yourcustomlogin" with custom slug that you set on your WPS Hide Login.
To find where you should add the snippet, please refer to this article:
1. Please go to your FTP/CPanel, and go to "wp-content/plugins"
2. Create a new file and name it with "bp-custom.php" (if you already have it, please just open it)
3. Put this snippet on the file
<?php
/**
 * Remove Profile Account Menu.
 */
function yzc_remove_profile_account_menu( $links ) {
    unset( $links['logout'] );
    return $links;
}
add_filter( 'youzify_get_profile_account_menu', 'yzc_remove_profile_account_menu' );
Change 'logout' with any menu you want to remove
PS: if you already have a file with another snippet there, please do not copy the <?php code
Gamipress is plugin for gamify system ofyour WordPress website. GamiPress lets you award your users with digital rewards for interacting with your WordPress website.
What new functions you will get with GamiPress Integration:
1. User balances widget on Profile Page
2. User badges widget on Profile Page
3. User badges Tab on Profile Page
And some features that you can check here >> https://wordpress.org/plugins/gamipress-buddypress-integration/
How to integrate it?
1. First, please install GamiPress
https://wordpress.org/plugins/gamipress/
2. You need to find and setup all the settings to manage the tabs displayed by navigating to GamiPress > Settings > Add-ons Tab > “BuddyPress” and “BuddyPress Profile Tab” boxes.
3. Turn on Gamipress integration button on Youzify Panel >> General Settings >> GamiPress Settings. Also you can enable/disable badges


1. Go to the Google Maps Platform
https://cloud.google.com/maps-platform
2. Click the Get Started button and log in with your Google account
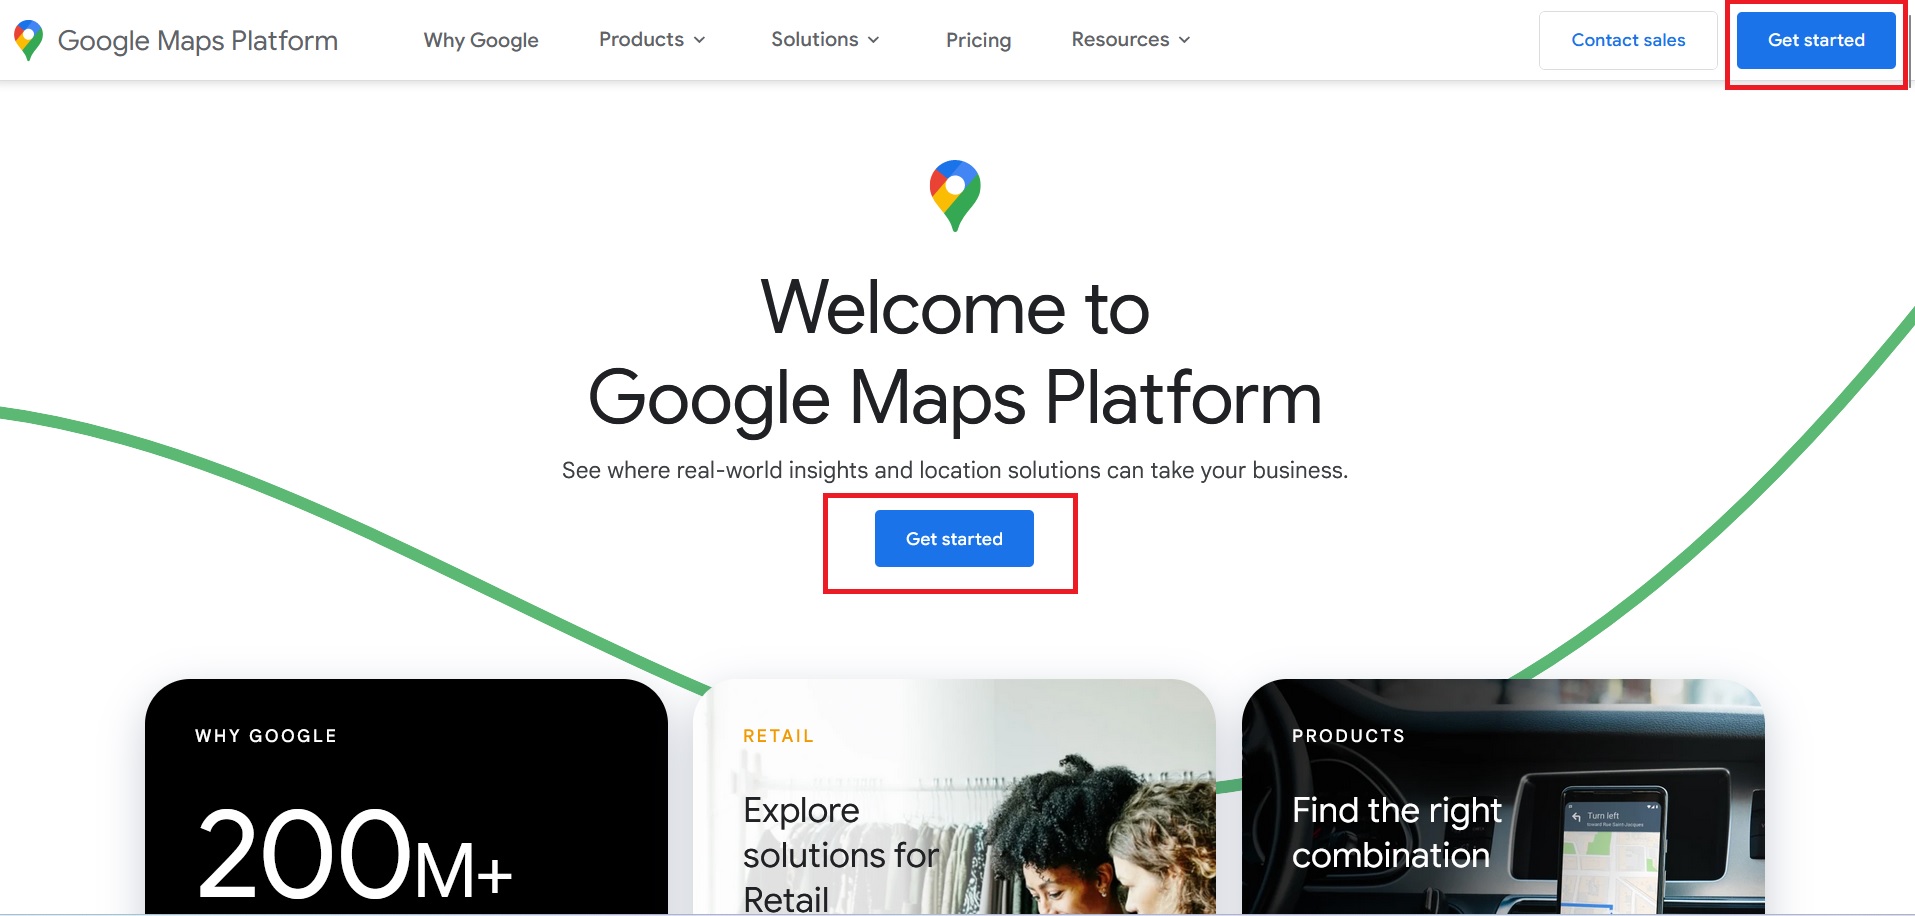
3. Click the Google Cloud logo on the upper left corner
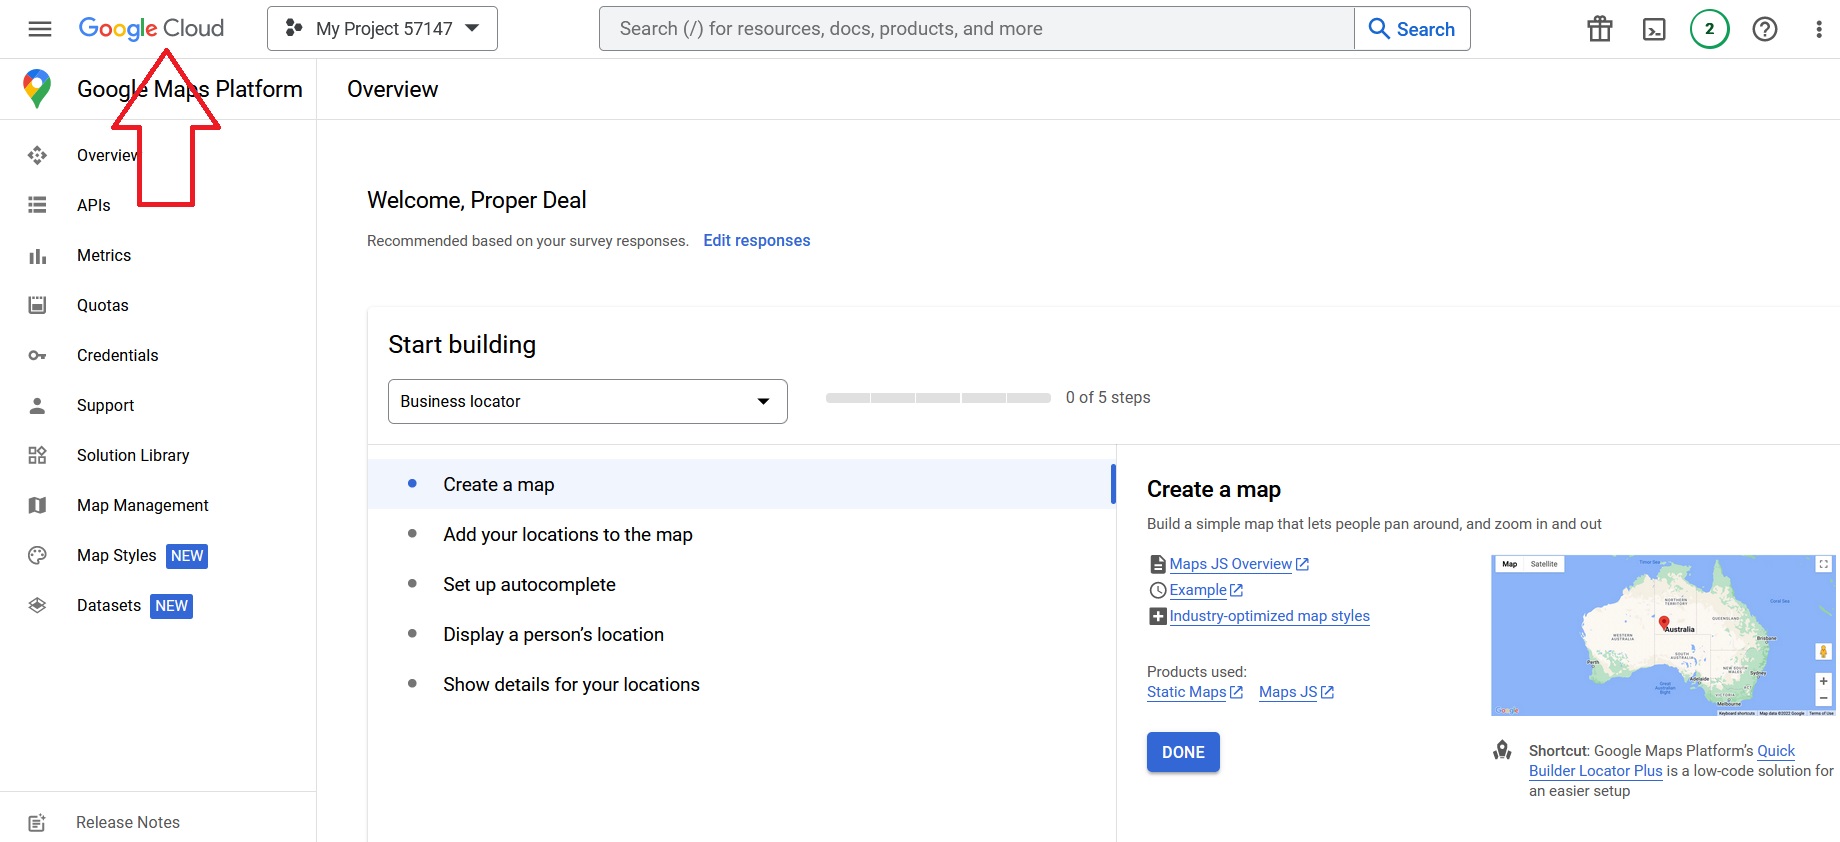
4. Click 3 line (hamburger) button, and select the "Billing" menu
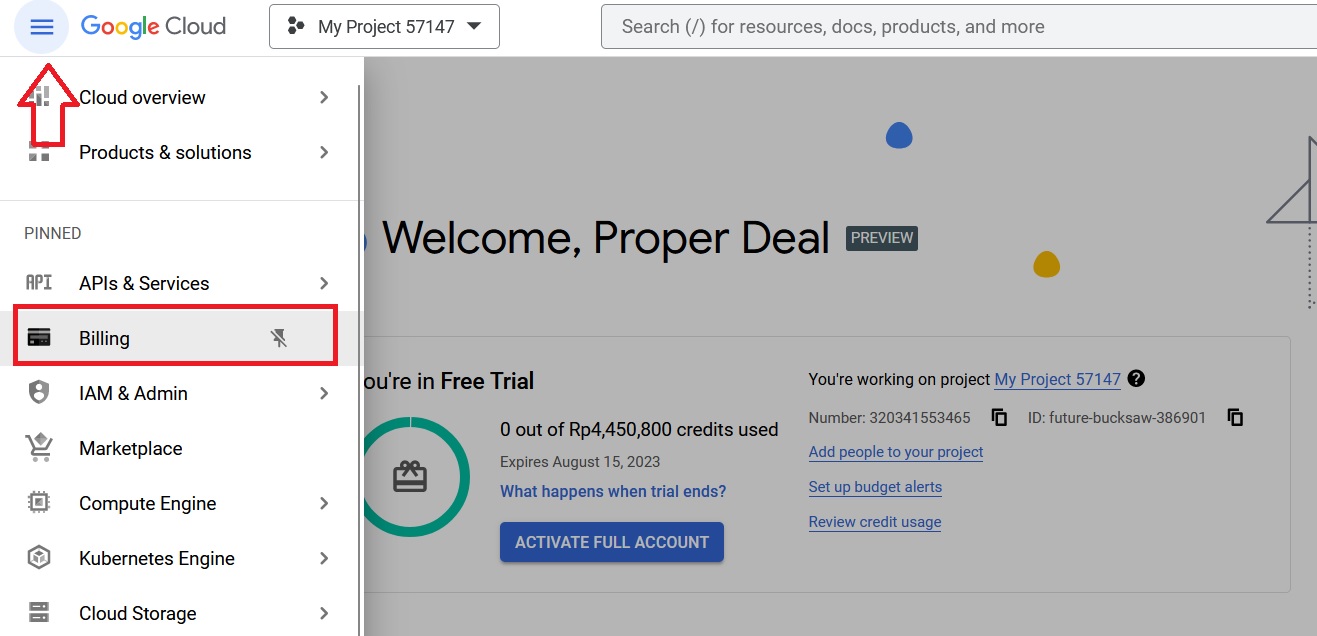
5. Setup your Billing by going to the menu Overview >> Payment Overview >> Manage Payment.
Don't worry, Youzify use a location tag feature works based on Google Maps's "Embed System" system which give this embedded system unlimited number for FREE. You will not be charged.
6. Click 3 line (hamburger) button, select the Google Maps Platform menu, and go to Credentials

7. Create Credentials >> Select API Key
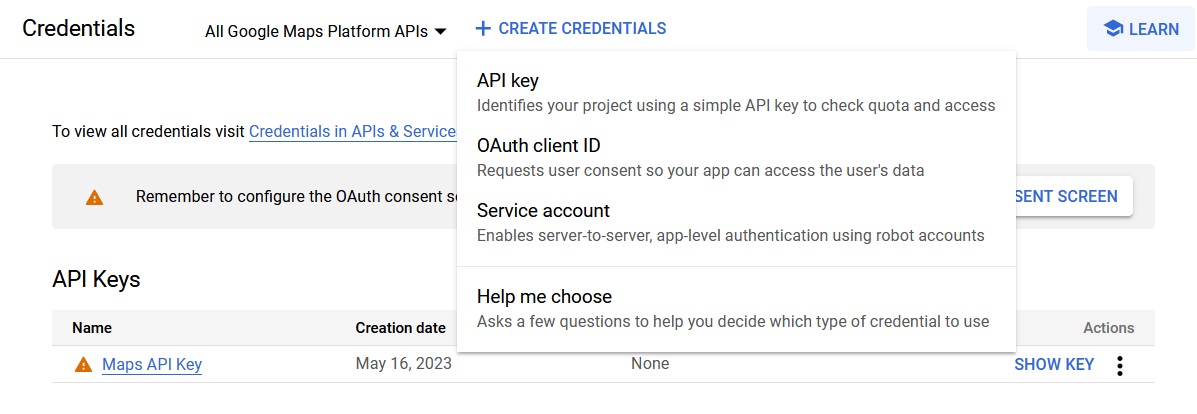
8. Copy the API code
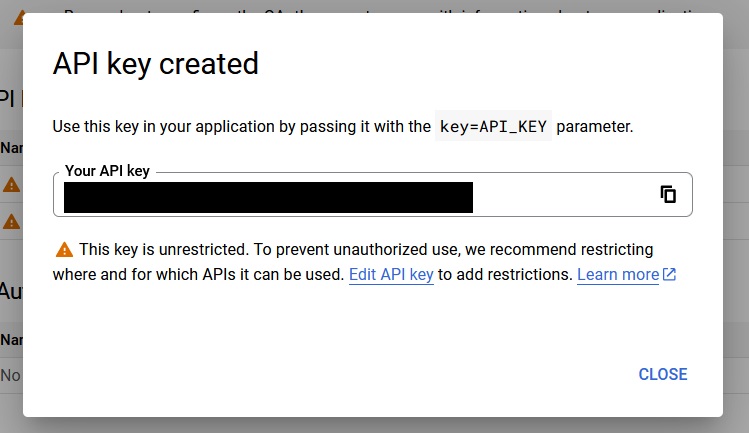
9. Go back to your WP Admin dashboard, go to Youzify Panel > General Settings >> Wall Settings
10. Paste the API code to the "Google Map API Key"
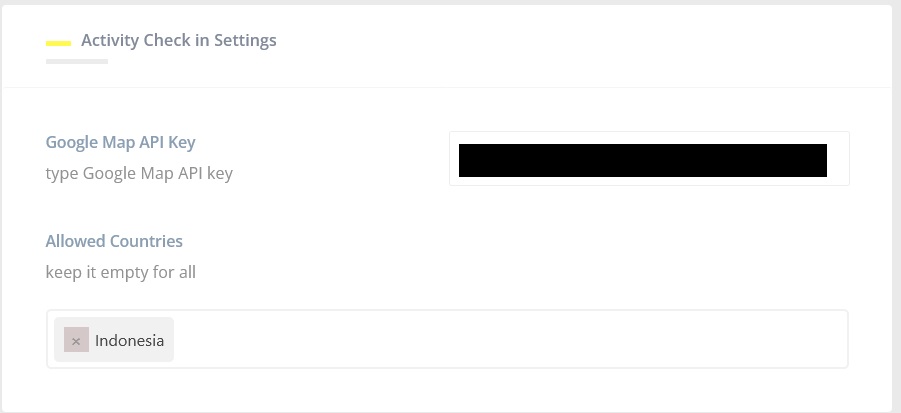
11. You also can select Allowed Countries which it will show on the list if your users want to search the location map
12. Save settings and if you use any cache plugin, please clear it.
13. Location tag feature is now available on the Post Form
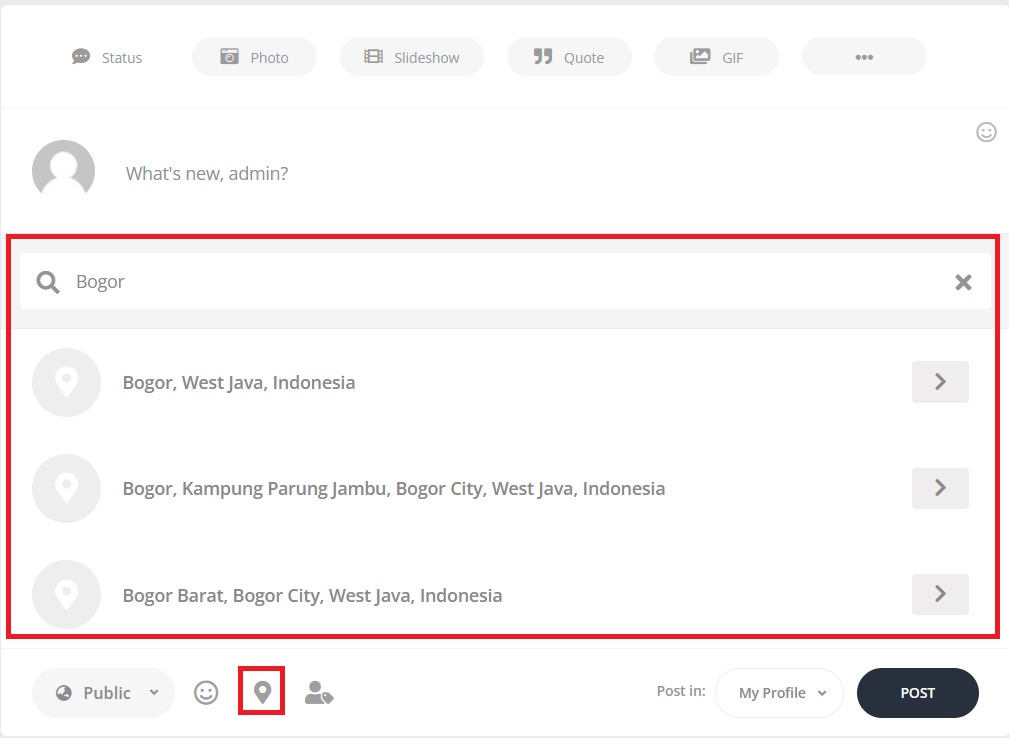
Youzify is integrated with some LMS plugins. Here is the list:
Please note, that the LMS plugin mentioned above is a standalone plugin and it is separated from Youzify. You have to install the plugin first to make it integrated with Youzify.
Tutor LMS >> https://wordpress.org/plugins/tutor/
Lifter LMS >> https://wordpress.org/plugins/lifterlms/
LearnPress >> https://wordpress.org/plugins/learnpress/
LearnDash >> https://www.learndash.com/
1. Course Tab on Profile Page. On this tab, users can see Enrolled Courses listed without need going to the original plugin LMS Dashboard. The "Courses Tab" shows course status, course description, course date, completion data, etc.

2. On the courses tab, users also can see certificates listed without need going to the original plugin LMS Dashboard. Please note, that some LMS plugins require a PRO version to activate the certificate feature.

3. Show a post on Activity Stream if a user enroll in a new course or Admin create a new course

1. Please go to Youzify Panel >> Profile Settings >> Courses Tab Settings. You can set any options there.

2. You can disable the tab or change the icon on Youzify Panel >> Profile Settings >> Tabs Settings, and find "Course Tab"
3. You also can disable "New Course" or "New Enrolled Course" post type on Youzify Panel >> General Settings >> Wall Settings >> Control Wall Posts Possibility box.
The courses that are shown on the courses tab are only courses that are already enrolled to the user. For example, you can see Course A and Course B on the User X courses tab only if the courses are already enrolled.
There are 2 ways to enroll in courses for students. First, automatically where you need to contact each LMS plugin support to help you to set it up.
Another way is enrolling in the course manually. Each LMS plugin has a different way to manually enroll courses to users.
Tutor LMS >> https://www.themeum.com/how-to-enroll-students-manually-in-tutor-lms/
Lifter LMS >> https://lifterlms.com/docs/manual-membership-management/
LearnPress >> https://thimpress.com/how-to-manually-enroll-student-to-a-course-in-learnpress-lms/
LearnDash >> https://www.learndash.com/support/docs/users-groups/user-management/
Please use this snippet
/**
 * Youzify - Add Missing ImageLoaded JS
 */
add_action( 'wp_enqueue_scripts', 'yzc_add_imagesloaded_js', 0 );
function yzc_add_imagesloaded_js() {
    if ( bp_is_members_directory() || bp_is_groups_directory() ) {
        wp_enqueue_script( 'masonry-yzc', 'https://npmcdn.com/[email protected]/imagesloaded.pkgd.min.js',array( 'jquery' ), '1.0.0', true);
}
}
Put the snippet on bp-custom.php file inside folder "wp-content/plugins". If you don't have yet, please create a new file first.
Please go to Youzify Panel >> General Settings >> Wall Settings. On the Polls Post Settings, please check "Max Voters Number". If it set as 3, that's mean you need at least 3 voters to make the result showing.
Or you can set it only to 1.

You can use this CSS template
.youzify p, .youzify span, .youzify a, .youzify i, .youzify-wall-link-title, .youzify-wall-link-desc, #whats-new {
  font-size: 14px !important;
  color: #000 !important;
  font-weight:500 !important;
}
Please change the color code or font size number ot font-weight number to another.
1. Please Install this plugin. It's free and works fine with youzify
https://buddydev.com/plugins/bp-community-activity-on-profile/
2. Please go to Youzify Panel >> Profile Settings >> Tabs Settings. And then, please disable "Activity tab"


To prevent spamer, you may try this methods
1. Change the /register/ slug to something unique. An example would be /create-your-account/, or something of that nature. It just needs to be unique and also make sense in a URL for your user. Spammers targeting BuddyPress look for /register/ as the signup page. It’s all automated so you want to filter them out at the first step.
2. Please try install and activate these plugins
https://wordpress.org/plugins/akismet/
https://wordpress.org/plugins/honeypot/
3. Change your “Admin” username to something dificult and at least 10 characters (+) but easily to remember (+ for you – for security) or you have to read a note (-) safely secured in your safe locker (+)
4. Set recaptcha on Youzify Registration Form. You can select reCaptcha v2 or v3
How to setup registration captcha V2?
How to setup registration captcha V3?
5. Set Login attempt on Youzify Login page
How to setup limit login attempts ?
However, checking Groups dashboard on your WP admin daily will keep being an important thing to do. You need to remove the Groups that created by bot and delete users that create it.
First, you need to get Captcha Site Key and Captcha Secret key
1. Go to this site >> https://www.google.com/recaptcha
2. Click v3 Admin Console menu. Please do not click "Get Started" button as it will bring you to reCaptcha Enterprise dashboard

3. Login with your Google Account
4. Once you already entering Google Captcha Account, please Register a New Site by clicking + on the right top of dashboard
5. Fill Label, Domain etc.
6. Select reCaptcha Score Based (V3).
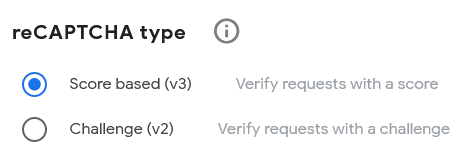
6. Click Submit and you will get Captcha Site Key and Captcha Secret key
And then, go back to your dashboard admin site
1. Please go to Youzify Panel >> Membership Settings >> Captcha Settings Tab
2. Enable Captcha, and then select "reCAPTCHA v3"
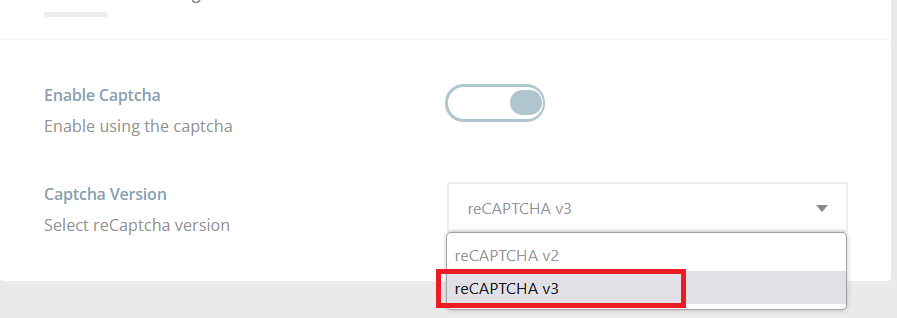
3. Add Site Key and Secret Key to the reCAPTCHA v3 Settings box. And then Save.

Please, you can use this snippet to disable "Mystery Man" avatar and enable WordPress avatar.
add_filter('bp_core_fetch_avatar_no_grav', '__return_false');Avatar and cover image won't show on profile page won't show. Direct upload avatar/cover can not be clocked, and some ajax error on profile page.
This happen because DUplicate GamiPress plugin on the Profile Structure. Please use this snipept to reset the profile structure
https://gist.github.com/KaineLabs/084784adb05a6f047677f9113764ffc5#file-yzc_reset_widgets-php
Check this article to find where you should add the snippet
How to Add Custom PHP Snippet?
After adding the snippet, please go to profile Page and refresh your browser twice. If the issue fixed, please remove the snippet then.
1. Please Install WP Dark Mode Plugin:
https://wordpress.org/plugins/wp-dark-mode/
2. Please go to WP Dark Mode >> Settings >> Advance Settings. And then enable "Make Dark Mode Default"

1. Please go to Youzify Panel >> General Settings >> Scheme Settings
2. On Appearance Settings box, you can select Dark or Light as Default Theme
3. You also can allowerd or not allowed users can change appearance or not.

4. If you allowed members to change the appearance, they can change it on their Account Settings by click Sun / Half Moon icon.

To have account settings button short code, please use this snippet:
/**
 * Youzify - Account Setting Icons Menu SHortcode [yzc_account_settings_icons_menu]
 **/
add_shortcode( 'yzc_account_settings_icons_menu', 'yzc_account_settings_icons_menu');
function yzc_account_settings_icons_menu() {
    ?>
    <link rel="stylesheet" id="custom-css" href="<?php echo YOUZIFY_ASSETS . 'css/youzify-account.min.css'; ?>" type="text/css">
    <?php
    // Get Data.
    $user_id = bp_displayed_user_id() ? bp_displayed_user_id() : bp_loggedin_user_id();
    $icon_url = youzify_get_profile_settings_url( 'change-avatar' );
    $profile_url = bp_core_get_user_domain( $user_id ) . bp_get_profile_slug() . '/';
    $header_buttons = apply_filters( 'youzify_account_menu_header_buttons', array(
        'home' => array(
            'icon' => 'fas fa-home',
            'title' => __( 'Home', 'youzify' ),
            'url' => home_url()
        ),
        'profile' => array(
            'icon' => 'fas fa-user',
            'title' => __( 'View Profile', 'youzify' ),
            'url' => bp_core_get_user_domain( $user_id )
        ),
        'networks' => array(
            'icon' => 'fas fa-share-alt',
            'title' => __( 'Social Networks', 'youzify' ),
            'url' => $profile_url . 'social-networks'
        ),
        'avatar' => array(
            'icon' => 'fas fa-user-circle',
            'title' => __( 'Profile Avatar', 'youzify' ),
            'url' => $profile_url . 'change-avatar'
        ),
        'cover' => array(
            'icon' => 'fas fa-camera-retro',
            'title' => __( 'Profile Cover', 'youzify' ),
            'url' => $profile_url . 'change-cover-image'
        ),
        'logout' => array(
            'url' => wp_logout_url(),
            'icon' => 'fas fa-power-off',
            'title' => __( 'Logout', 'youzify' )
        )
    ) );
    if ( ! buddypress()->avatar->show_avatars ) {
        if ( isset(  $header_buttons['avatar'] ) ) {
            unset( $header_buttons['avatar'] );
        }
    }
    if ( ! bp_displayed_user_use_cover_image_header() ) {
        if ( isset(  $header_buttons['cover'] ) ) {
            unset( $header_buttons['cover'] );
        }
    }
    // if there's no networks don't show the networks form..
    $networks = youzify_option( 'youzify_social_networks' );
    if ( empty( $networks ) ) {
        unset( $header_buttons['networks'] );
    }
    $count = count( $header_buttons );
    ob_start();
    ?>
    <div class="youzify-account-header">
        <div class="youzify-head-buttons">
            <div class="youzify-head-buttons-inner">
            <?php foreach ( $header_buttons as $key => $button ) :?>
                <div class="youzify-button-item youzify-<?php echo $key; ?>-button" style="width: <?php echo 100 / $count; ?>%;"><a href="<?php echo $button['url'] ?>" data-youzify-tooltip="<?php echo $button['title']; ?>" ><i class="<?php echo $button['icon'] ?>"></i></a></div>
            <?php endforeach;?>
            </div>
        </div>
    </div>
    <?php
    return ob_get_clean();
}
To find where you have to put that snippet, kindly check this article
How to Add Custom PHP Snippet?
And then, please use this short code
[yzc_account_settings_icons_menu]
In order to get application ID and secret key from Telegram API, we need to create a telegram bot. Kindly follow these steps to create our own telegram bot:-
1) Open telegram mobile app and search for 'BotFather' in contacts. You will find it with verified badge from telegram.
2) Start chatting with BotFather by typing:-
/start
3) Now it will list out all the commands available, please type the following to create a new bot:-
/newbot
4) BotFather will prompt to choose a name for your bot, which can be any user friendly name. Example:-
My Youzify Bot
5) Now it will ask to choose a unique username to your bot and it must end in 'bot'. Example:-
youzifylogin_bot
6) Congratulations! Now BotFather will send a confirmation message along with HTTP API key which should be used in Youzify social login settings > Telegram settings > Application Secret text field. An example secret key will look like this(please remove spaces if any):-
506069259001:AAFjR3Xv9GEabfd23f52C3n2t3Fn6kbNNiqF
7) The final step is to set domain for your bot which should be your website URL. To set domain, please type:-
/setdomain
8) BotFather will ask you to choose your bot since we can have any number of bots, please choose your bot from the list. It can be done by typing your unique bot name with prefix @
@youzifylogin_bot
9) Next you can type your website URL and press enter:-
example.com
10) You should get a confirmation message as following:-
Success! Domain updated.
Finally you need to use your unique bot name(ex: youzifylogin_bot) in Youzify social login settings > Telegram settings > Application ID field.
That's it. If you find any difficulty, kindly consider creating a ticket in our ticksy portal :)