1. Go to Wordpress Dashboard > Users > Profile Fields.
2. Access the field edit page .
3. Assign the field to the member type you want through the member types box :

1. Go to Wordpress Dashboard > Users > Profile Fields.
2. Access the field edit page .
3. Assign the field to the member type you want through the member types box :

I have member type plugin. can I show custom tabs for specific member type? for example "student" have "learn" tab. and "teacher" have "work" tab on their profile
Pleae go to your FTP/CPanel >> Folder wp-content/plugins >> create a file and name it with bp-custom.php >> Paste snippet code below into the file >> Save
https://gist.github.com/KaineLabs/ecaa2532c740d9602c8e7805a116da9f
Please change 'member_type_id_here' with member type ID and 'tab_slug_here' with Tab Slug. For tab, you can add a new custom tab on Youzer Panel.
1. Go to Wordpress Dashboard > Users > All Users .
2. Click the user you want!
3. Please go "Extended Profile" tab


Hello,
Please make sure to make the "Member Type Singular Name" lowercase and do not use spaces. Also, please make sure you have checked "Has Directory View" and fill "Custom type directory slug"

1. Please go to Users >> Member Types
2. Please fill all required fields there (Member Type ID, Singular Name, Plural Name etc)
3. To show Member Types filter on the Members Directory, you need to check "Has Diectory View" and fill the "Custom Type Directory Slug"

4. Click "Add New Type" Button
1. Go to Wordpress Dashboard > Users > Profile Fields.
2. Access the field edit page .
3. Assign the field to the member type you want through the member types box :

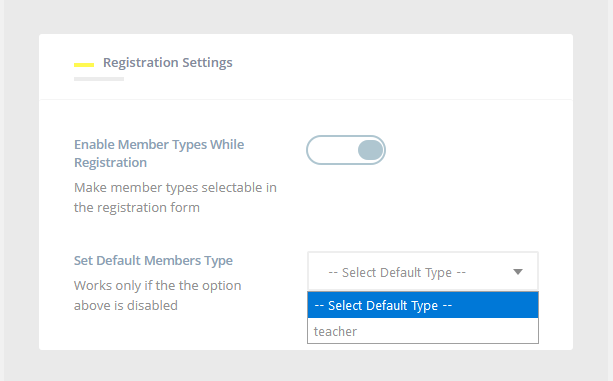
1. Go to Youzify Panel > General Settings > Member Types Settings or If you do not use Youzify, please go to Settings >> BuddyPress Extensions Settings.
2. Disable the option "Enable Member Types While Registration".
3. Select Default Member Type.

4.Save Changes.
With Youzify
Go to Youzify Panel > ExtensionSettings > Member Types Settings.


1. Please go to Users >> Member Type
2. Hover your mouse any Member Type you want to update

3. To remove a member type click "Delete"
4. To edit a member type, click "Edit"
5. Don't forget to click "Update" button after edit it.
Make Sure that the option "Enable Member Types While Registration" is Enabled.
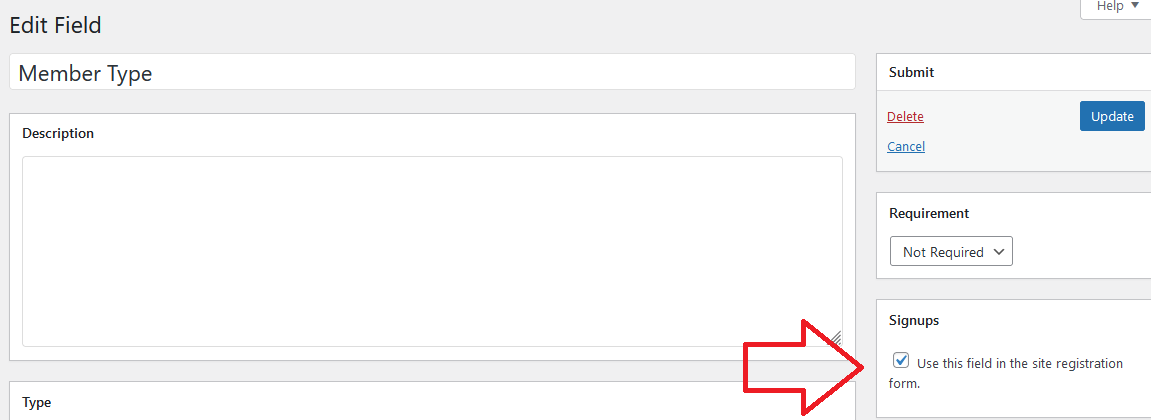
1. Make sure that "Use this field in the site registration form" is checked

2. Make sure the "Users with no member type" is enabled in the "Member Type Box.

3. Make sure that the option "Enable Member Types While Registration" is enabled in the path Member Types Settings > Registration settings ( section ).

1. Go to Wordpress Dashboard > Users > Profile Fields.

2. Go to the primary tab by default "Base" and click "Add New Field".

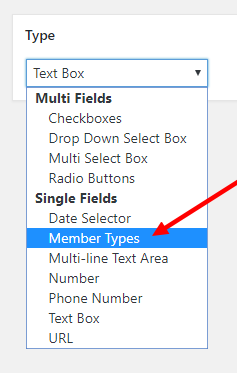
3. Create New Field with the Type "Member Types".

4. Set field as Required and Click "Save".
1. Please go to Users >> Member Type Settings.
2. Click a member type you want to hide from Members Directory
3. Uncheck "Show on Member"
4. Check "Exclude From Members Directory

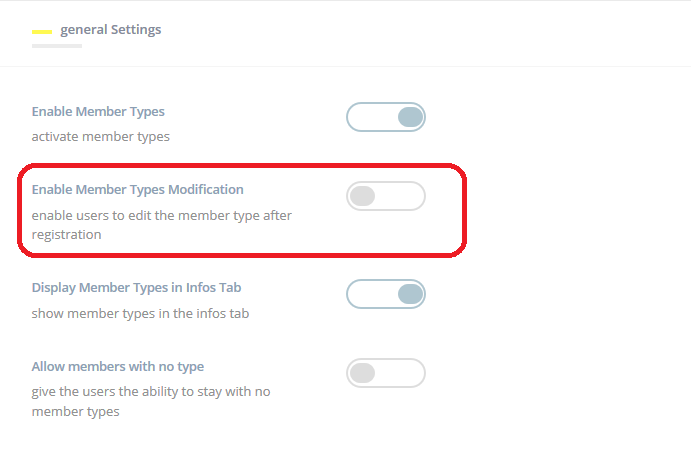
1. Please go toMember Type Setting. Turn off the "Enable Members Types Modification" and save.

2. Admin can assign a Member Type to an existing users. Please go to All Users >> Click Any Users you want to assign >> Go to Extended Profile Tabs >> Choose Member Type >> Click "Update profile" button.

1. Please go to users >> Member Type
2. You need to check "Show this Member Type on profile Settings" on each member Type settings

1. Please create a new WordPress Page
2. Use this shortcode
[youzify_members member_type="member type ID" ]
Change "member type ID" with any Member Type you want

3. Save the page
4. To show the Tab Filters only for specific members you want, you can use this CSS
For single members type
.youzify-members-directory-shortcode .item-list-tabs ul li {
    display: none;
}
.youzify-members-directory-shortcode .item-list-tabs #members-membertypeid{
    display: block;
}
For multiple members type
.youzify-members-directory-shortcode .item-list-tabs ul li {
    display: none;
}
.youzfy-members-directory-shortcode .item-list-tabs #members-membertypeid1, .yz-members-directory-shortcode .item-list-tabs #members-membertypeid2 {
    display: block;
}
1. First, please create a filed with Member Type option. Please check this article to know how to do that
https://kainelabs.ticksy.com/article/13253/
2. And then, please go to Youzify Panel >> Profile Settings >> Header Settings.
3. On "Header Meta Settings" or "Vertical Header Meta Settings" (it depend on what header type you have set before), and select "Member Type".

4. Save
1. Please go to Users >> Member Type
2. Create a new Member Type or if you want to assign on existing type, please click it.
3. On the Associated Roles, please select any role you want

Please Do Not Use character " - " for member Type ID. Please use " _ " instead

For example, do not add ID "member-type-registration", But make it "member_type_registration"