1. Please go to your FTP/CPanel, and go to folder "wp-content/plugins"
2. Create a file there, and name it with "bp-custom.php" file (if you already have it, please create a new one).
3. Put this snippet int the file and save
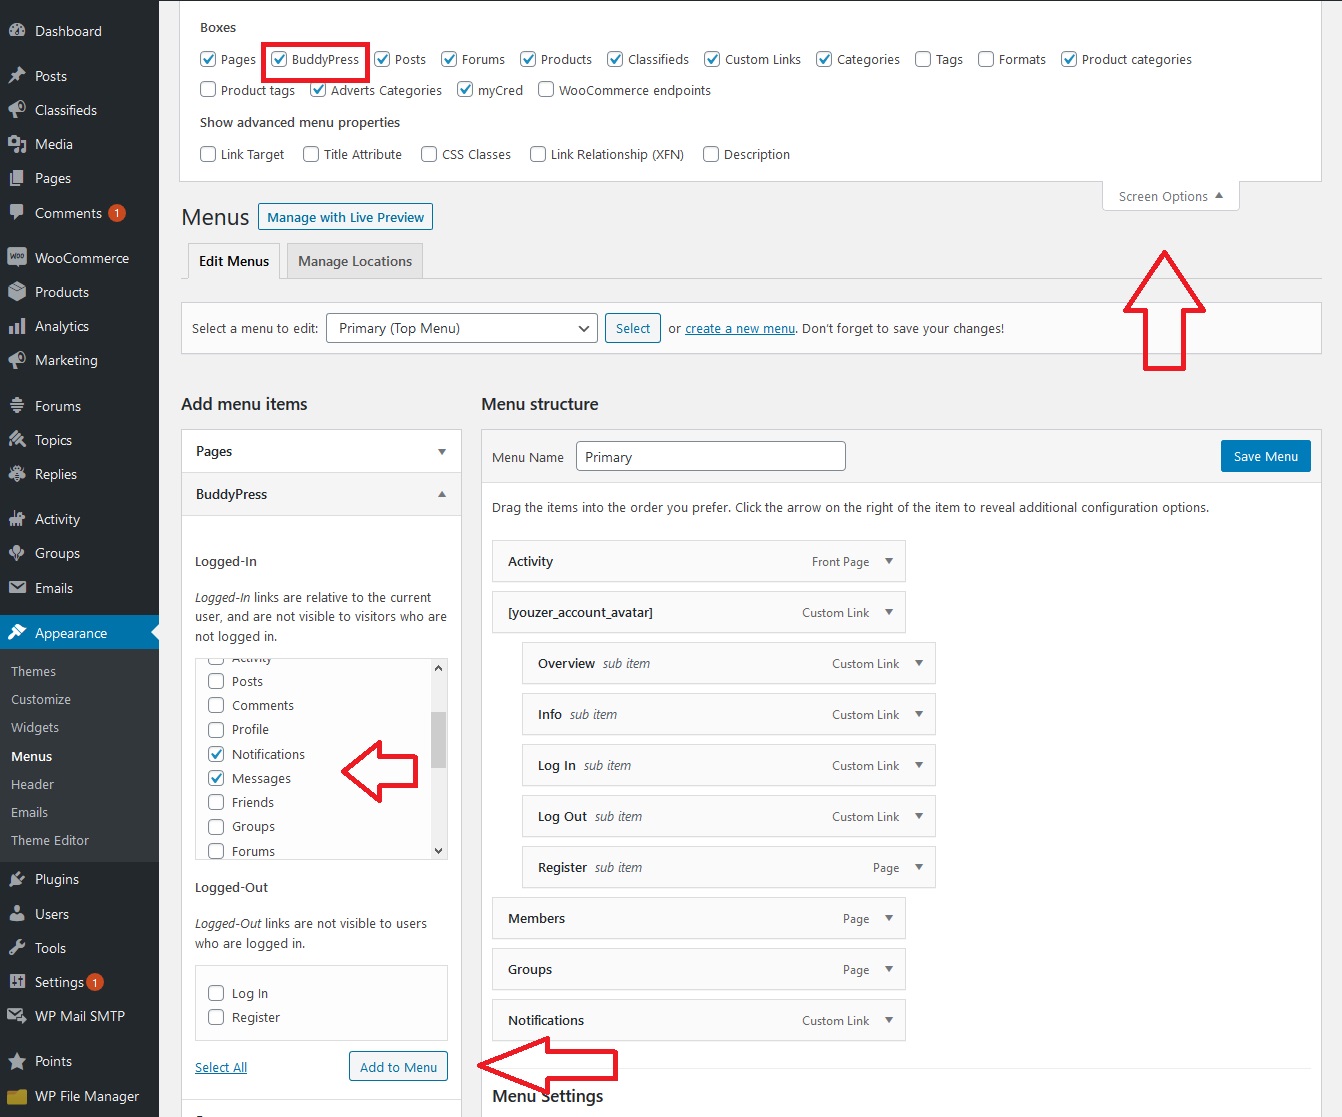
4. Please go to Appearance >> Menu. Click Screen option button on the top right of your screen. Then check "BuddyPress"
5. Then "BuddyPress" category will appear on your left side. Open it, then check "Notifications" and "Messages" and cClick "Add to menu" button.
6. If youw ant to change "Notifications" and "Messages" menu from texts to icons, Put CSS below on Youzer Panel >> General Settings >> Custom Styling Setting
.bp-notifications-nav a, .bp-messages-nav a {
    font-size: 0px !important;
}
.bp-notifications-nav a span, .bp-messages-nav a span {
    font-size: 10px;
}
.bp-menu.bp-notifications-nav a::before {
    content: "\f0f3" !important;
    font-size: 20px;
    font-family: "Font Awesome 5 Free" !important;
}
.bp-menu.bp-messages-nav a::before {
    content: "\f0e0" !important;
    font-size: 20px;
    font-family: "Font Awesome 5 Free" !important;
}